Data and Device Management Workshop

Introduction
Welcome to your first workshop! Along with the videos, we wanted to give you real, step-by-step instructions on how to accomplish and use most of the tools we covered in the videos. So, from here on out, you can expect every course to have a workshop.
The workshops build upon one another. So, as you create devices, workflows, etc. in the workshops, make sure to keep those around as they may come up again in the future.
This workshop is all about Data and Device Management. We are going to use the platform features talked about in Course 3, such as creating a device, the Device Simulator, and the Data Explorer.
Let’s begin.
Story
Before we start building, let’s describe what you are building. Imagine you work for a company that manufactures industrial equipment. This company is named Embree Manufacturing.
![]()
Embree is launching an initiative to adopt IoT and offer new capabilities to their customers. Currently, Embree produces water pumps for industrial use cases like mining, construction, and oil & gas. Their goal is to gain deeper insight into the pumps and provide more value to their customers.
To begin the new initiative, the Embree team decided to start with a proof of concept, which will enable them to solve a small, useful problem to get results faster. For this first project, Embree wants to take one of their existing pumps and send the data it’s collecting, like flow rate and temperature, to the Cloud.
To build this proof of concept, they chose to use Losant. They chose Losant because the user experience would allow them build this proof-of-concept in no time, and they could easily build new applications with the insights gained.
Start Building
Let’s start building this application for Embree. First, if you haven’t already, sign up for the no-cost developer sandbox.
Next, you’ll need to create an application.
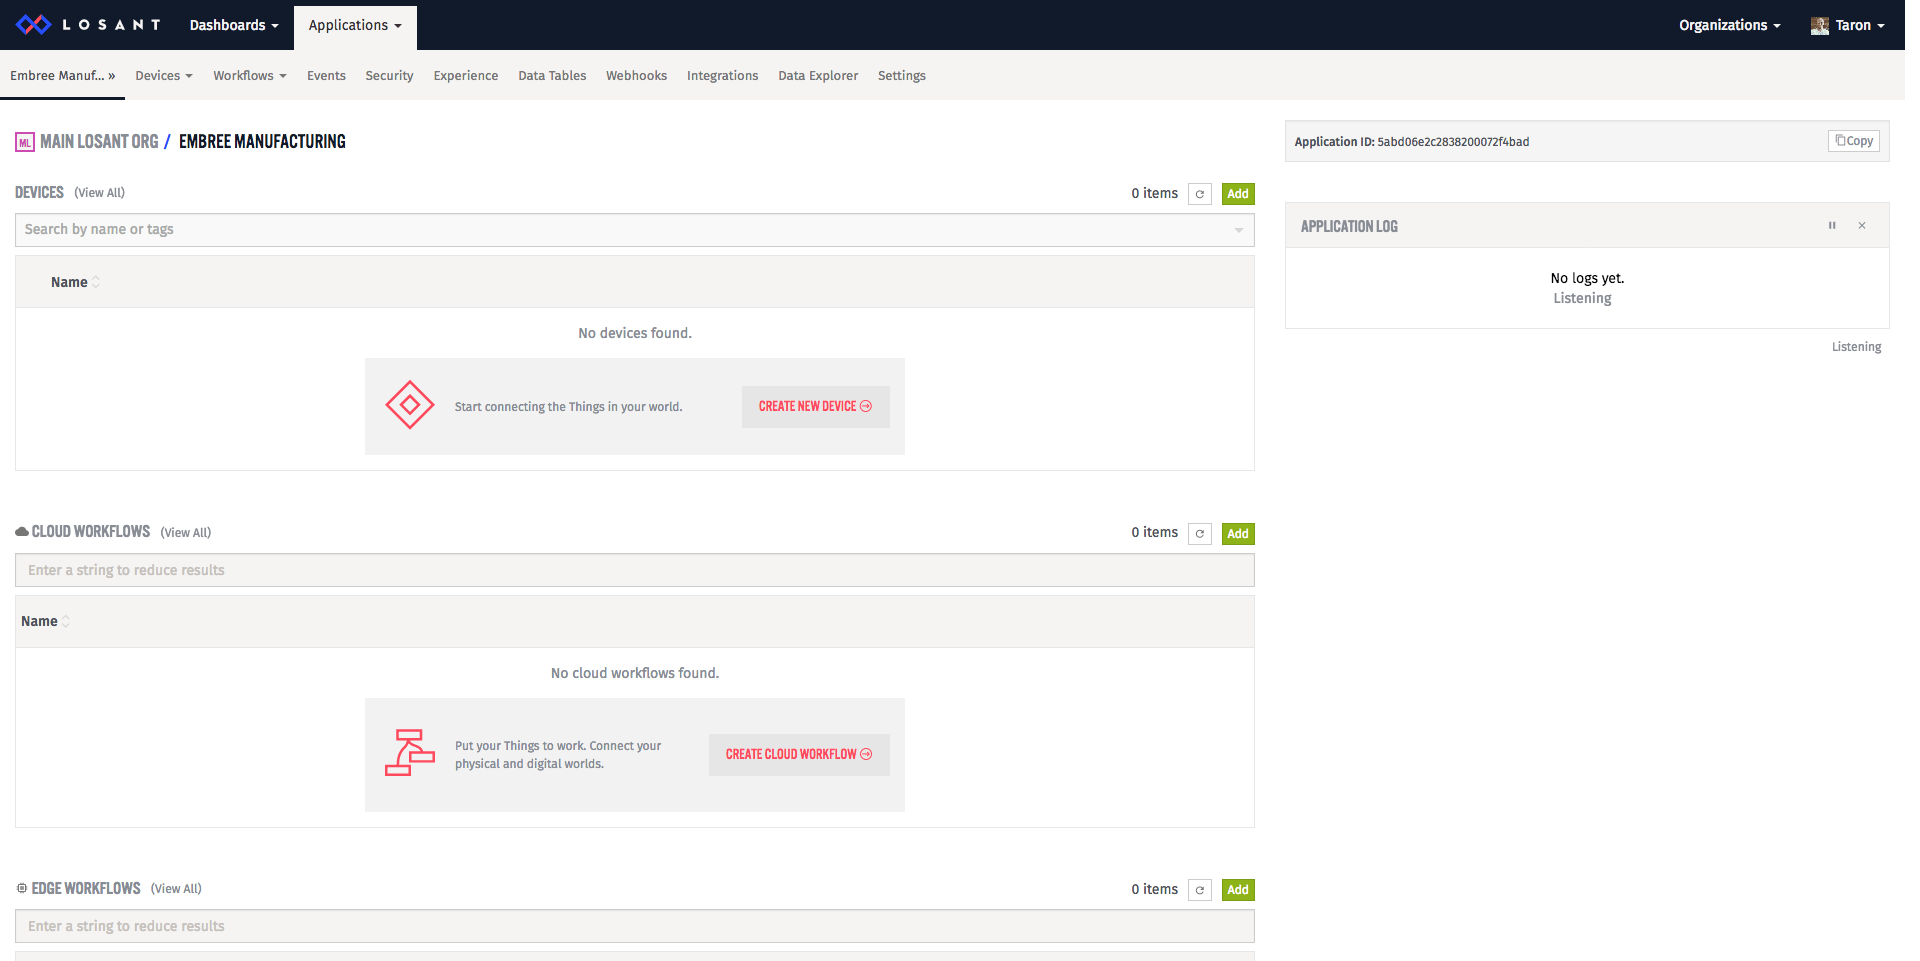
Next, we can create a new device for our water pump.
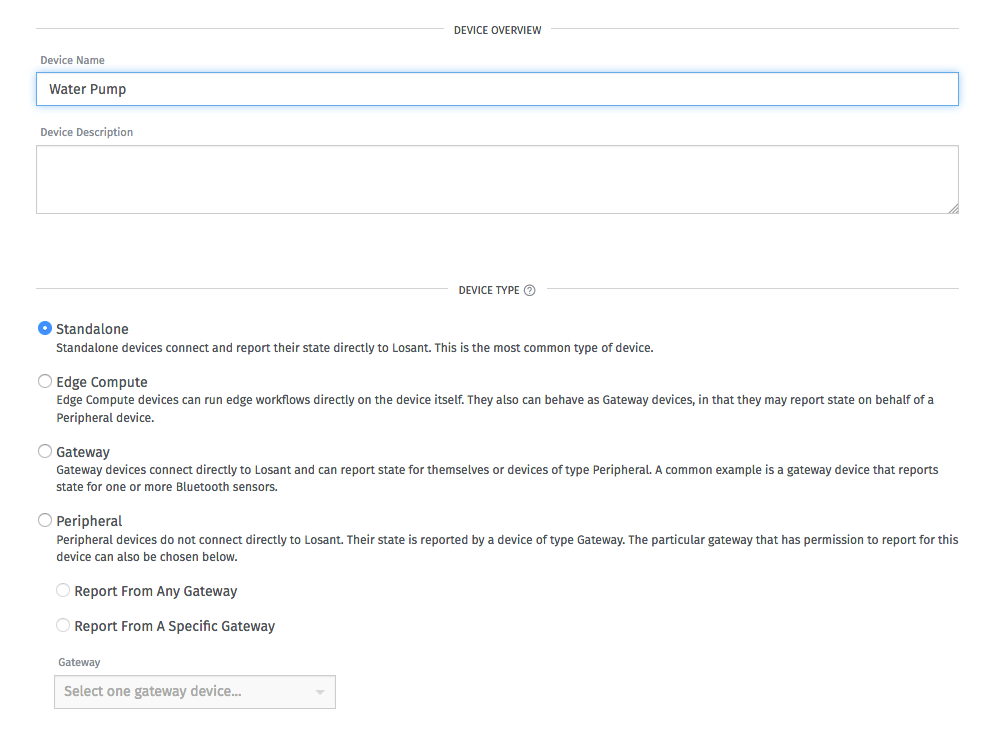
For this experiment, Embree connected a pump to the internet using cellular—so it has the ability to send data directly to Losant. Because it connects directly, the device will be a standalone device type in Losant.
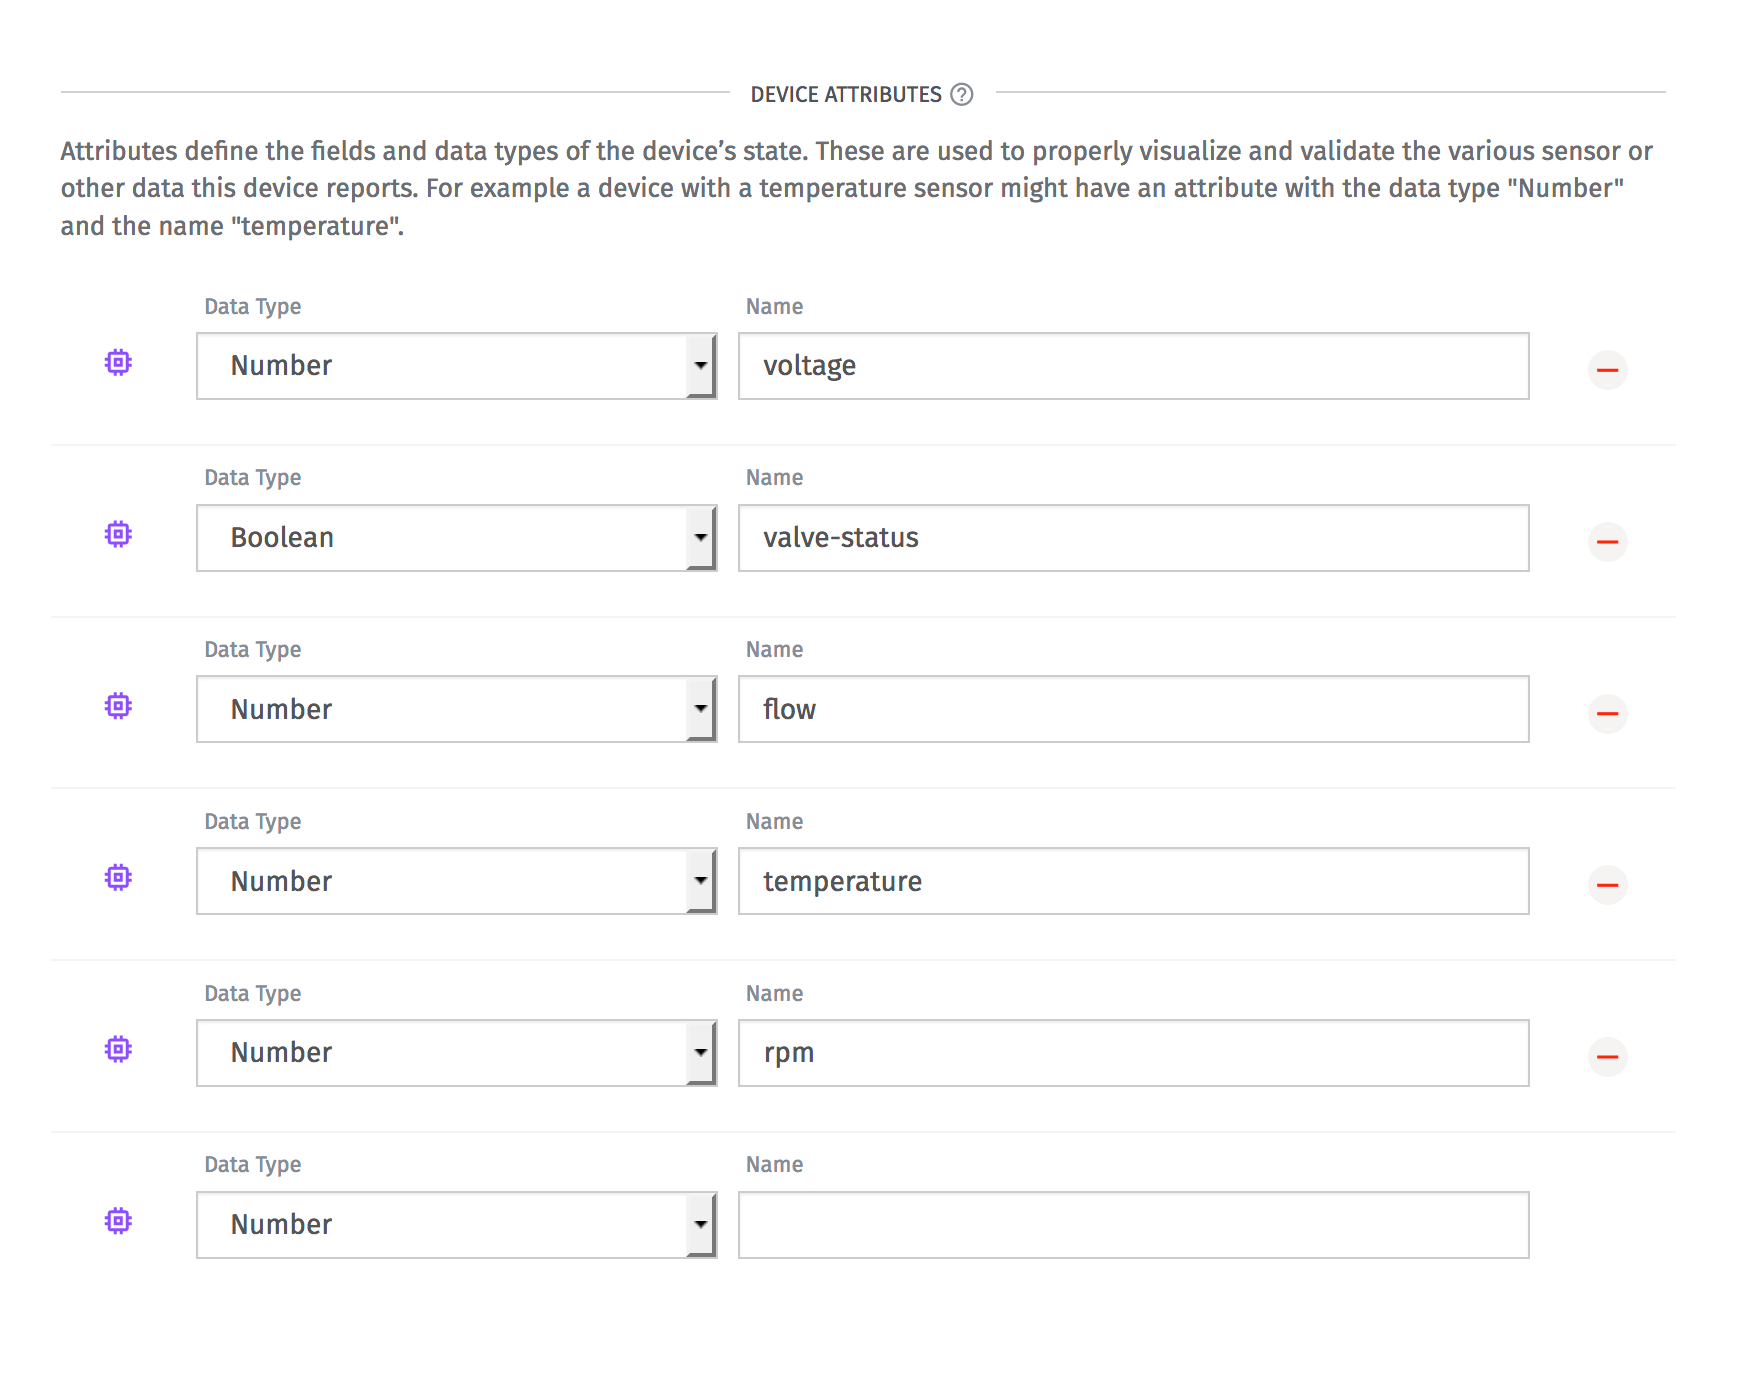
Next, we need to give the device some attributes. Right now, all pumps are actively measuring:
- Battery Voltage
- Valve Status
- Flow (liters per second)
- Temperature
- RPM
Each of these data points will be an attribute in Losant. All of them will have the type of number except for the valve status, it will have a boolean type. Here is how that looks within Losant:
When you are all done with your device settings, save this new device.
Simulating Data
As we learned in the video, to test things out in Losant, we don’t need hardware. We can use the Device Simulator.
When it’s time to connect physical things, remember that Losant is hardware agnostic. As long as the hardware can connect to Losant directly (or through a gateway), it will work with the platform.
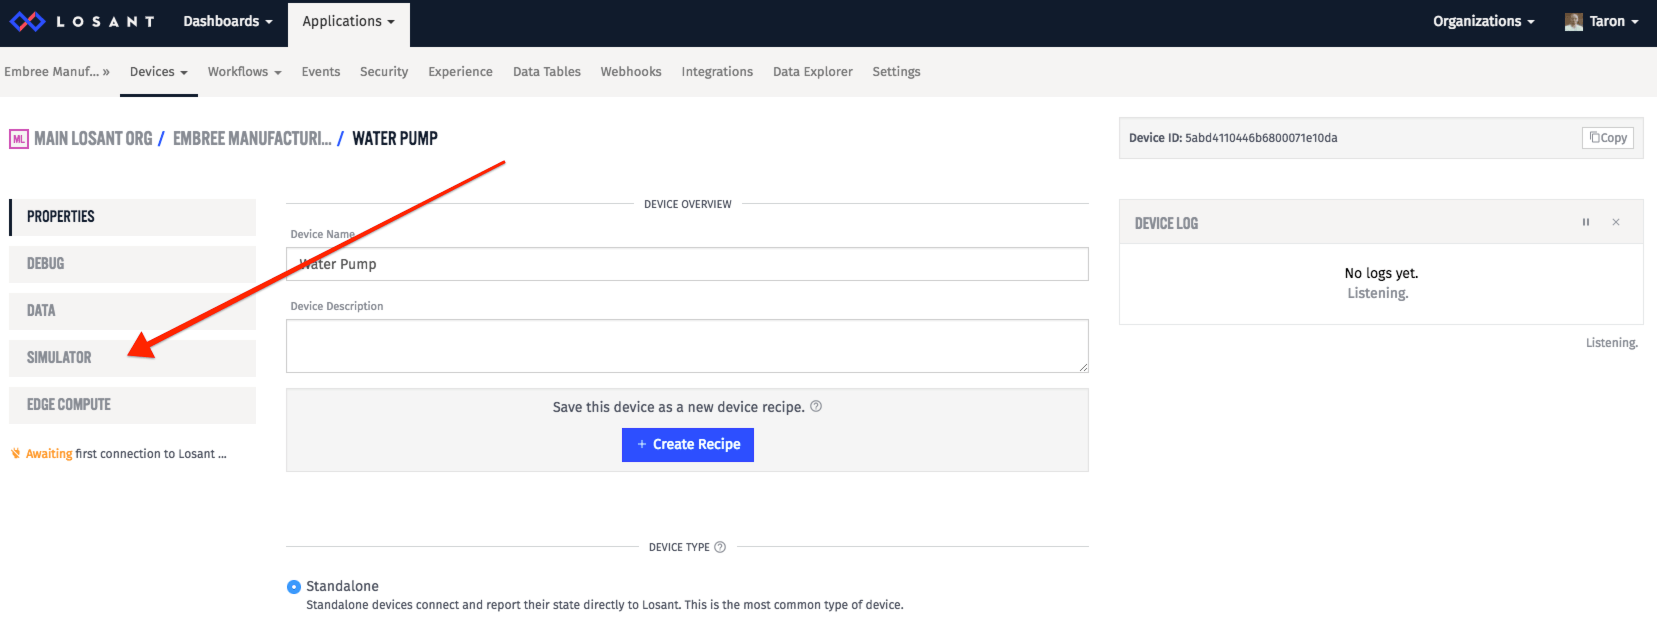
Now, fire up the Device Simulator. If you open up the device page, on the left side, you'll see simulator.
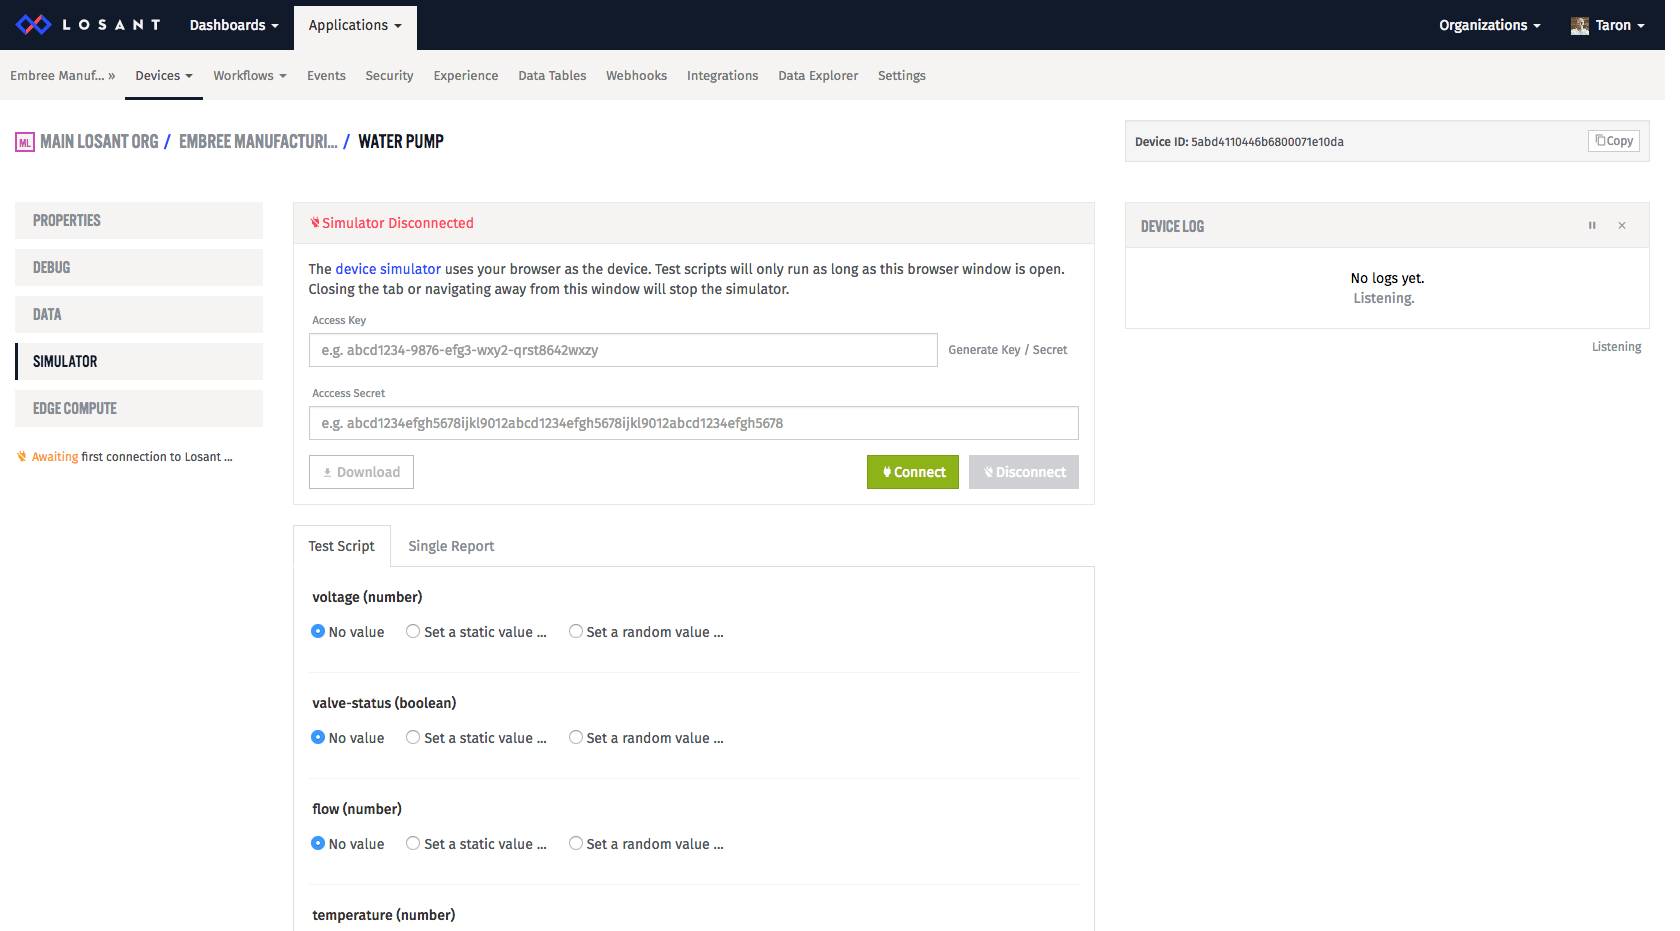
Remember, the simulator is using your browser window as the device. So, you must leave this browser window open for your device to simulate data.
Pro Tip: If you want to simulate data without having your browser window open, you can use the workflow engine. With the Timer Trigger, Random Number Node, and Device State Node, this becomes an easy task.
Next, generate a key/secret pair and connect your device**.** Here, we can easily press the “Generate key/secret” button. However, normally, one would go to the “Security” tab in the navigation and create new keys there like so:

Now, create a test script. You can set all the values to be random:
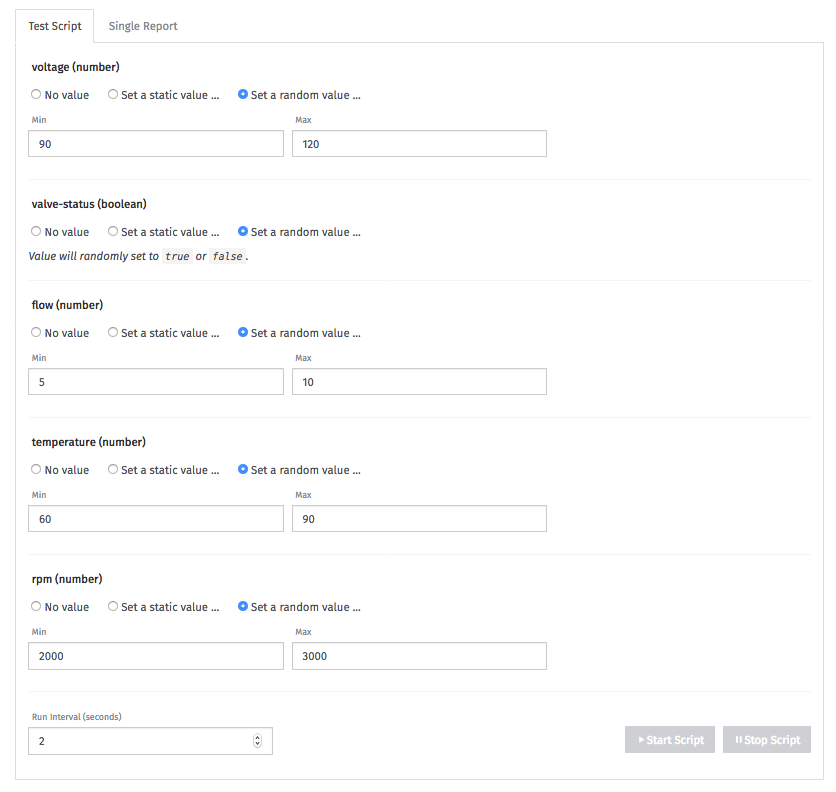
Once done, press “Start Script”.
Be sure to check out your Device Log. It’s an indicator that everything is working properly:
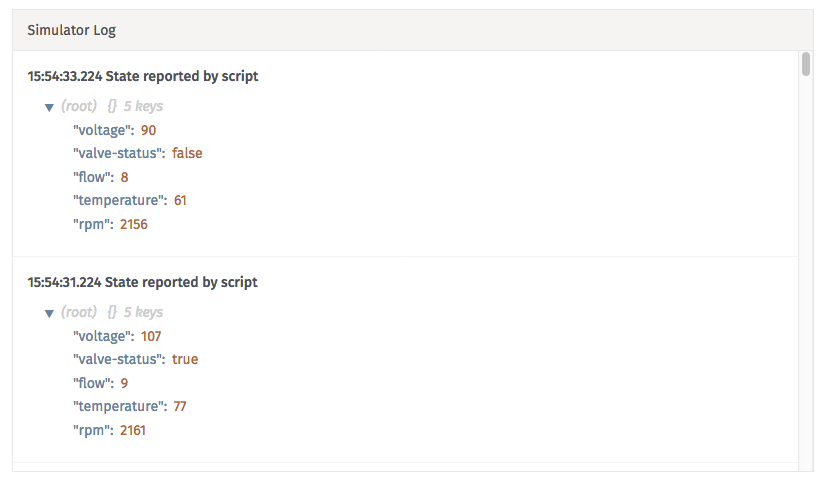
You can also look at the Simulator Log to see the simulator activity.
Now that our device is successfully connected and sending data, we can open up the Data Explorer to explore the data that's coming in.
Digging Into Your Data
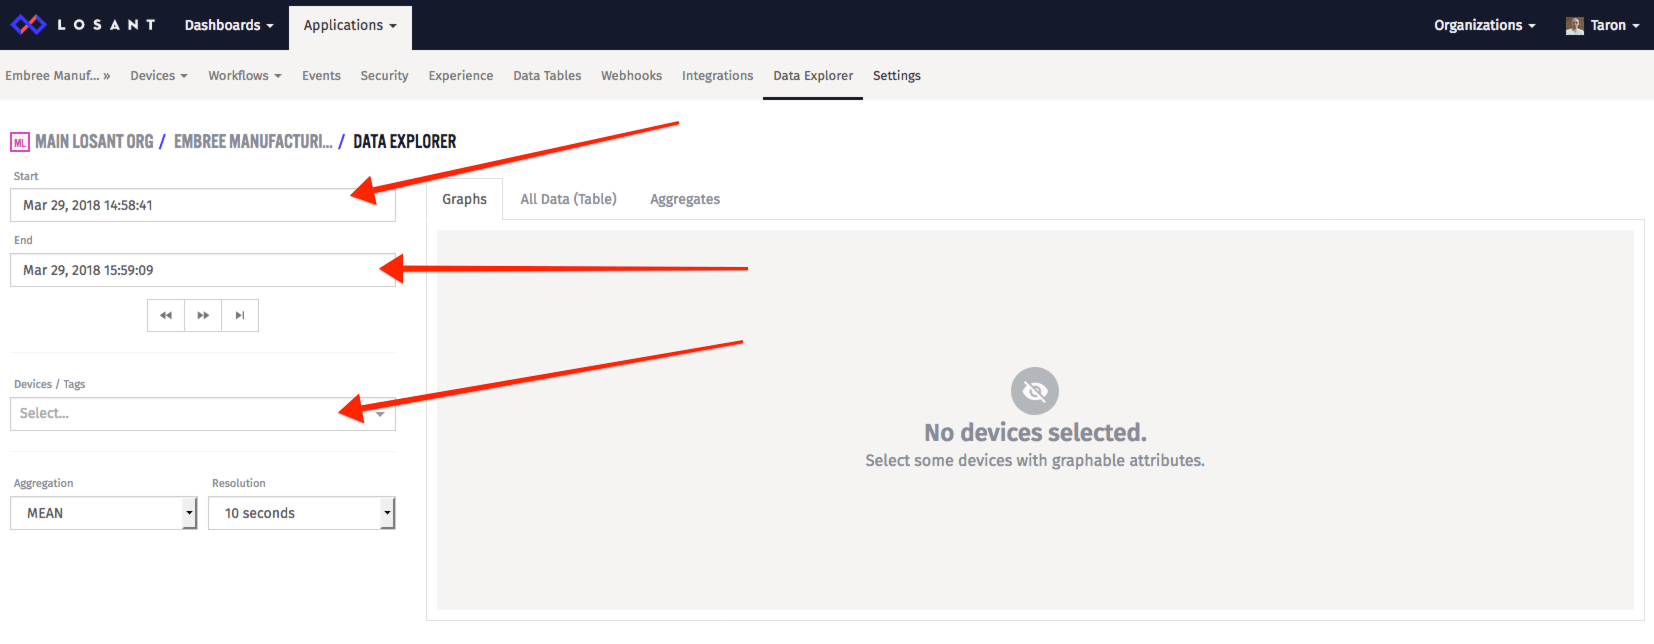
In a new tab, open up your Data Explorer. Once there, choose a proper start time, end time, and device.
Since our simulator hasn’t been running for that long, you can update your start and end time to be the last five minutes. That way, you’ll have a more interesting graph.
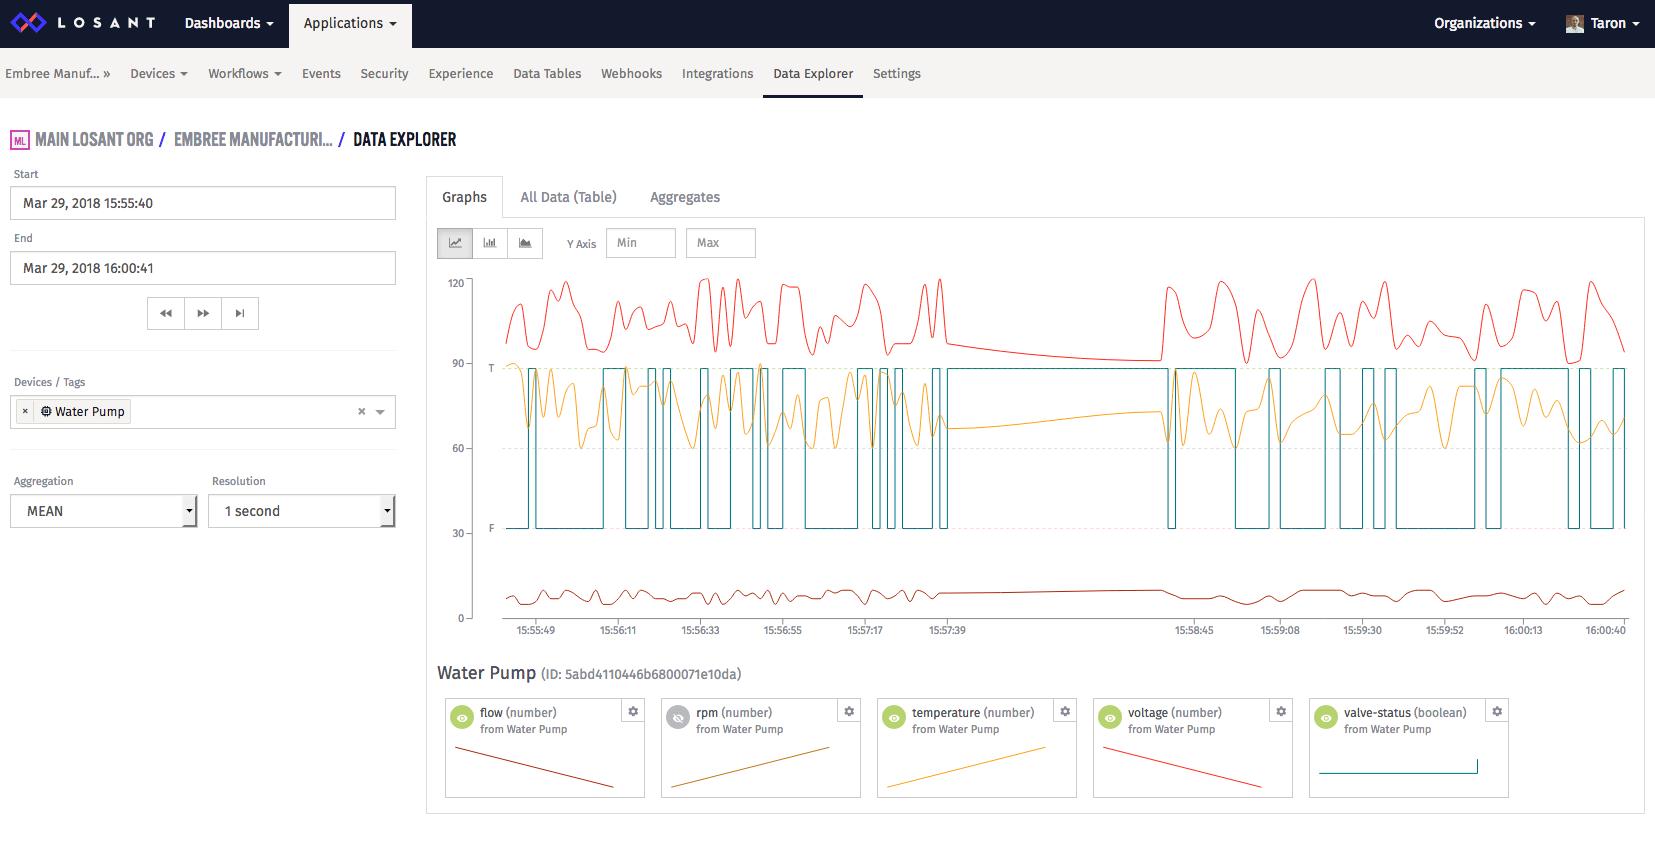
After you choose your device and some attributes, your explorer should look similar to this:
Wrap up
Congratulations, you are now officially done with Course 3 of Losant University!
Feel free to poke around Losant; there is a ton to explore. If you have a specific use case in mind of how you would like to use Losant, feel free to create and simulate other devices that more closely represents your data and use case.
If you run into any troubles along the way, the Documentation and Forums are there to help.
Was this page helpful?
Still looking for help? You can also search the Losant Forums or submit your question there.