Experience Groups
An Experience Group is a mechanism for associating your application's devices with your Experience Users. Doing this allows you to implement access control to these devices using the Verify Group and Verify Device workflow nodes, as well as within Dashboards using Experience User Context Variables.
Experience Groups also allow for controlling access to your application's Experience Endpoints. When configuring an endpoint - or within a workflow using the Verify Group Node - you can limit access to the endpoint or change the user experience based on their group membership. This is useful for setting up administration routes within your Experience; for example, only a subset of your users may create other experience users or delete resources.
Viewing Experience Groups
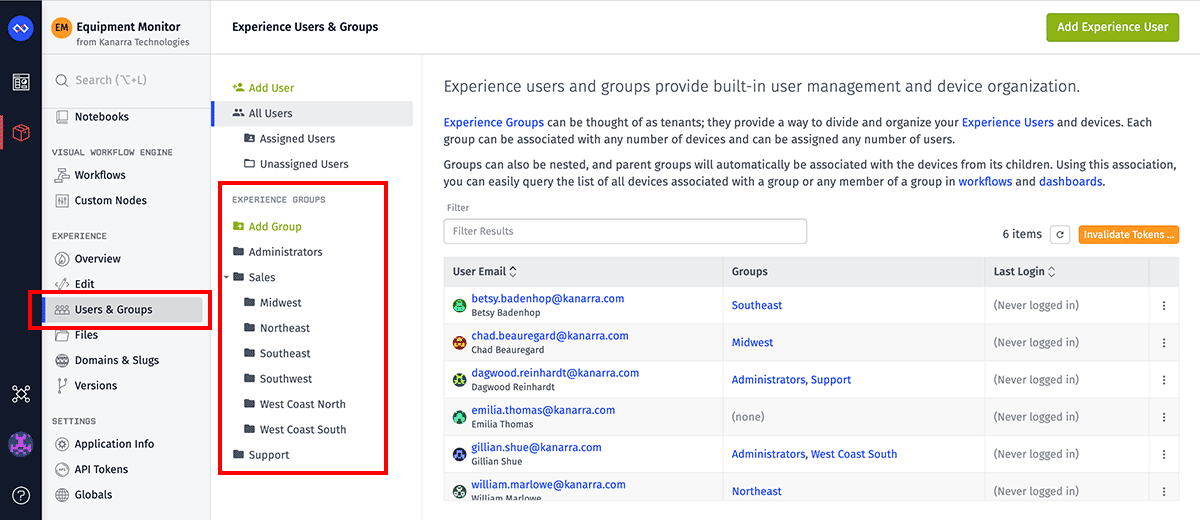
Click the "Users & Groups" link under the "Experience" section of your application menu. While in this section, all of your application's experience groups are listed in the left column. Groups that have children will display those children in a collapsible tree format.
To view or edit an existing group, click the group's name.
Adding an Experience Group

Click the "Add Group" link at the top of the groups list to add a new group. This will take you to a screen where the new group's properties can be configured.
Defining a group is broken up into many sections:
Group Information
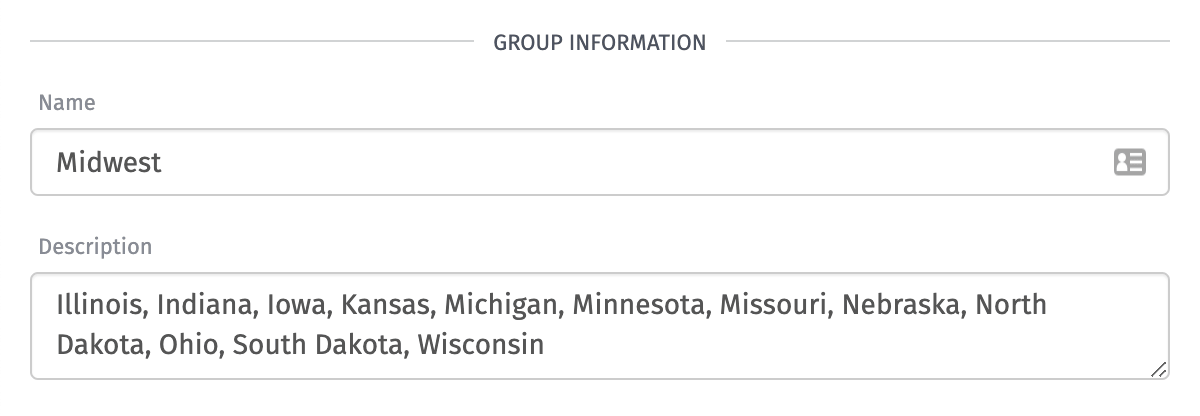
Like most platform resources, groups require a name and optionally take a description. These properties are simply for display purposes, though it is possible to fetch a group by name in the Get Experience Group Node.
Parent Group

You may optionally set a parent group if you wish to set up a multitenancy application experience. Any users who are a member of the parent group - as well as its parent, and so on - will automatically be associated with the child group's devices and will, for the purposes of endpoint access, be considered members of that group.
Devices
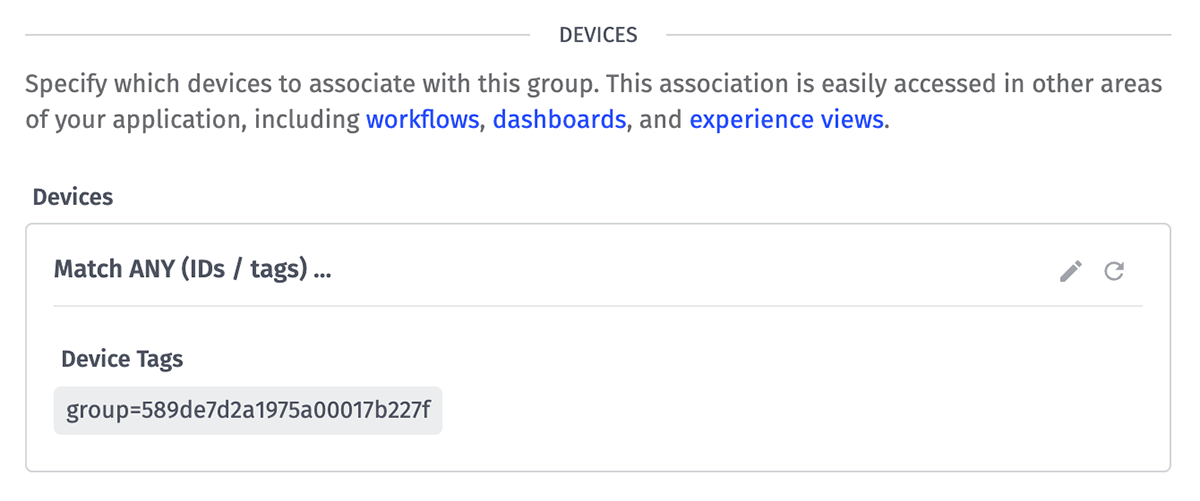
If desired, you may associate devices with this group through a device query, and any members of the group (or its parent groups) will in turn be associated with the chosen devices. The recommended implementation is to associate devices with a group tag set to the ID of the group itself (i.e. group=<THE_GROUP_ID>). With this implementation, whenever a device is onboarded, you only need to add a group tag to the device and set its value to the ID of the desired experience group. The association you created on the experience group will then automatically pick up the new device.
Advanced Queries
While it is possible to associate devices to an experience group through an advanced query, applications of even moderate scale can reach the "query component limit". This results in the following error when querying devices by user or by group:
Cannot resolve to more than 150 device query components
This error occurs when there are more than 150 groups that must be searched (using advanced queries) when finding devices. When you have nested groups and you query devices for a top-level parent, it's easy to exceed 150 child groups (and therefore 150 components in the underlying query).
Associating devices by tag or by ID is specifically optimized for this use case. When using tags or IDs, you can have up to 2,000 unique associations across all of your groups. For example, if each group associates devices using a tag, you can search up to 2,000 groups in a single query. The platform will automatically optimize advanced queries that equate to simple device ID or device tag matches.
Group Tags
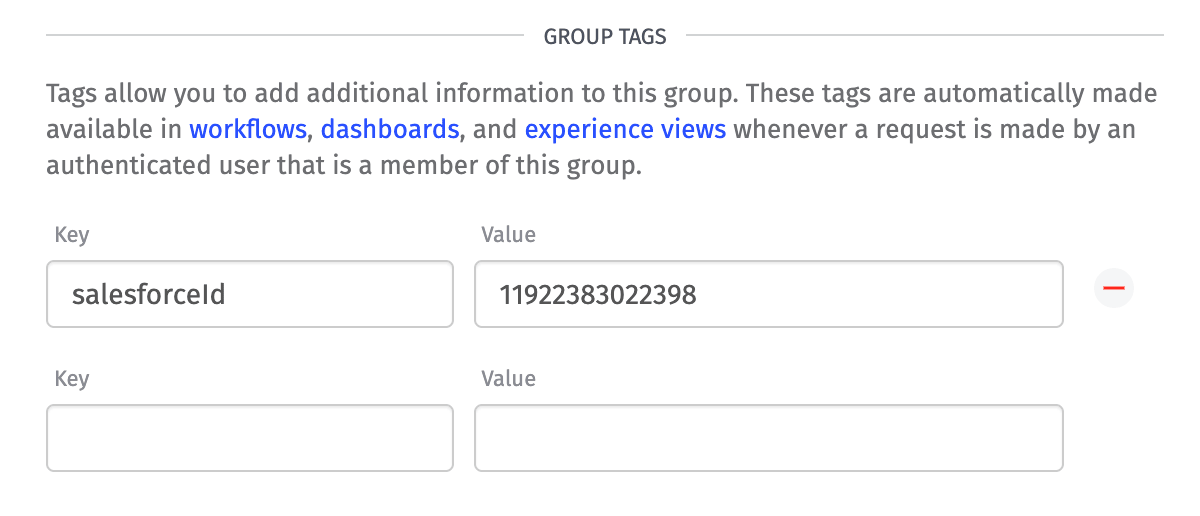
As with experience users, you may also provide meta information about the group in the form of key/value tags. Groups can then be queried by the values of these tags in the Get Experience Group Node.
Parent Group Members
Experience groups can be assigned a parent group, and those parents can have parents, and so on. Any user who is assigned to a group is, for most purposes, considered a member of any group who lists that group as a parent, and any group that lists each of those as a parent, etc. It is important to understand this distinction when using groups to manage device and endpoint access.
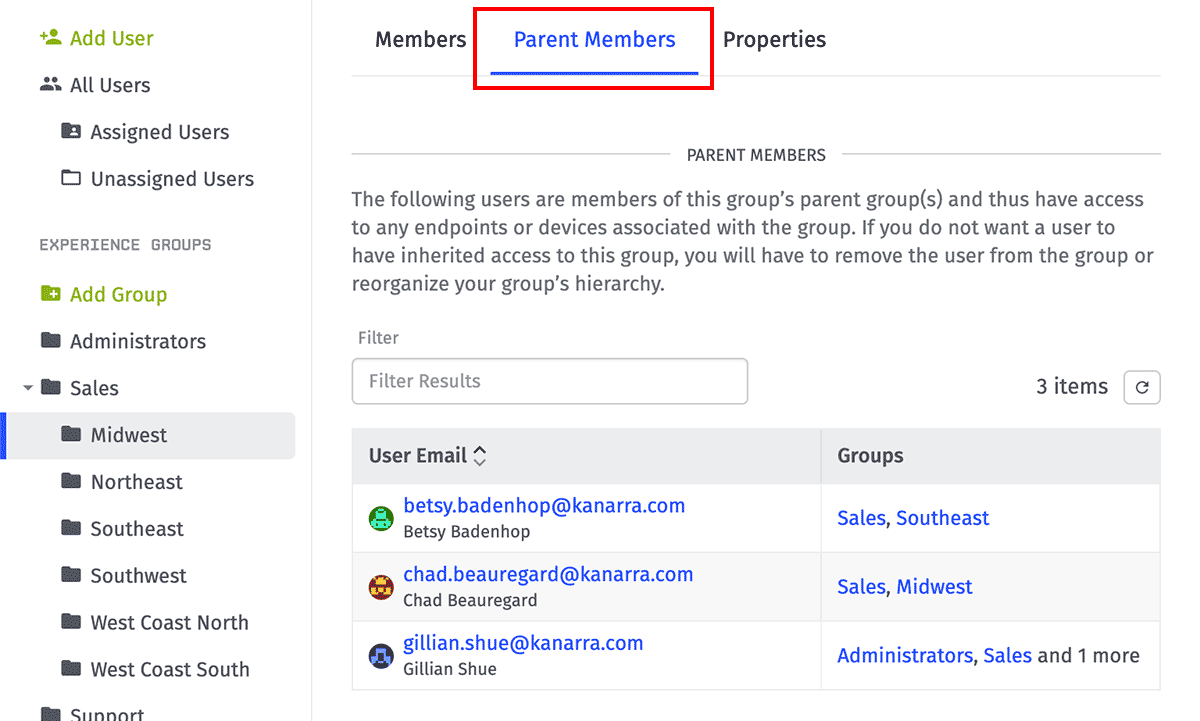
To view the members of an experience group's parents, click the "Parent Members" tab on the group detail page. This will display a list of all users who are in the group's immediate parent, the parent's parent, etc. Users may not be removed from those groups from this list; rather, you must manage the parents' membership individual per group.
Assigning Members to Groups
There are multiple methods for managing a group's members ...
From the Group Edit Page
After a group has been created, Experience Users can be added to it from the "Members" tab from the group's detail page.
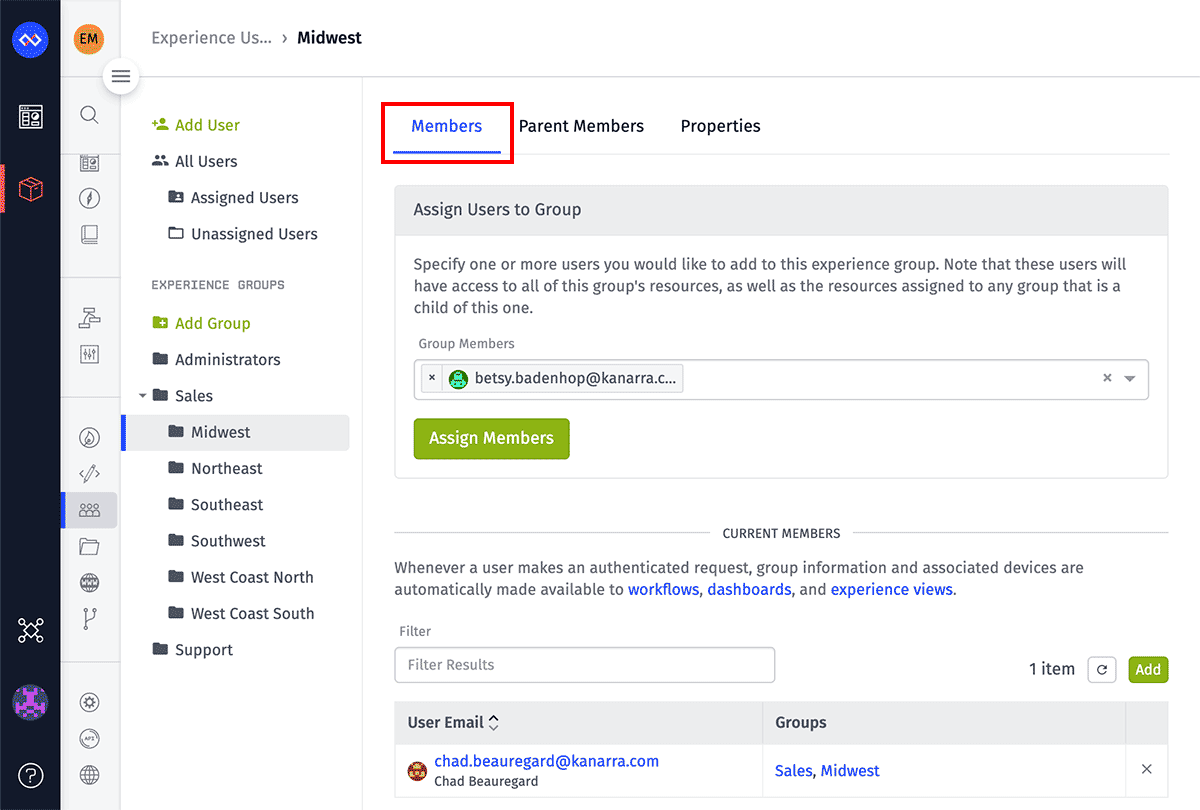
At the top of the page is a form where you can enter the email address of one or more Experience Users you would like to assign to the group. After clicking "Assign Members", those users will then display in the "Current Members" table at the bottom of the page.
To unassign a user from a group, click the "X" icon in that user's row within the "Current Members" table.
From the User Edit Page
On a user's detail page, you can manage that individual user's group membership by adding or removing new groups and submitting the form.
From the User List Page
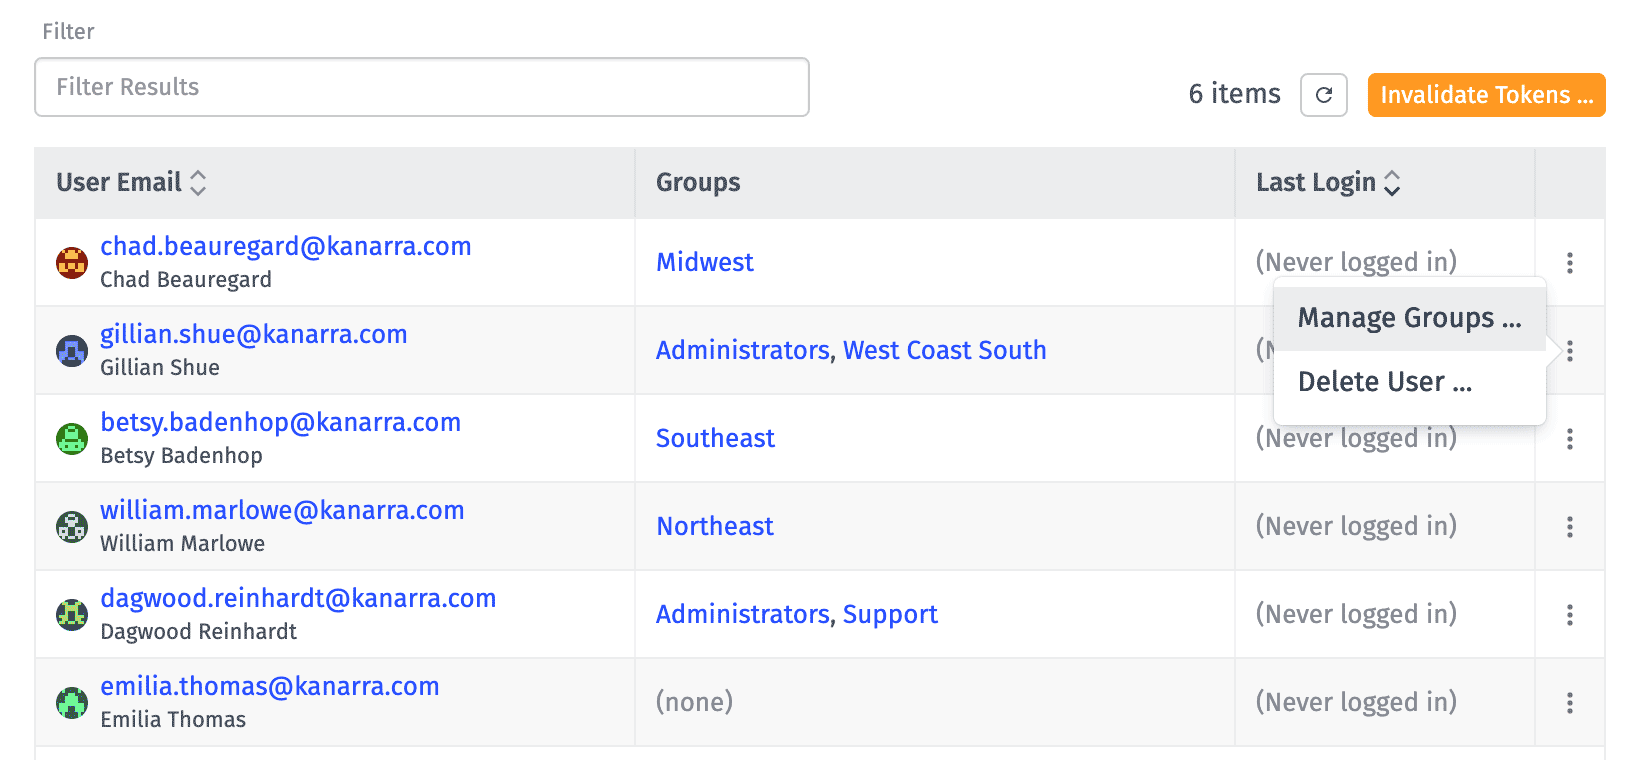
When viewing a list of users (all, assigned or unassigned), you may choose the "Manage Groups" option in each user row's dropdown menu. This will display a modal similar to the group selector in the user edit page where you may add or remove the group's assigned members.
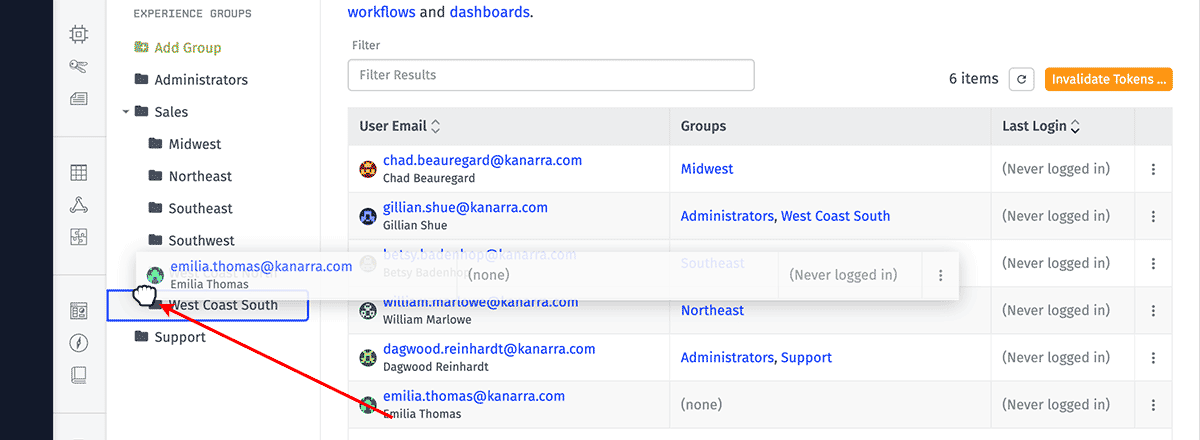
From the same list view, you may also drag rows from the table to the group names in the left column to assign users to those groups.
Using Experience Groups
In addition to simply being a method by which to organize your Experience Users, there are a number of uses for groups when building out your application experience.
Device Association
By associating devices with an Experience Group, you can expose those devices and their data within dashboard pages using an experience user context variable. Also, using the Device: Get Node, you may retrieve a list of devices associated with an Experience Group or Experience User, which you can then use in your workflow executions and page rendering.
Access Control
In an experience endpoint's access control, you may limit an endpoint's access to "Only users who are in the following groups ..." When selected, a request will only be treated as authenticated if the Experience User is signed in AND is a member of one or more of the groups you select.
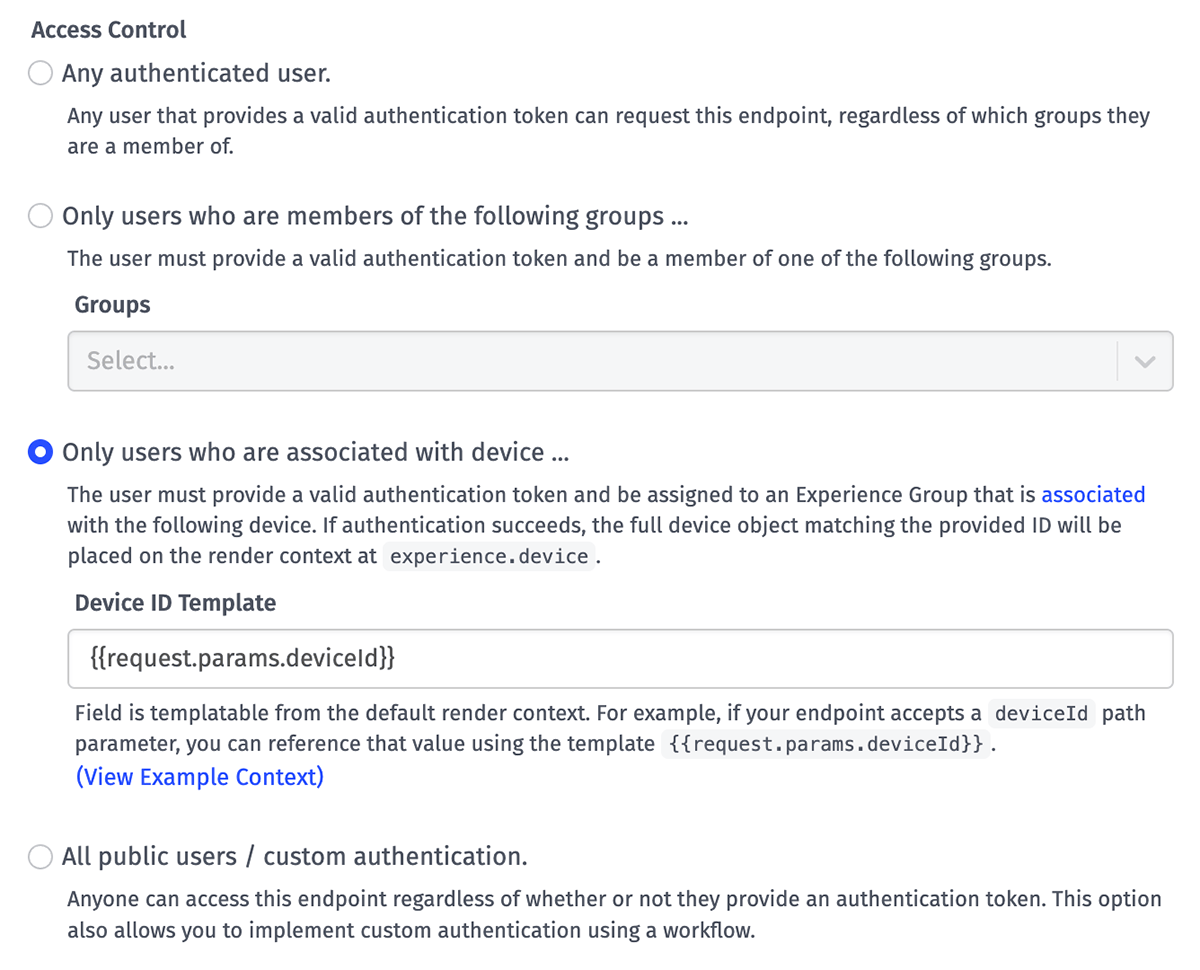
In a workflow, you may use the Verify Group Node to check if the user making the request is a member of a specific group or one of its ancestors, and you may branch your workflow's execution based on this. Note that this method is endpoint-agnostic; if you use the first method above to limit the endpoint's access control, and the user is not a member of one of the selected groups, your workflow will never fire.
Conditional Rendering
In an Experience View, assuming you do not override the context passed to the page, you will have access to the user's information - including their group membership. Certain portions of the page could be conditionally rendered based on the user's group membership, such as an "Admin" link that takes the user to a gated portion of your Experience.
Deleting Groups
A group can be deleted by clicking the "Delete" button in the footer of a group's edit page. Deleting a group does not delete the users or devices associated with that group.
Note: If any other Experience Group lists the group you wish to delete as its parent, you may not delete that parent group. You must first delete all the child groups or move the child groups to other parents.
Was this page helpful?
Still looking for help? You can also search the Losant Forums or submit your question there.