Experience Domains And Experience Slugs
Experience Domains and Experience Slugs are the two ways that you (or your users) can access an experience that you have created.
Experience Domains
An Experience Domain is a custom domain at which a version of your experience is available on the Internet. Your application can have multiple Experience Domains, and each domain can point to a different version of your experience. Or, multiple domains can point to the same Experience Version.
Experience Domains are only available within applications owned by an organization. If you require a fully custom domain in front of your experience endpoints for one of your Sandbox applications, you will need to migrate that application to an organization.
Experience Slugs
Experience Slugs are unique subdomains on the onlosant.com domain (such as my-experience-slug.onlosant.com). Though less customizable than an Experience Domain, Experience Slugs do provide a way of exposing your experience securely to your end users and thus are often utilized in staging environments and early proof of concepts. You can configure one or more subdomains of onlosant.com to point at your experience versions.
Every application experience is guaranteed to have a single slug, which is <YOUR_APPLICATION_ID>.onlosant.com. By default this is pointed at the "develop" version of your experience. You cannot delete this slug, although you can change which version it points at.
Viewing Experience Domains and Slugs

"Domains and Slugs" can be found under the "Experience" section of your application's sub-navigation. Click a domain name or a slug in the respective lists to view their configuration or make edits.
Working with Experience Domains

From the Domains list page, click "Add" in the at the top right of the domain list. This will take you to a page where the new domain can be configured.
Domain Configuration
Setting up an Experience Domain takes only one required field: the Domain itself. The domain must meet the following criteria:
- It must be comprised of valid characters for a domain.
- It must be unique across the entire Losant platform.
- It must originate from a known top-level domain.
- It may contain a subdomain in the form of a wildcard or a static name.
If you do not already have a domain, you can purchase one through a registrar such as NameCheap or GoDaddy.
You will almost certainly want to fill out the next field as well, the Version field. This configures which version of your experience this domain will load and use. By default, it is the develop version, but you can change it to any version of your experience that exists (or even choose no version at all).

Configuring DNS Records
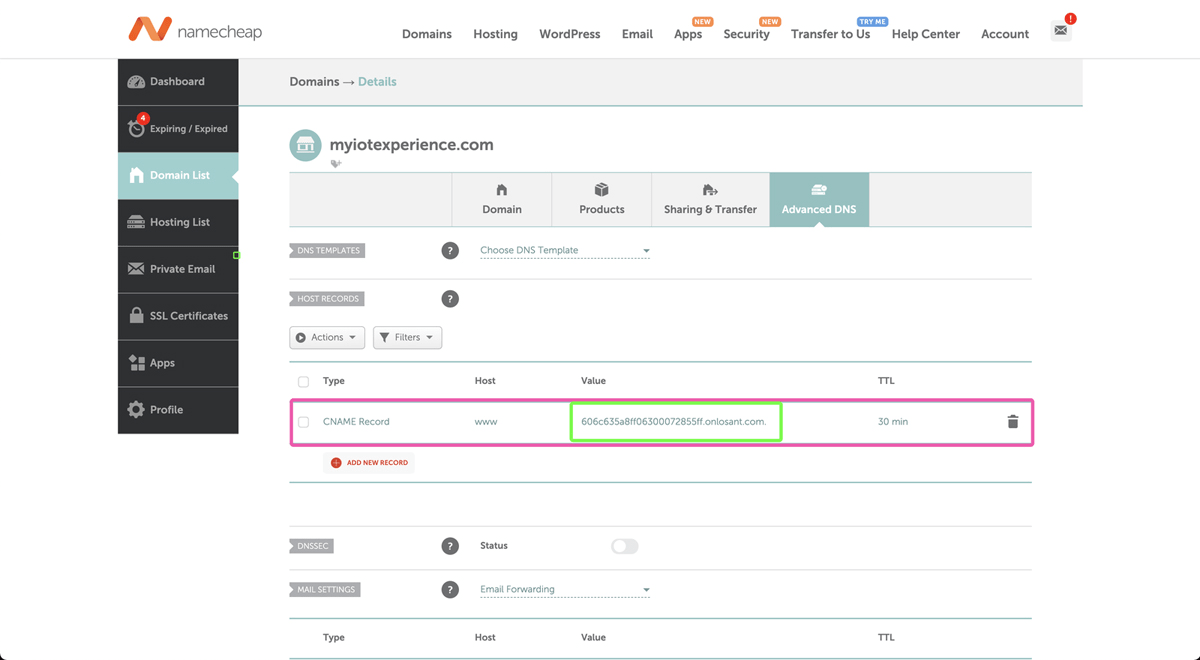
After you have set up the domain within Losant (and assuming you have the domain registered already), you will have to make a change to your domain’s DNS records to forward all requests hitting the domain to your application experience. So first, head over to your domain registrar and either update the CNAME record for the subdomain you'd like to point to your Losant Experience or create a new CNAME Record.
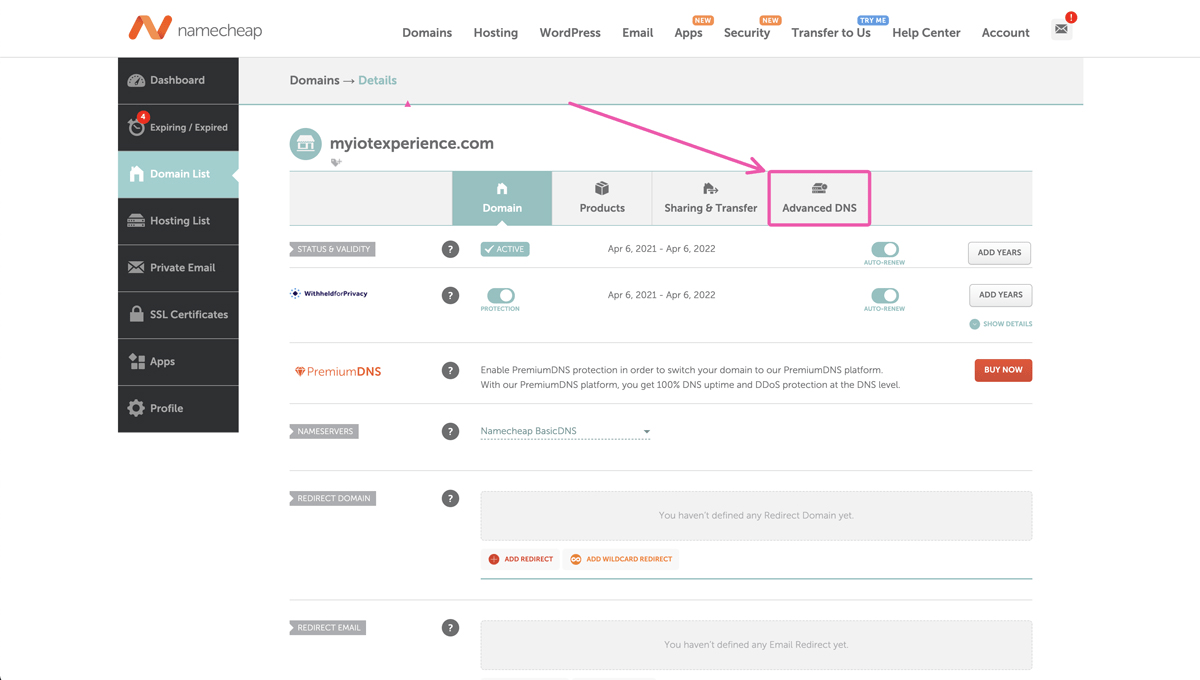
For example, if you'd like your Losant Experience to be tied to the "www" subdomain, using Namecheap as a registrar, you can go to the Advanced DNS panel, and update the value of the "www" CNAME record to your default domain for your Losant Application Experience, which you can find in the Domain Configuration page in Losant:
The default domain for your Losant Experience is your application ID plus onlosant.com, so if your Application ID is 1234ifh234234hg your default domain would be 1234ifh234234hg.onlosant.com. There are a few places where you can find this, but on the domain configuration page it is easy to see and copy:

It may take some time for the changes to propagate after you save your work; propagation usually takes a couple hours but can take as long as 24 hours. At that point you can start issuing requests to your experience endpoints using the new domain.
Securing Your Domain
When configuring the domain, you may also include an SSL Key and SSL Certificate to secure requests to your experience endpoints. If the certificate was acquired through a non-standard issuer, you may optionally include an SSL Bundle containing the root and intermediate certificates.
Securing the domain is optional, though we strongly recommend it. SSL certificates can be purchased at providers such as NameCheap; you can also get a free SSL from Let's Encrypt and install it using our How-to Guide.
After acquiring an SSL certificate, return to your experience domain and insert the Key and Certificate values, and optionally the Bundle.
Working with Experience Slugs

From the Domains list page, click "Add" in the at the top right of the slugs list. This will take you to a page where the new slug can be configured.
Slug Configuration
Setting up an Experience Slug has two fields - the slug name (which serves as the subdomain on the onlosant.com domain) and the experience version this slug should point at.

The slug name is required and must meet the following criteria:
- It must be comprised of valid characters for a domain.
- It must be unique across the entire Losant platform.
- It must be at least three characters long.
The version field configures which version of your experience this slug will load and use. By default, it is the develop version, but you can change it to any version of your experience that exists (or even choose no version at all).
Deleting Domains and Slugs
A domain or slug can be deleted by clicking the "Delete" icon next to any domain or slug on the list page, or by clicking the "Delete" button in the footer of a domain's or slug's edit page. Deletion will take effect immediately, and any requests to the domain or slug will neither return a result nor forward to your experience's other domains or slugs.
Note: You cannot delete the Application ID Experience Slug.
Was this page helpful?
Still looking for help? You can also search the Losant Forums or submit your question there.