Streaming Endpoints
Most Experience Endpoints are implemented with a request/response model, meaning each request resulted in a single response. The response is either raw data (e.g. a JSON API response) or a rendered Experience Page (e.g. a browser request for a webpage).
Streaming Endpoints allow you to reply with a Server-Sent Event (SSE) response. SSEs keep the HTTP connection open indefinitely; providing you the ability to push new data to a user in real-time.
Overall, Streaming Endpoints allow you to:
- Build Experiences that display custom real-time data from Device State and/or custom MQTT topics
- Avoid polling an Experience API Endpoint over and over again to receive new data
Creating a Streaming Endpoint
Streaming Endpoints are a combination of Experience Endpoints and Endpoint Reply Nodes within a Workflow.
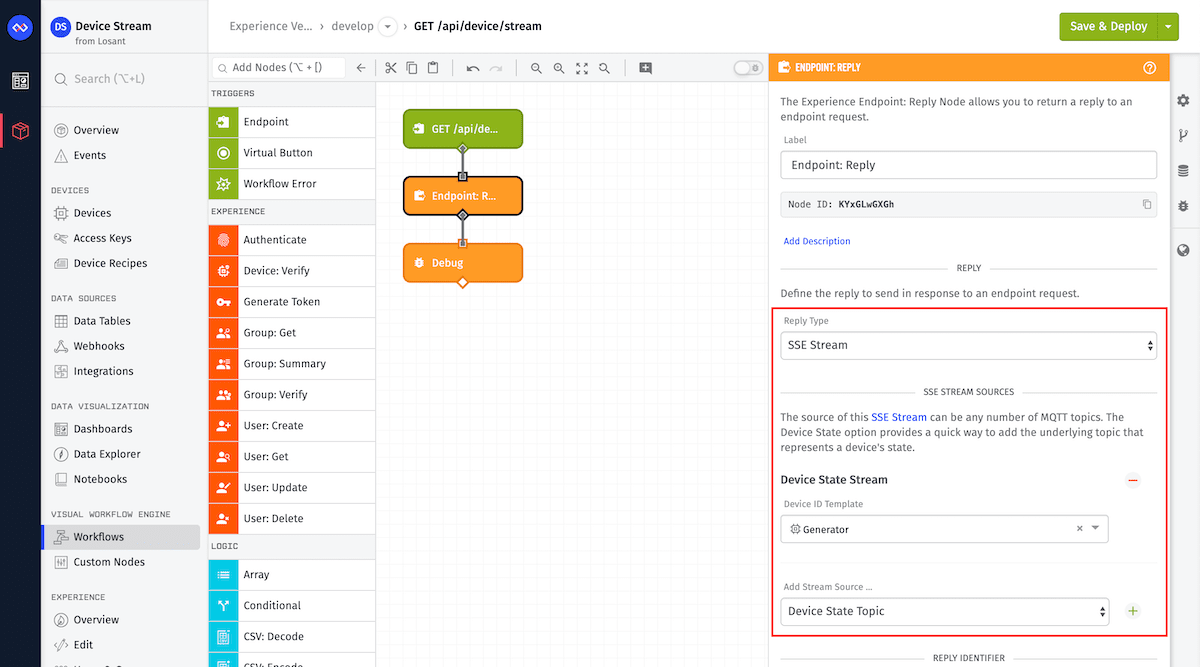
Under the “Reply” configuration select the “Reply Type” of “SSE Stream”. There you can configure your SSE Stream Sources.
Note: If you wished to stream non-device state data being published to the Losant Broker, you can access it by including the MQTT topic as a Custom Topic.
Consuming a Streaming Endpoint
Consuming a Streaming Endpoint requires familiarly of HTML, CSS, and JavaScript.
The Javascript EventSource API is used by your application to listen to the SSE stream produced by a Streaming Endpoint.
Here is an example that could be used within an Experience Page:
// Connect to one of your Experience Endpoints.
const evtSource = new EventSource('/api/stream/devices/MY-DEVICE-ID')
//Losant sends events using the mqttMessage subject.
evtSource.addEventListener('mqttMessage', function(e) {
  console.log(e); // Very useful during development to see the data format.
  const { topic, message } JSON.parse(e.data); // Parse the stream message as an object and save the topic and message as local variables
  let theMessage;
  try {
    // this could fail if message originated from a custom MQTT topic
    // and the messages are not stringified JSON objects
    theMessage = JSON.parse(message);
  } catch (e) {
    // if we fail to parse the message, simply do nothing
  }
  if (theMessage && theMessage.data && typeof theMessage.data.temperature !== 'undefined') {
    // Losant attributes are on the data object. Display the temperature attribute on the page.
    // If you subscribe to custom topics, this message will be whatever you originally published.
    document.getElementById('value').innerHTML = theMessage.data.temperature
  }
});
Configuring the Streaming Endpoint
// Connect to one of your Experience Endpoints.
const evtSource = new EventSource('/api/stream/devices/MY-DEVICE-ID');
new EventSource creates an interface object. It accepts one parameter, which is a URL. Here, we can use an Streaming Endpoint’s relative URL.
Listening to Messages
Losant sends events using the mqttMessage subject.
evtSource.addEventListener('mqttMessage', function(e) {
  ...
});
When subscribing to a device state stream, event data (e) will come in the following format:
{
  "data": {
    "message": {
      "data": {
        "temperature": 167
      }
    }
  }
}
The raw event data is a JSON string within e.data. Deeper in the raw data message is the MQTT message object:
{
  "data": {
    "temperature": 167
  }
}
SSE Connection Handling
There are instances where you may need to handle connecting and disconnecting from an SSE. For example you may want to verify that your Experience Endpoint is configured correctly, if configured the onopen event should fire within milliseconds of creating a new EventSource:
evtSource.onopen = (info) => {
  // successfully connected to an SSE Endpoint
  // do something with the connection info
  console.log(info);
}
If you wish to close the SSE connection, simply call the close method:
evtSource.close();SSE Error Handling
To handle SSE errors, listen for the onerror event:
evtSource.onerror = (err) => {
  console.error('EventSource failed:', err)
}
SSE in Older Browsers
Note: Support for older browsers (e.g. IE) requires a JavaScript polyfill. E.g. add this before the event source script:
<script
  src="https://cdnjs.cloudflare.com/ajax/libs/event-source-polyfill/0.0.9/eventsource.min.js"
  integrity="sha256-pP53saijIaNHRg0G+JZRZTV/aDfpP316o+XQRB/5oSg="
  crossorigin="anonymous"
></script>
Streaming Endpoint Example
To illustrate one of the many uses for an SSE Stream we’re going to create an example which steams device state data to an Experience Page.
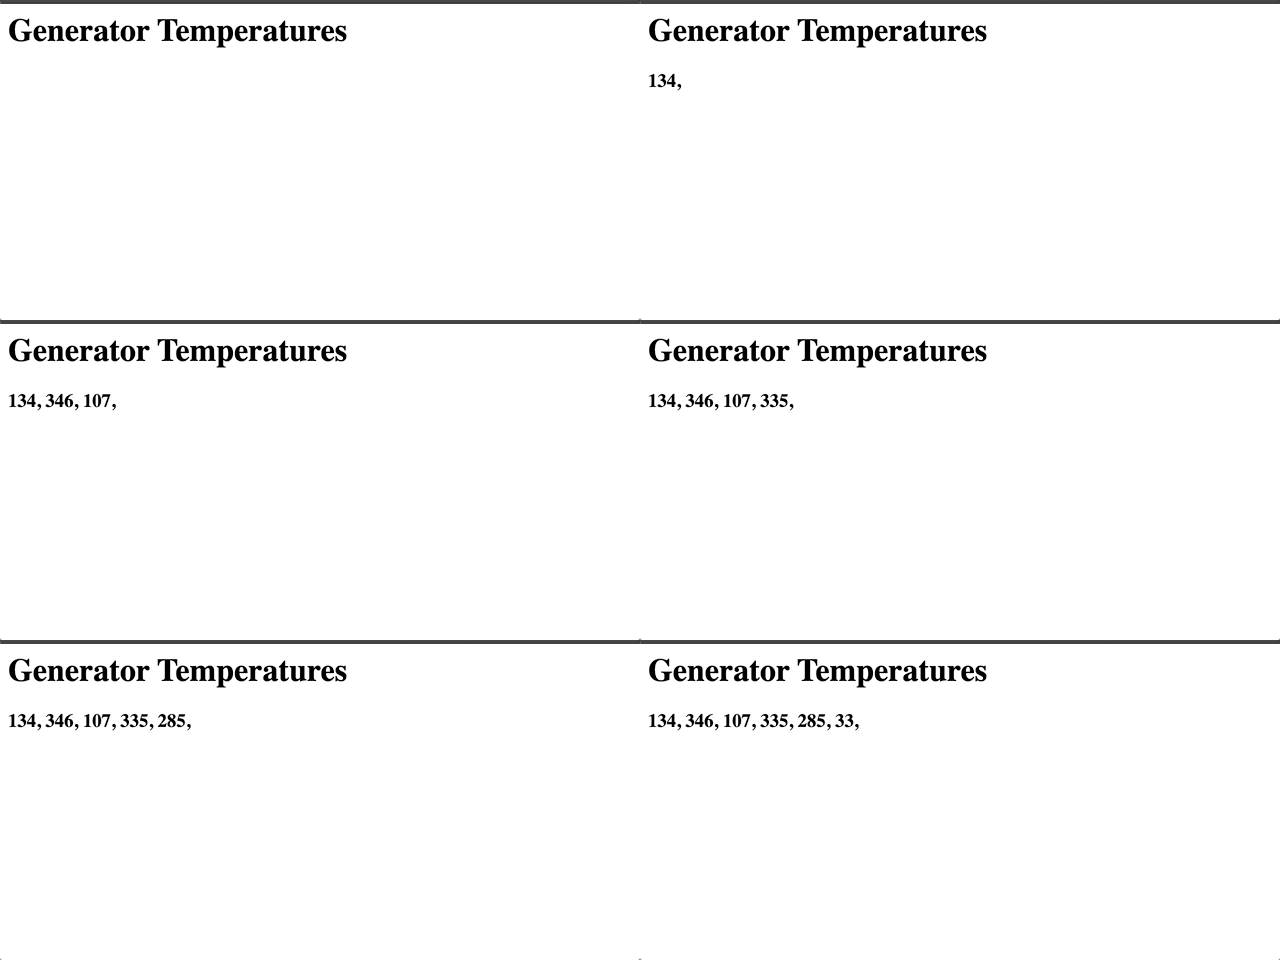
Experience Endpoint Configuration
Let’s create a Steaming Endpoint by configuring an endpoint with a GET method and “No Static Reply”. We can do this using the Experience Endpoint wizard:
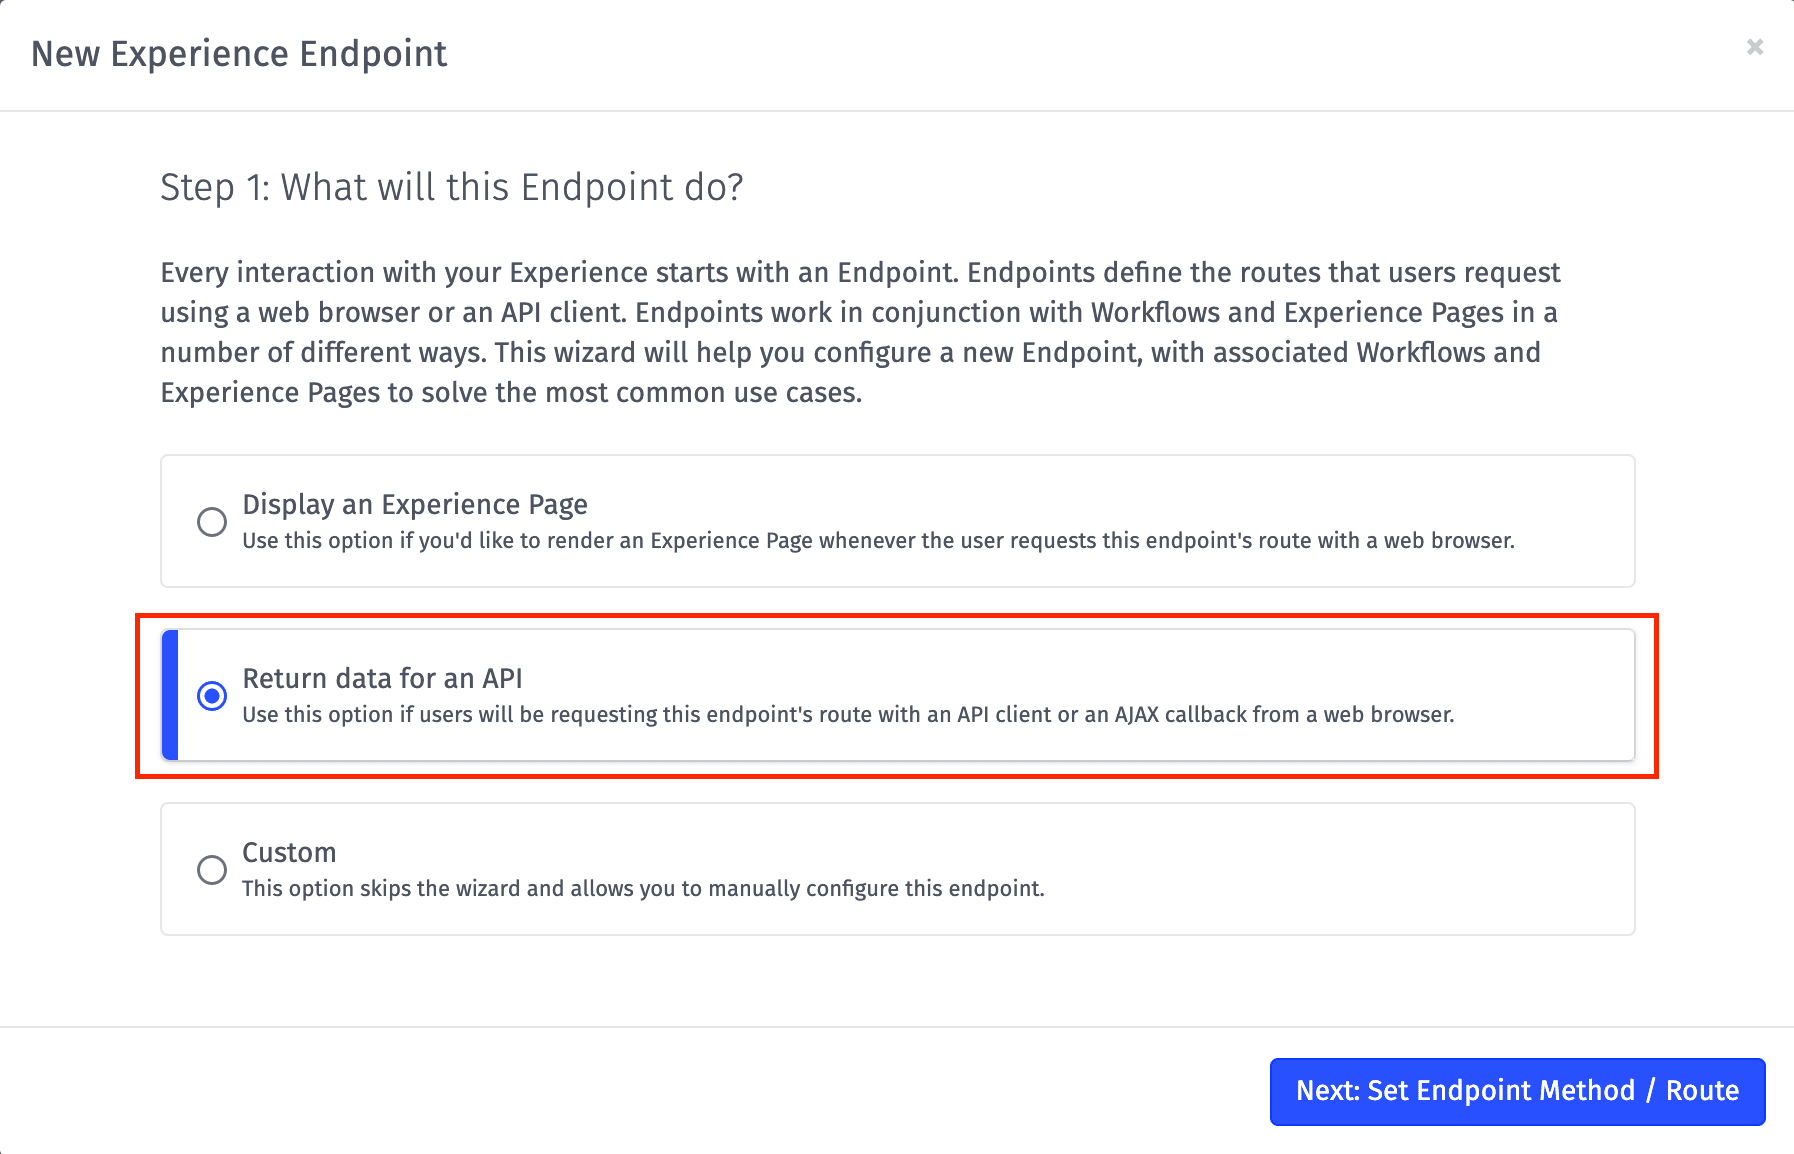
First, we select “Return data for an API”:
Next, we select “GET” as the method and we name the endpoint /api/device/stream.
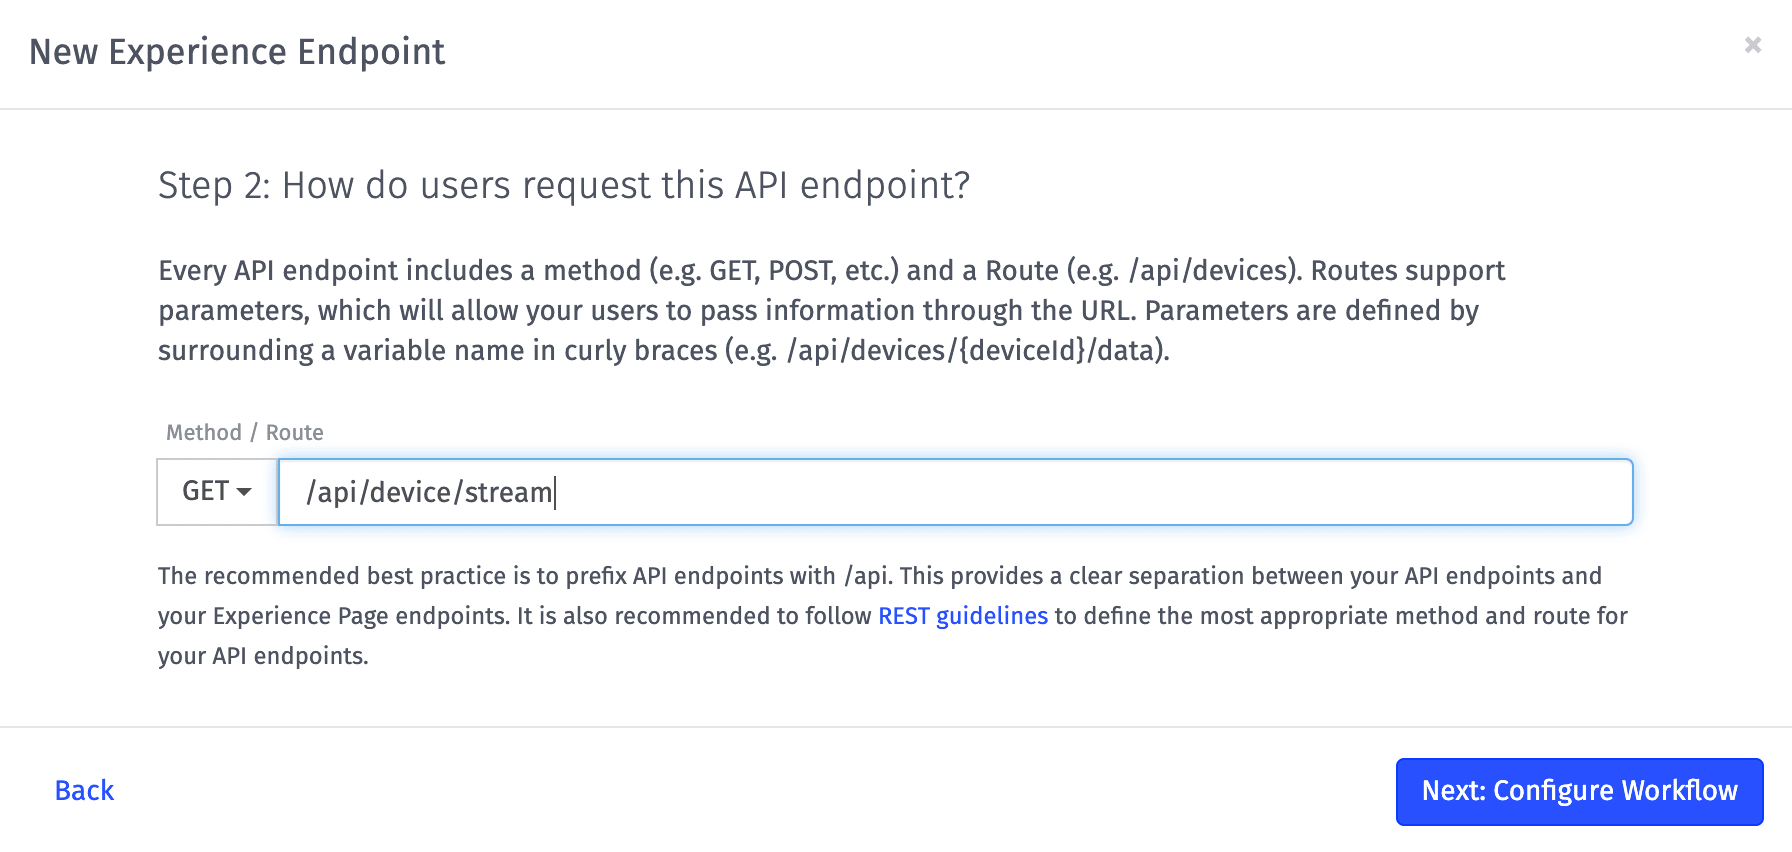
For the rest of the wizard leave all the other options as default. If you chose to make your route authenticated, you must have a valid Experience User logged in for the Streaming Endpoint to work.
Endpoint Reply Configuration
The Experience Endpoint wizard will create the Experience Workflow for this Endpoint, but we’ll need to edit the Endpoint Reply Node in the workflow.

Under the “Reply” configuration select the “Reply Type” “SSE Stream”.
We can select the default “Device State Topic” as the “Stream Source” and select a device under for the “Device ID Template”.
We are now ready to access this endpoint from a web interface.
Experience Page Configuration
You can then create or use an existing page. Be sure to configure it in the Endpoint Reply Node.
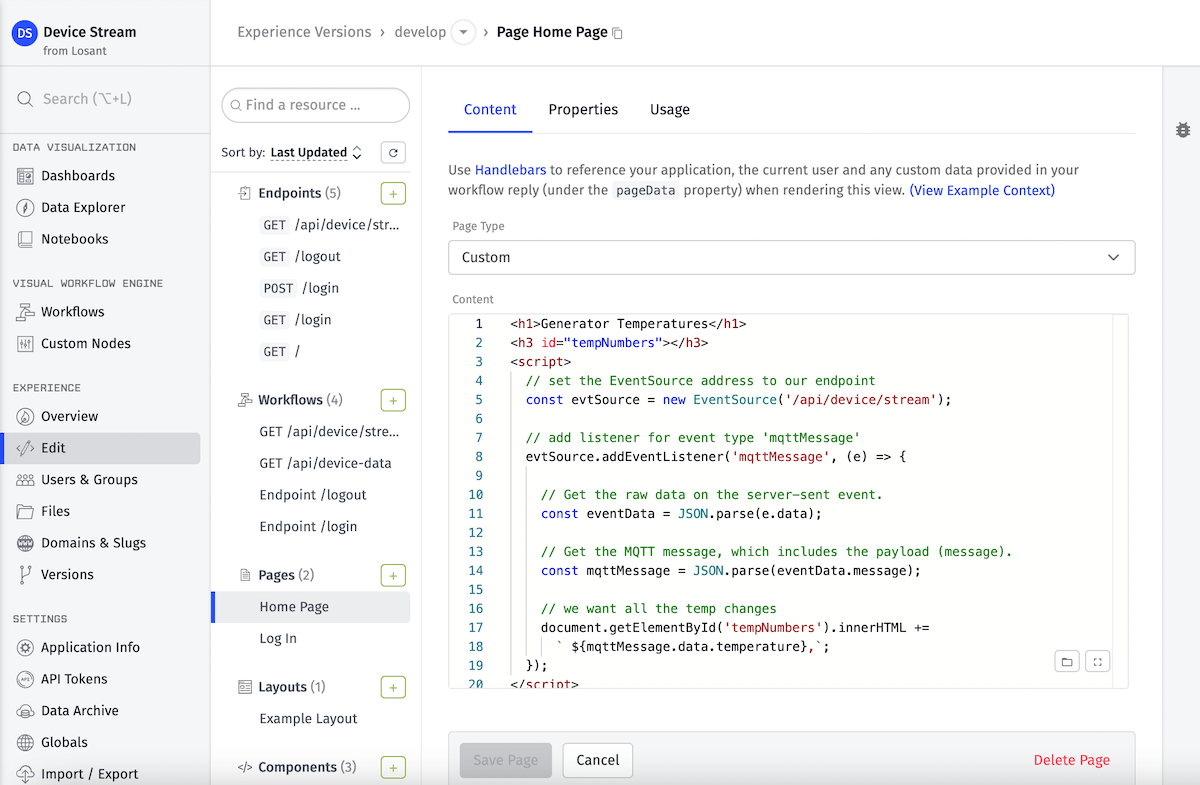
Here are the contents of the page:
<h1>Generator Temperatures</h1>
<h3 id="tempNumbers"></h3>
<script>
  // set the EventSource address to our endpoint
  const evtSource = new EventSource('/api/device/stream')

  // add listener for event type 'mqttMessage'
  evtSource.addEventListener('mqttMessage', e => {
    // Get the raw data on the server-sent event.
    const eventData = JSON.parse(e.data)

    // Get the MQTT message, which includes the payload (message).
    const mqttMessage = JSON.parse(eventData.message)

    // we want all the temp changes
    document.getElementById(
      'tempNumbers'
    ).innerHTML += ` ${mqttMessage.data.temperature},`
  })
</script>
Here is the Experience Page output:

Was this page helpful?
Still looking for help? You can also search the Losant Forums or submit your question there.
