Table: Insert Rows Node
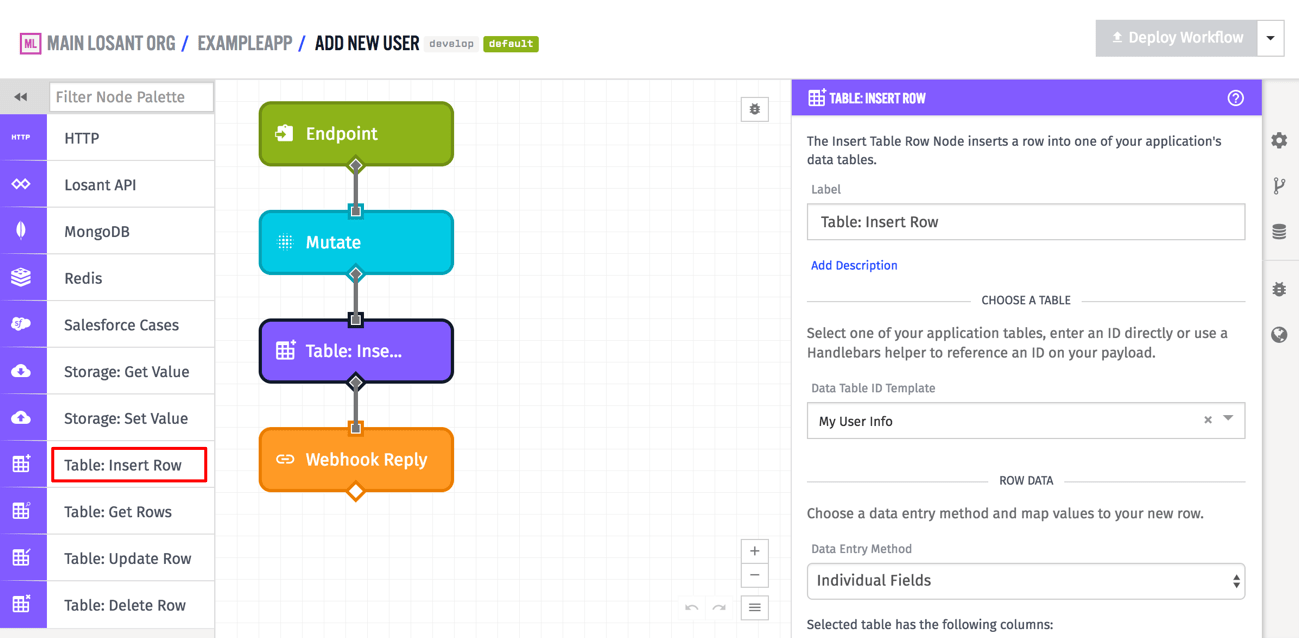
The Data Table: Insert Row Node allows a workflow to insert or more new rows into a Data Table within the current application, and optionally add the newly created row(s) to the current workflow payload.

Configuration
There are three different ways to configure input data for the Table: Insert Row Node - "JSON Template", "Payload Path", and "Individual Fields". The first two are more complicated to use, but are very powerful because they give you full control over the row to insert, while the third choice is the more common option for simple situations.
In all three cases, though, you start by choosing a Data Table, which will determine where this row will be inserted, and also determines what columns are expected for the row.

For "JSON Template", the input must be a JSON template string that can be parsed into a JSON object that validates against the Data Table Row Insert schema. For "Payload Path", the input must be a payload path that points to an object on the current workflow payload that, again, validates against the Data Table Row Insert schema. In both of these cases, this means it must be an object or array of objects (for multiple row inserts) where the keys of the objects are the column names of the data table, and the value for each key is the value for that column in the new row.
For example, given a data table with the following columns ...
priority(number type)status(string type)isActive(boolean type)
... you may provide the following JSON Template (or payload path pointing to an object) like the following:
{
  "priority": 42,
  "status": "errored",
  "isActive": false
}
You could also provide an array of object to insert multiple rows like so:
[
  {
    "priority": 12,
    "status": "queued",
    "isActive": true
  },
  {
    "priority": 24,
    "status": "inProgress",
    "isActive": false
  }
]
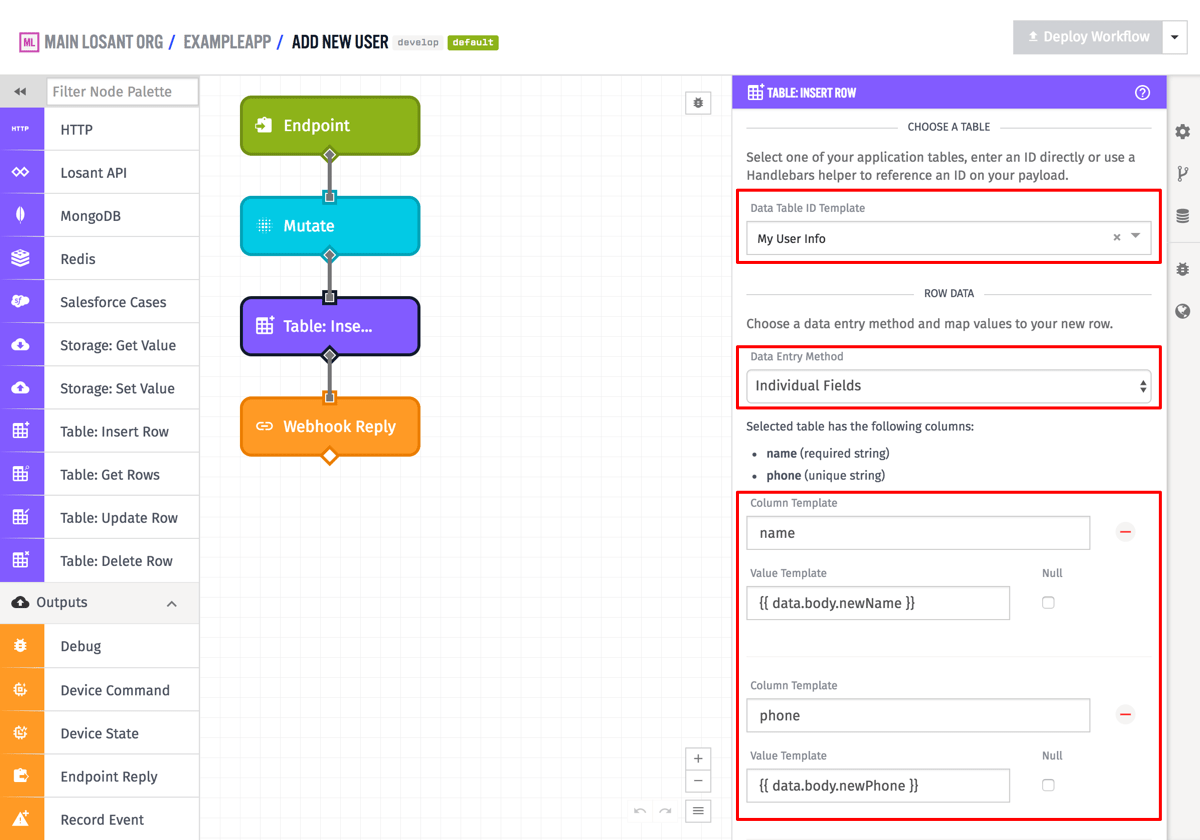
For "Individual Fields", the most common method to use and the one shown in the example above, each column in the row can be filled in individually. Both the column name field and the value field are string templates, allowing dynamic mapping of what columns are filled in. You can also choose to set the value for a column explicitly as null, by using the Null checkbox. What columns are required depends entirely on the configuration of the columns of the data table itself.

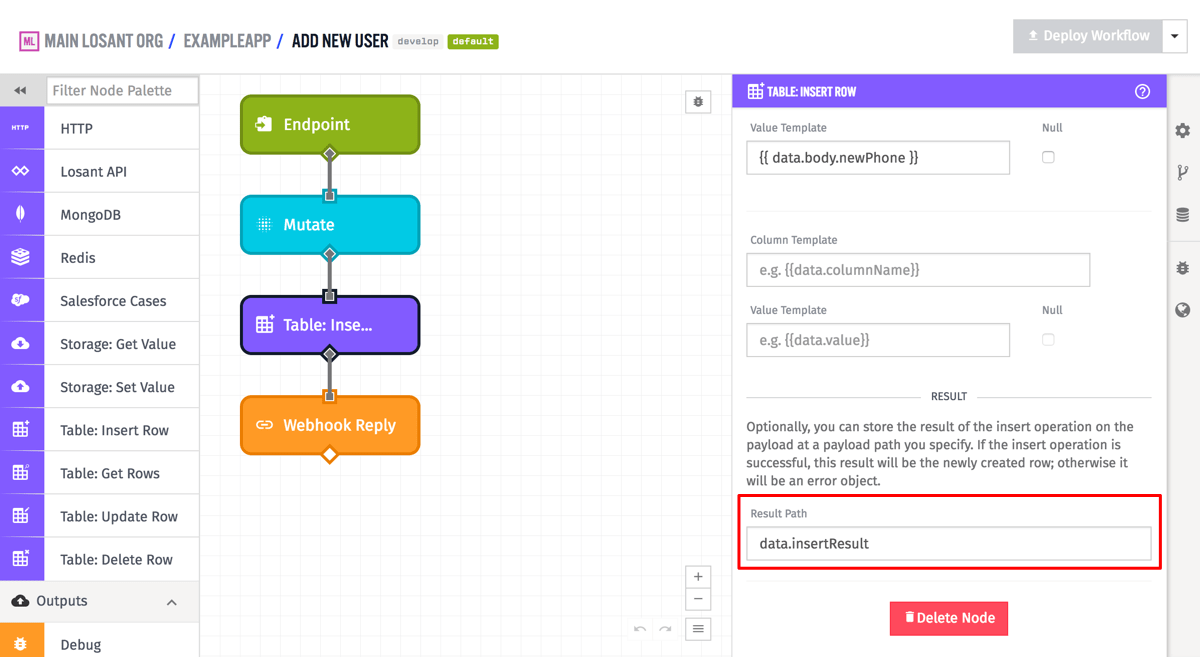
Optionally you can provide a payload path in the "Result Path" field so that the inserted row can be placed at that path on the current workflow payload. In the case of a successful row insertion, this will be the row object, and in the case of a failed row insertion this will be an object of any errors about the insertion of the row.
For instance, given the example node configuration in the screenshots above, this is a possible result for a successful row insertion:
{
  "data": {
    "body": {
      "newName": "Bob",
      "newPhone": "867-5309",
      ...
    },
    "insertResult": {
      "name": "Bob",
      "phone": "867-5309",
      "id": "598ddf39ae2e7b0007fb7bcf",
      "updatedAt": "2017-08-11T16:45:45.861Z",
      "createdAt": "2017-08-11T16:45:45.861Z"
    },
    ...
  },
  ...
}
And again, given the example above, this is a possible result for a failed row insertion where the phone number field is required to be unique by the data table, and the given phone number already exists in another row:
{
  "data": {
    "body": {
      "newName": "Bob",
      "newPhone": "867-5309",
      ...
    },
    "insertResult": {
      "error": {
        "type": "AlreadyExists",
        "message": "Entry already exists"
      }
    },
    ...
  },
  ...
}
Was this page helpful?
Still looking for help? You can also search the Losant Forums or submit your question there.