Event: Create Node
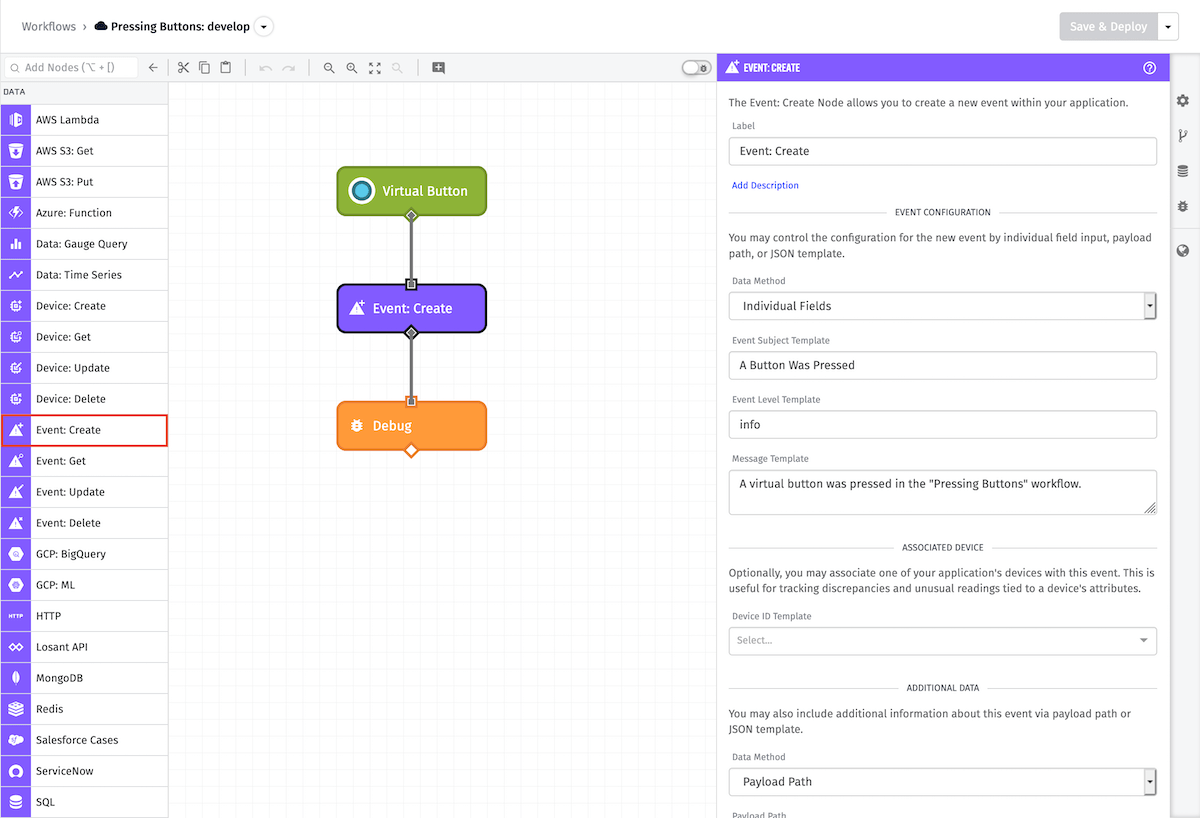
The Event: Create Node allows a workflow to create a new Event inside the current application.
Events created using this node are subject to event creation rate limits.
Node Properties
To use the Event: Create Node, you’ll have to start by choosing how you wish to configure your new event. You can pick which of these options you want to use from the dropdown menu labeled “Data Method.” There are three options:
- Individual Fields: This option lets you input values for specific fields that can be filled in using individual string templates.
- Payload Path: This option takes a path on the current payload that points to an event object and will be validated against the new Event schema.
- JSON Template: This option takes a JSON template string that can be parsed into a JSON object that validates against the Events schema.
The Event: Create Node defaults to using the “Individual Fields” option because it is the most common and easiest to use, but “JSON Template” and “Payload Path” provide more control if needed for advanced solutions.
Event Configuration
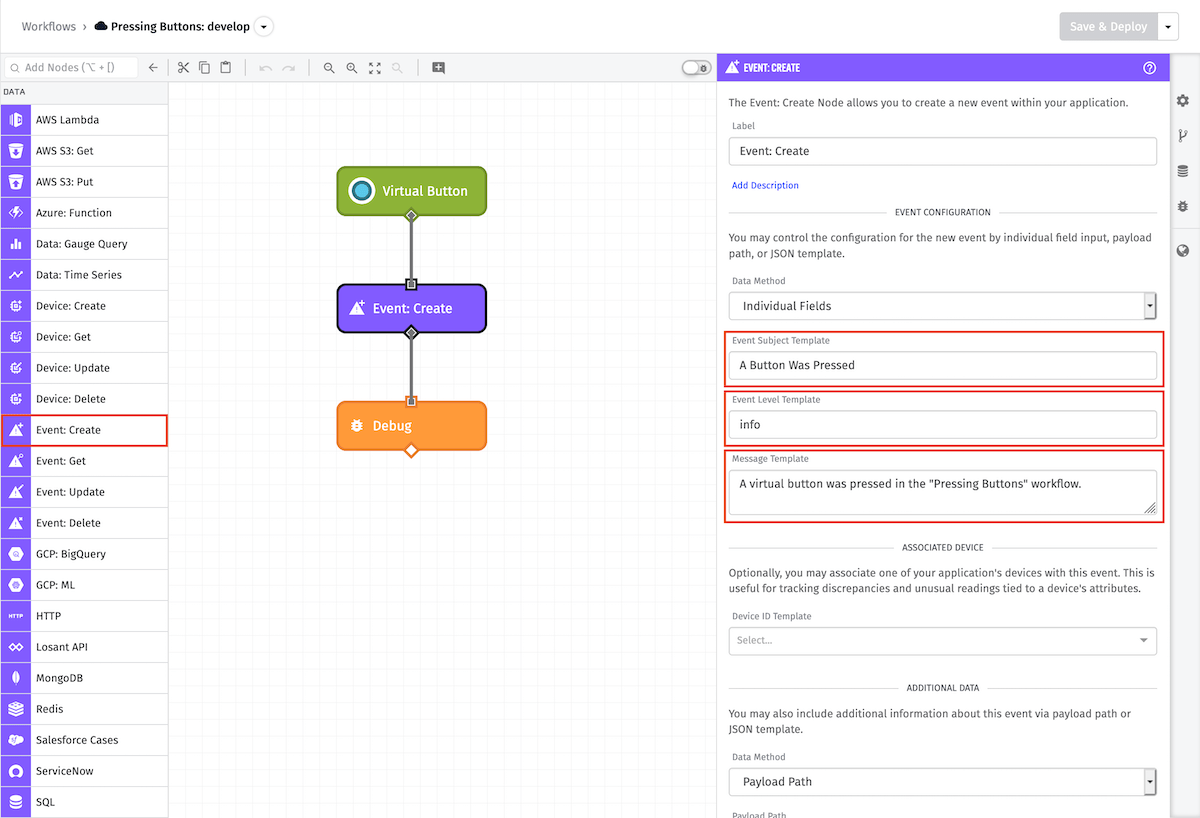
If you choose the “Individual Fields” option to create your event, you’ll start by configuring the event itself. This section includes the following fields:
- Event Subject Template: You’ll need to provide a subject to include with your new event, which must be a valid string template. This field is required.
- Event Level Template: Your new event also requires an event level, which can either be a valid string template or one of
critical,error,warning, orinfo. - Message Template: You may optionally provide a JSON template string message to include as well.
Associated Device
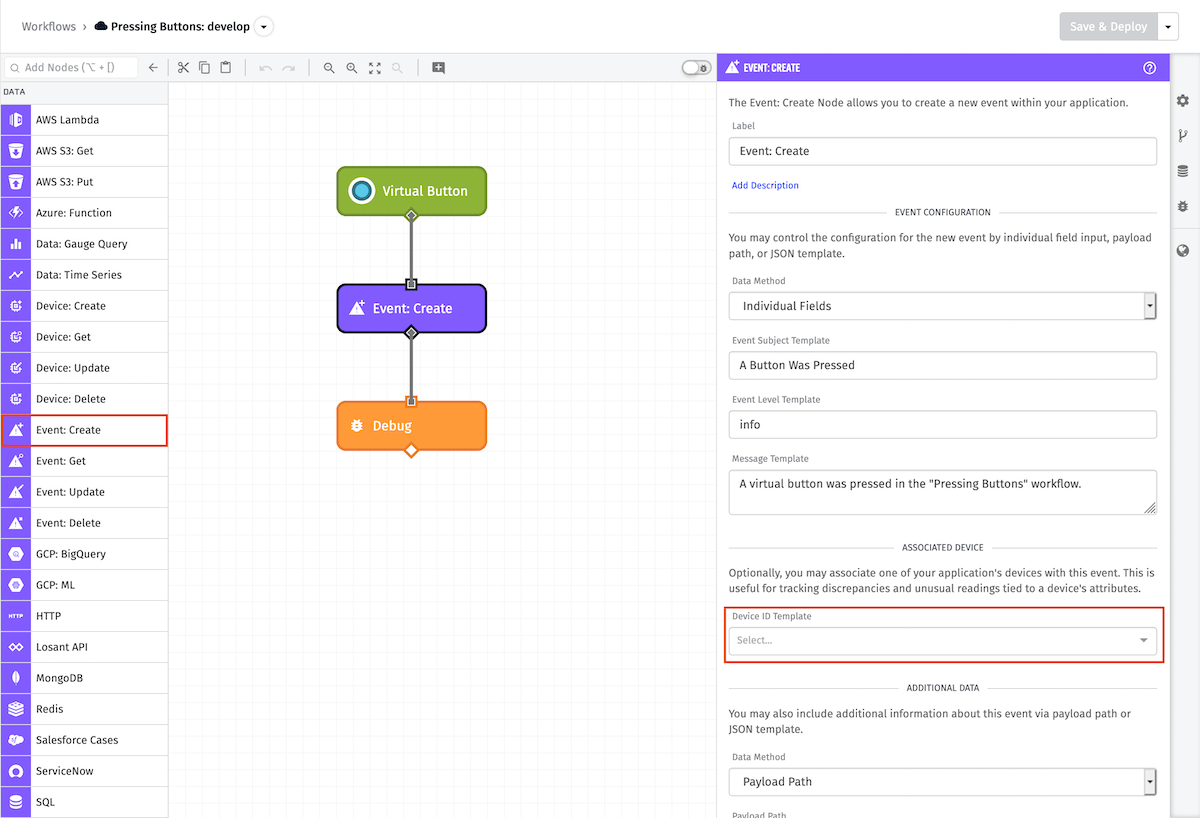
Next, you have the option to add a device to your new event, which can be useful for tracking discrepancies and unusual readings tied to a device’s attributes.
- Device ID Template: Optionally choose which device you’d like to include.
Additional Data
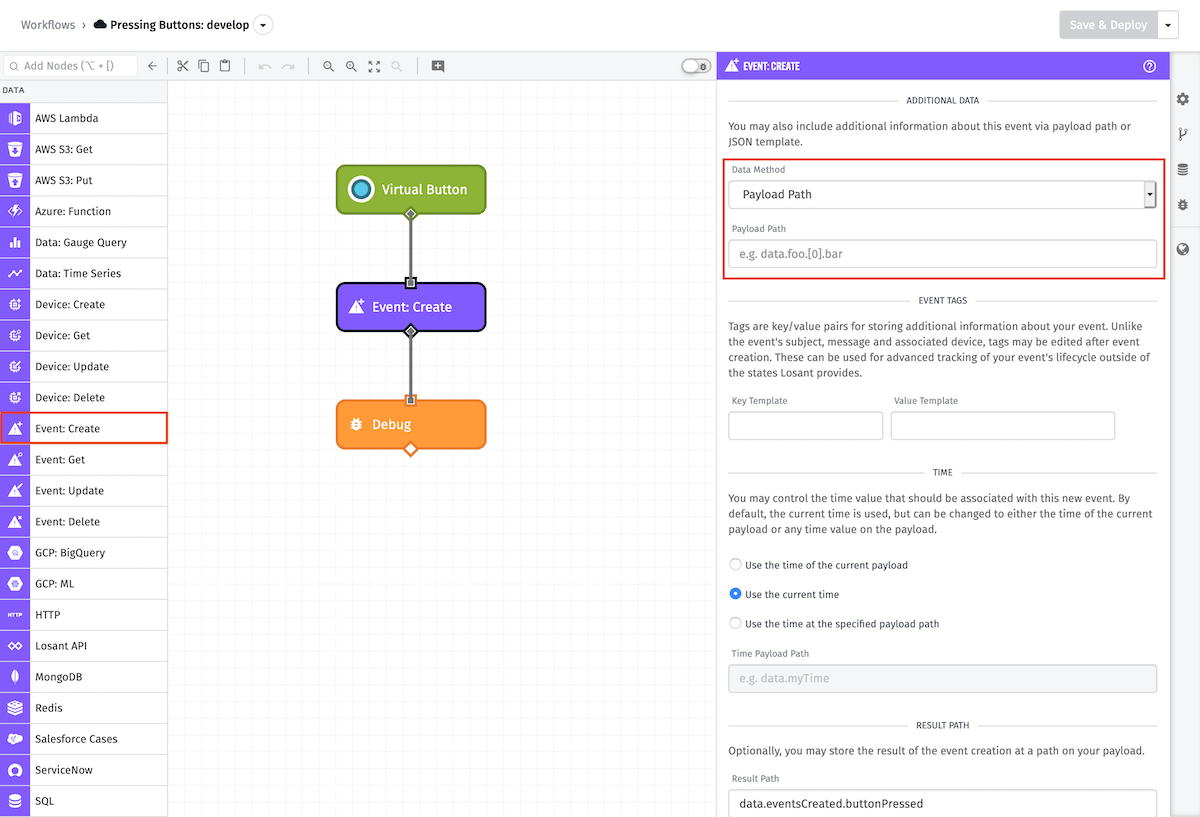
Your new event may also have additional data included with it.
- Data Method: If you wish to provide any additional data with the event, you can choose how you’d like to provide it here.
- Payload Path (only available with the “Payload Path” data method): Allows you to provide a valid payload path that points to an object on the current workflow payload.
- JSON Template (only available with the “JSON Template” data method): Lets you create a valid JSON template string of data to use.
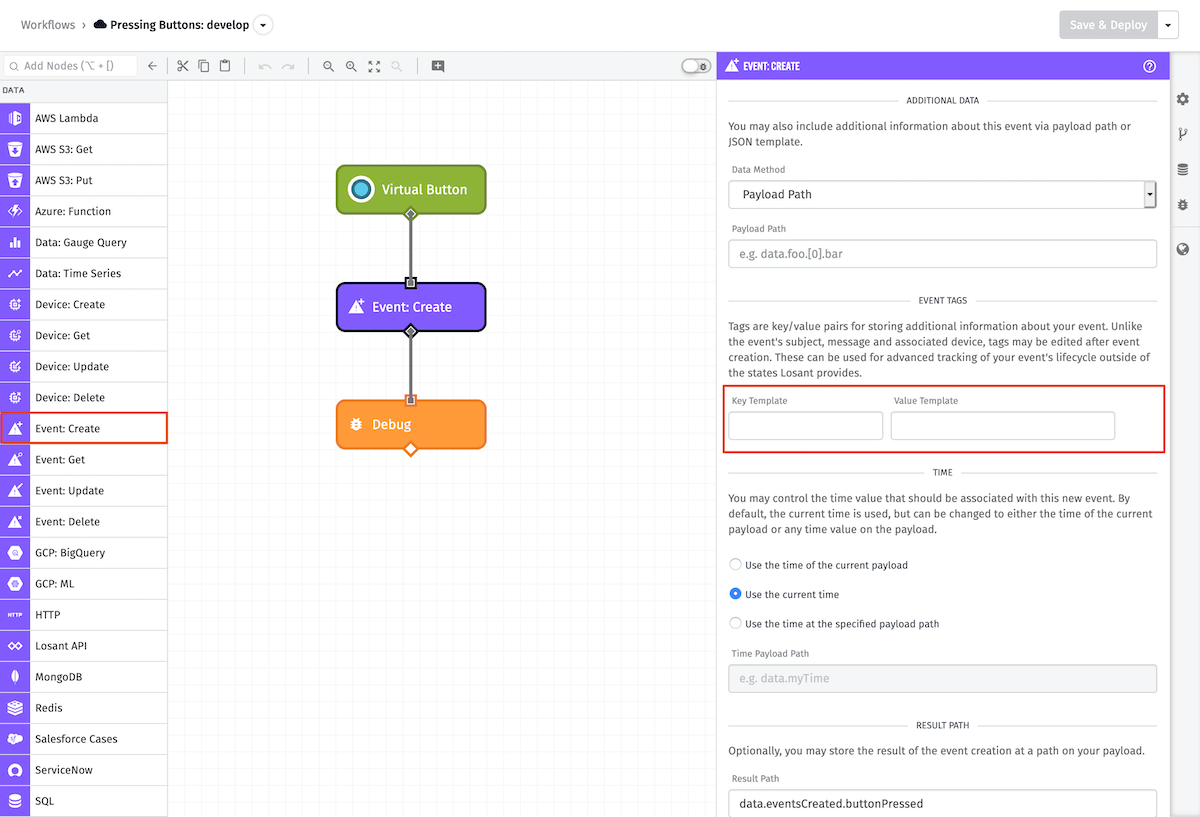
Event Tags
You may also include tags with your new event, which are key/value pairs for storing additional information. Unlike the event’s subject, message and associated device, tags may be edited after event creation. These can be used for advanced tracking of your event’s lifecycle outside of the states Losant provides. Each tag included must have both of the following:
- Key Template: A valid string template to function as the object’s key for the tag.
- Value Template: A valid string template to function as the value of the key provided above.
Time
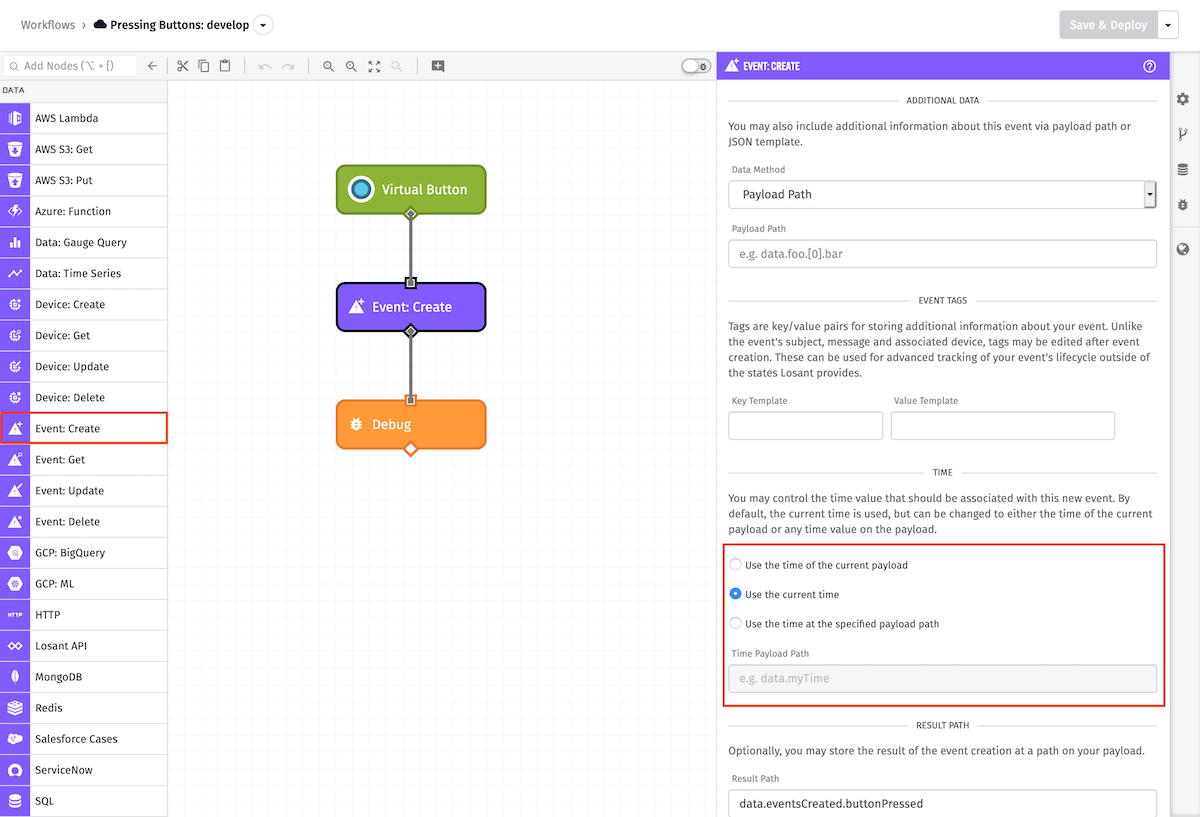
Finally, you can choose what time to associate with your new event. There are three options:
- Use the time of the current payload: Will use the value of the
timekey at the root of the current payload path. - Use the current time: Will use the current time.
- Use the time at the specified payload path: Allows you to specify another location on the payload from which to grab time from.
If you choose “Use the time at the specified payload path”, you’ll also have to include:
- Time Payload Path: Allows you to provide a valid payload path that points to a time on the current workflow payload.
The Event: Create Node will include the current time by default.
Node Example
Given the node configuration in the screenshots above, successful event creation placed on the path data.eventResult will result in the following data:
{
  ...
  "data": {
    "eventResult": {
      "buttonPressed": {
        "sourceName": "Pressing Buttons",
        "state": "new",
        "level": "info",
        "id": "5d30abbb2dd7ce0006db7545",
        "eventId": "5d30abbb2dd7ce0006db7545",
        "updates": [],
        "lastUpdated": "2019-07-18T17:26:19.163Z",
        "applicationId": "5d13b3850d38e30006976071",
        "creationDate": "2019-07-18T17:26:19.160Z",
        "sourceId": "5d2f804e7438c30006e7f4a4",
        "sourceType": "flow",
        "eventTags": {},
        "message": "A virtual button was pressed in the \"Pressing Buttons\" workflow.",
        "subject": "A Button Was Pressed"
      }
    }
  }
}
Node Errors
If we replace one of the event tag keys shown above with the invalid value {{currentDateTime}}, the payload will output the following to designate event creation failure:
{
  ...
  "data": {
    "eventResult": {
      "error": {
        "message": "eventTags has additional properties",
        "type": "Validation"
      }
    }
  }
}
Related Nodes
- Event: Delete Node
- Event: Get Node
- Event: Update Node
- Record Event Node (deprecated)
- Modify Event Node (deprecated)
Was this page helpful?
Still looking for help? You can also search the Losant Forums or submit your question there.
