User Authentication
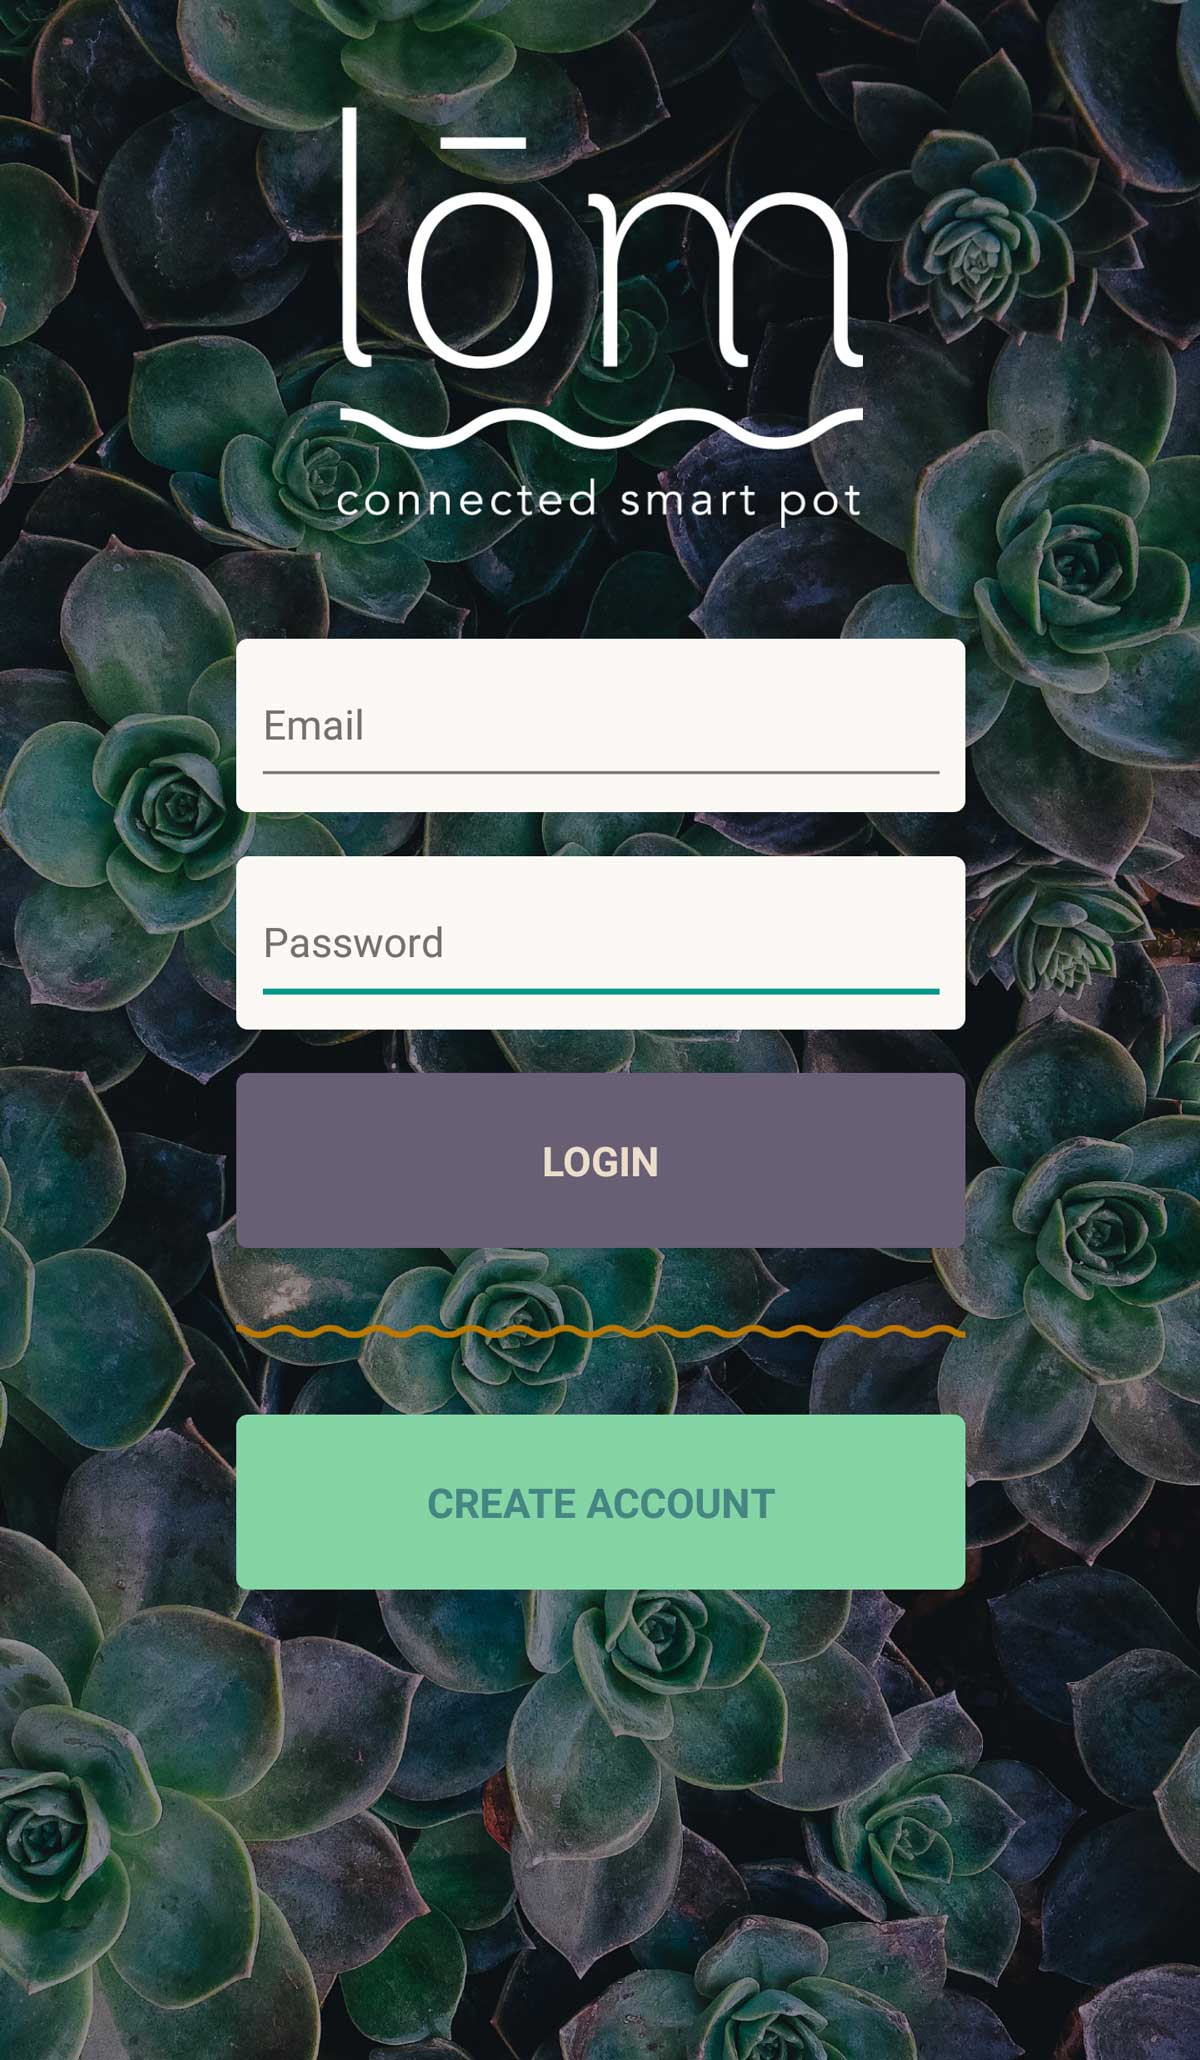
In Part 1 of this guide, we created users for the lōm mobile application. In this part, we'll learn how those users can log in to the app and authenticate against the lōm API.
All authentication against Experience Endpoints is performed using a token. Each token is specific to a user and grants access to any endpoint that you've specified in the endpoint configuration or the user group configuration.
The process of logging in is to check a user's email and password and return a token if they're valid. That token can then be used to request API endpoints on behalf of that user. Losant automatically authorizes a token against endpoints and returns a 401 (Unauthorized) error back to the client if the token doesn't allow access to an endpoint.
Step One: Create an Authentication Endpoint
We need to create an endpoint and a workflow that does this authentication. First, create a /auth endpoint:
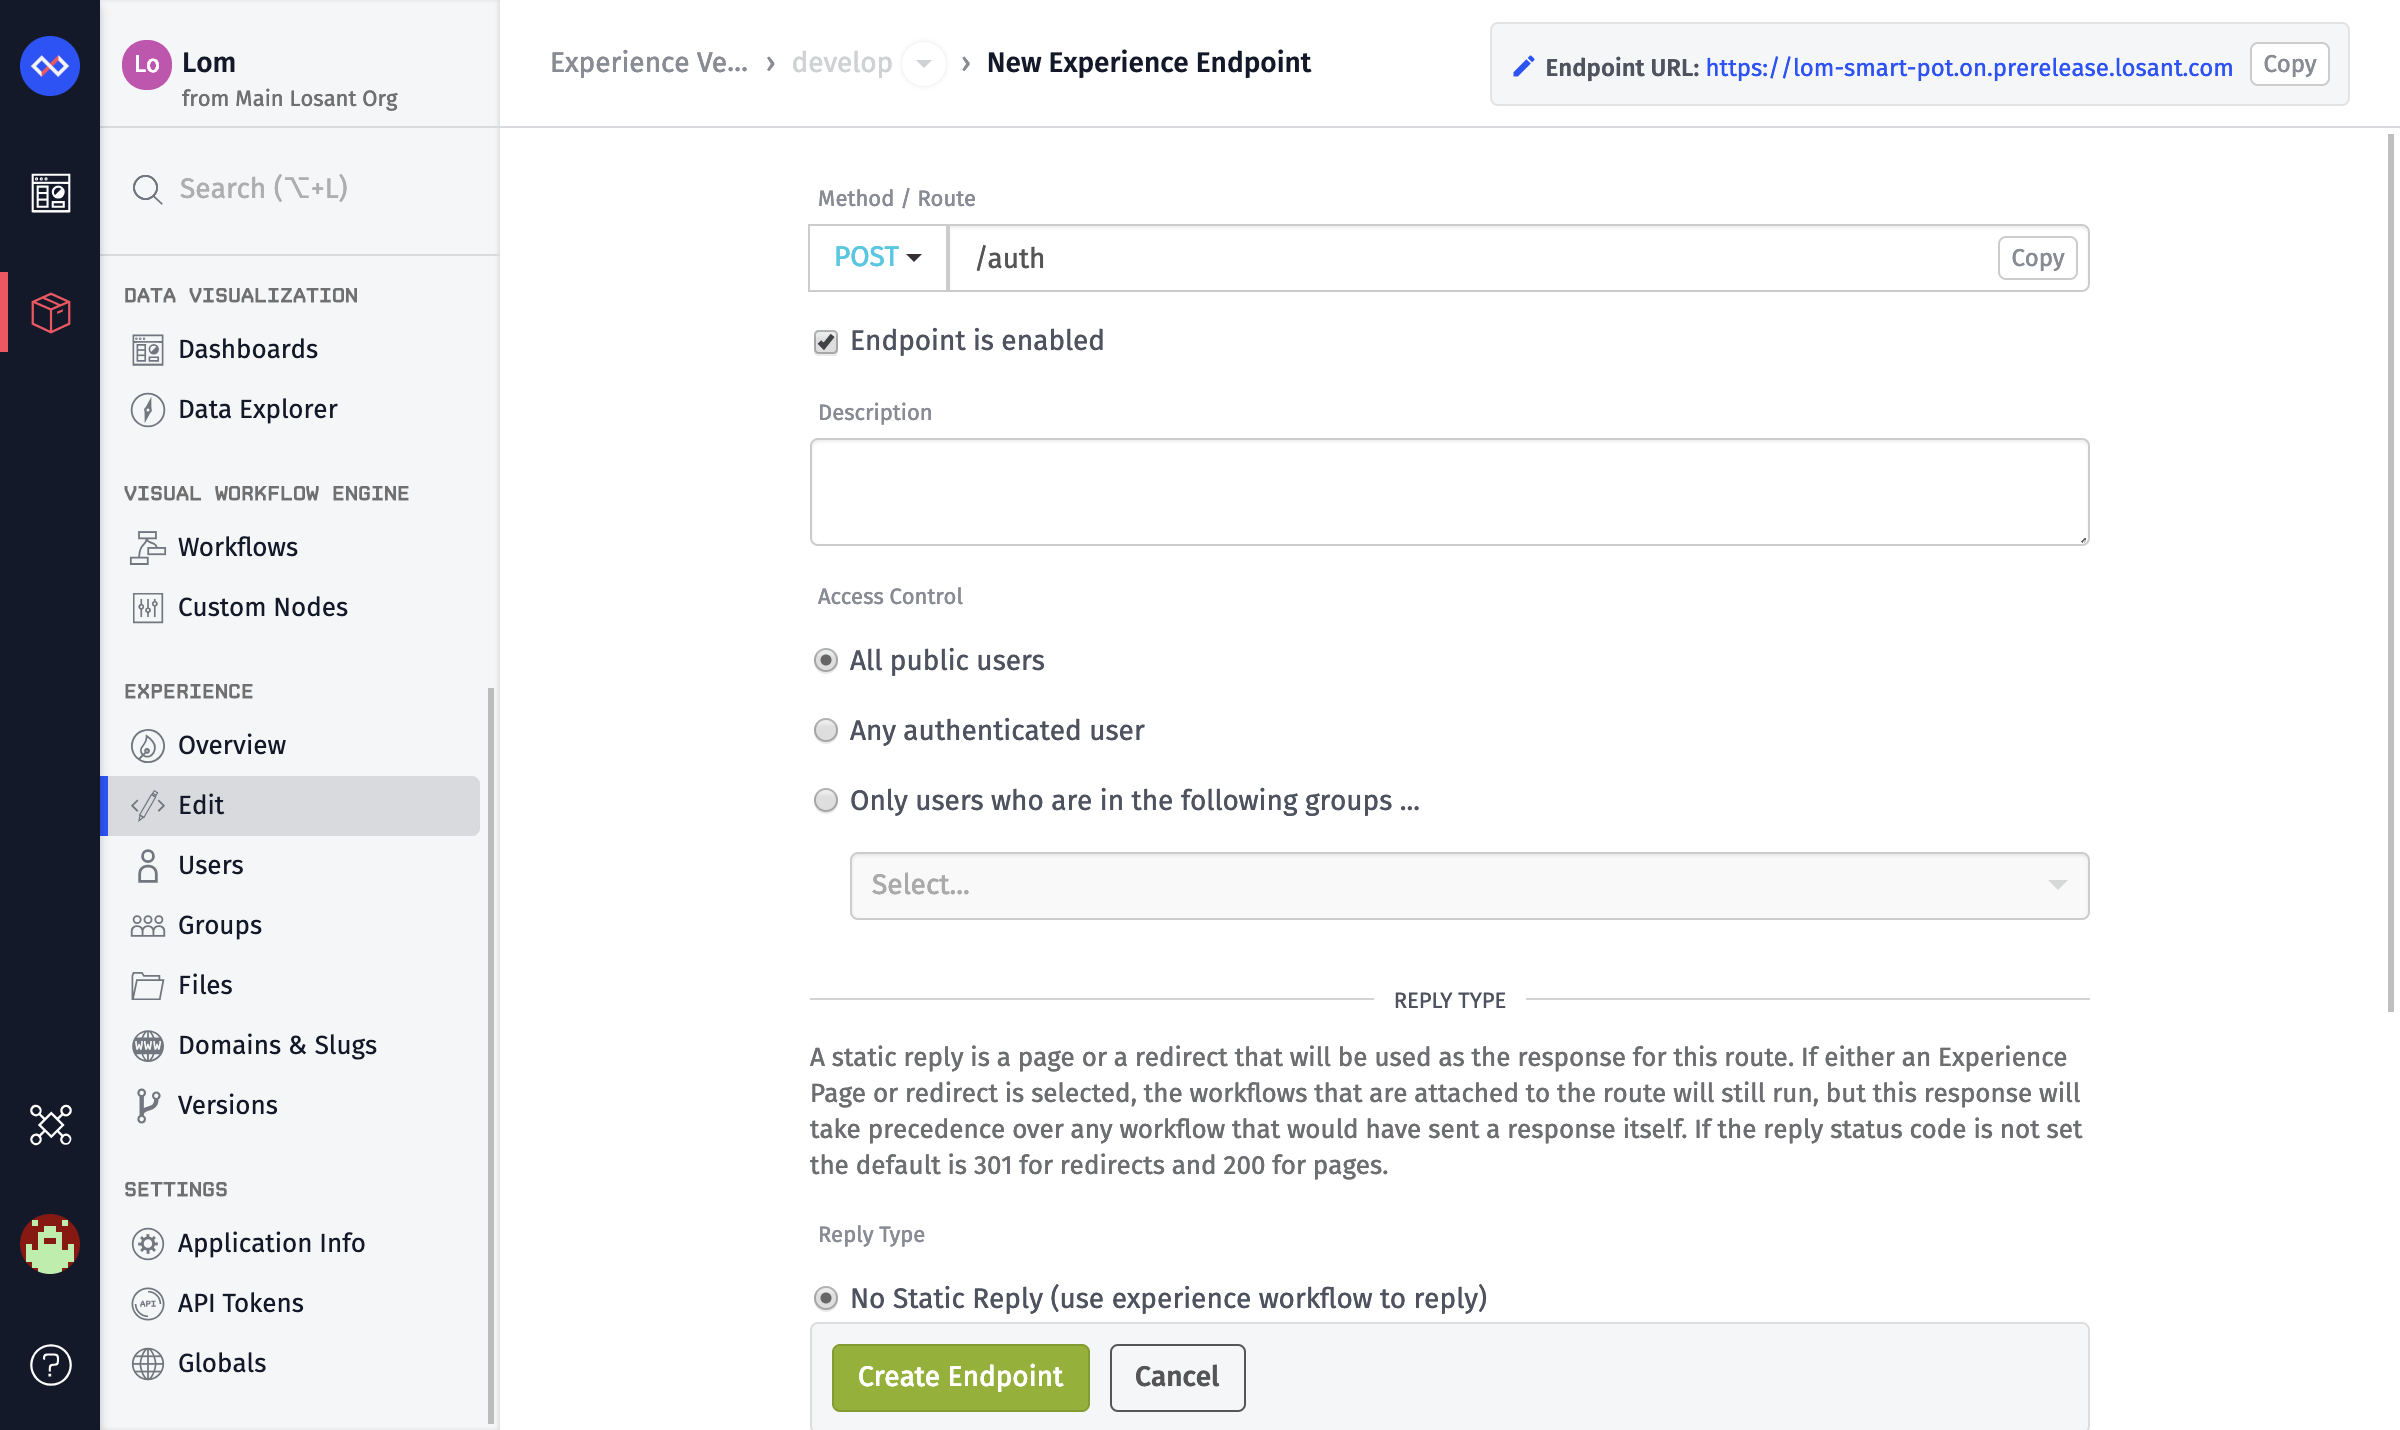
- Set the
MethodtoPOST. - Set the
Routeto/auth. - Add a
Description. - Set the
Access ControltoAll public users.
Step Two: Create an Experience Workflow
Next, create an experience workflow that handles the login requests for that endpoint.
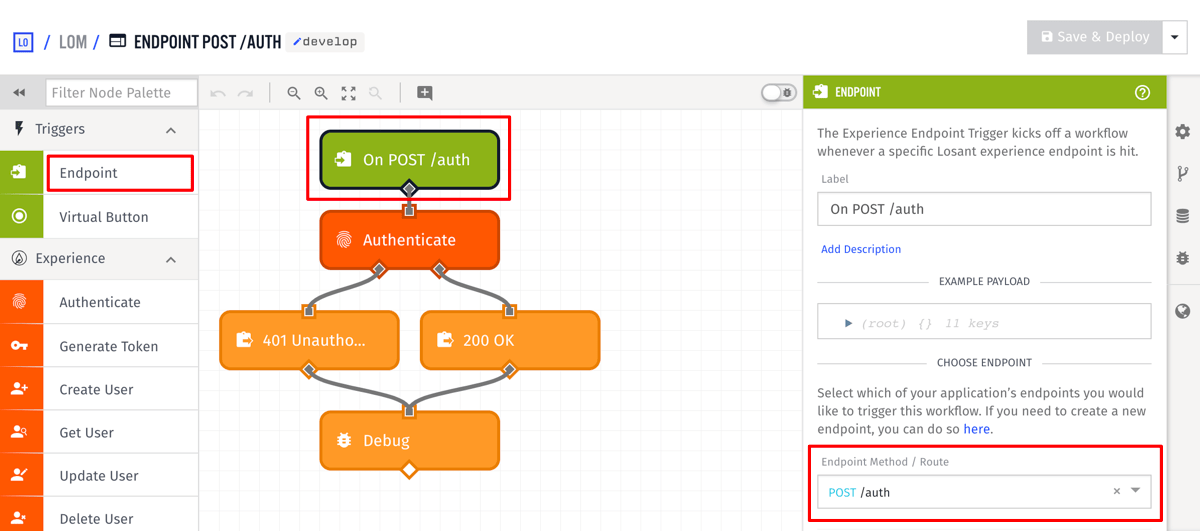
Use an Endpoint trigger and select the /auth endpoint that you created.
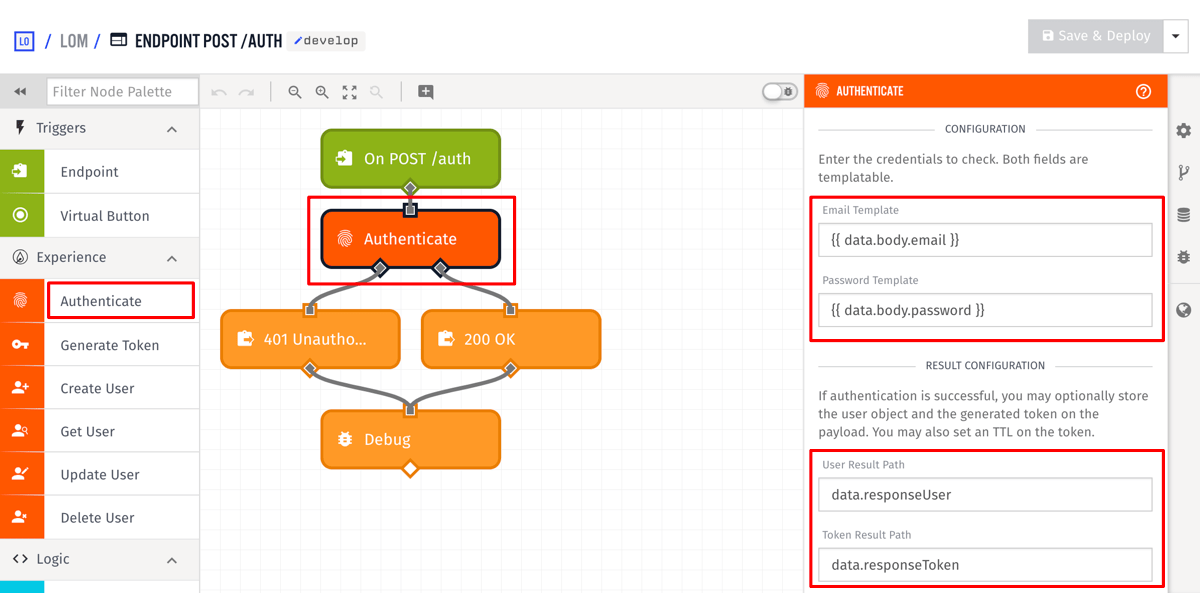
Add an Authenticate node, and configure it as the following:
- Set the
Email Templateto{{ data.body.email }}. - Set the
Password Templateto{{ data.body.password }}. - Set the
User Result Pathtodata.responseUser. - Set the
Token Result Pathtodata.responseToken.
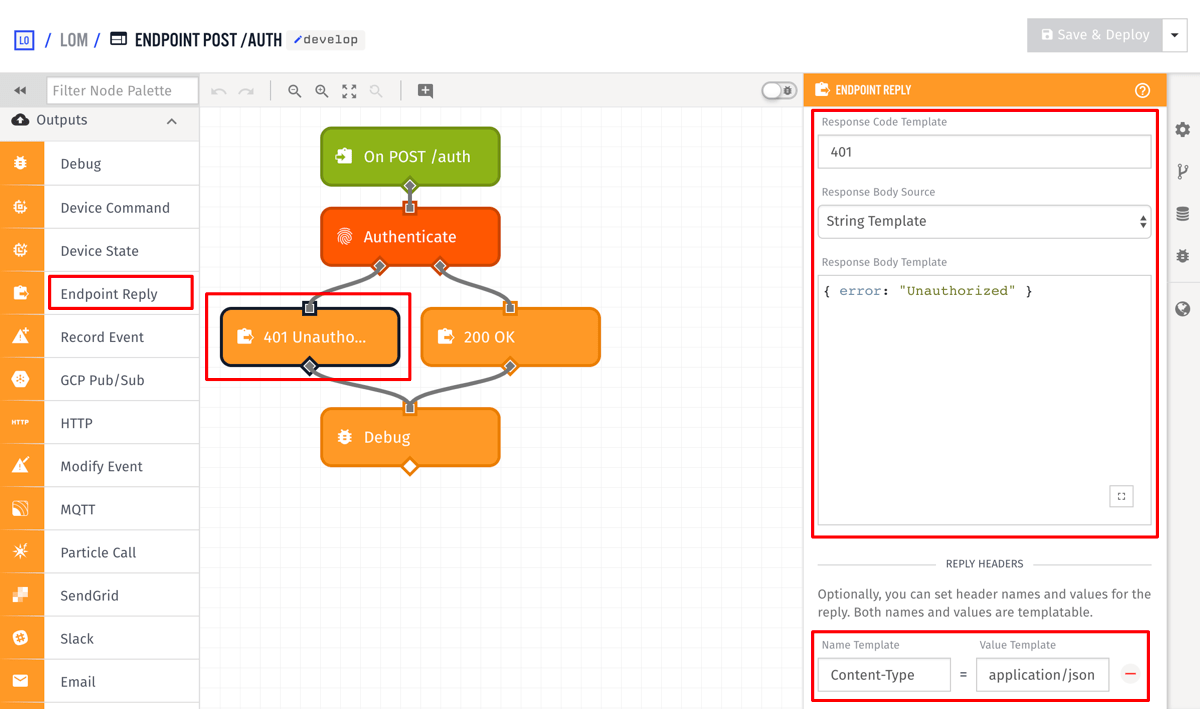
Add an Endpoint Reply node to the false output of the authenticate node and configure it to the following:
- Set the
Response Code Templateto401. - Set the
Response Body Templateto `{ "error": "Unauthorized" }. - Add a
Content-Typeheader with the valueapplication/json.
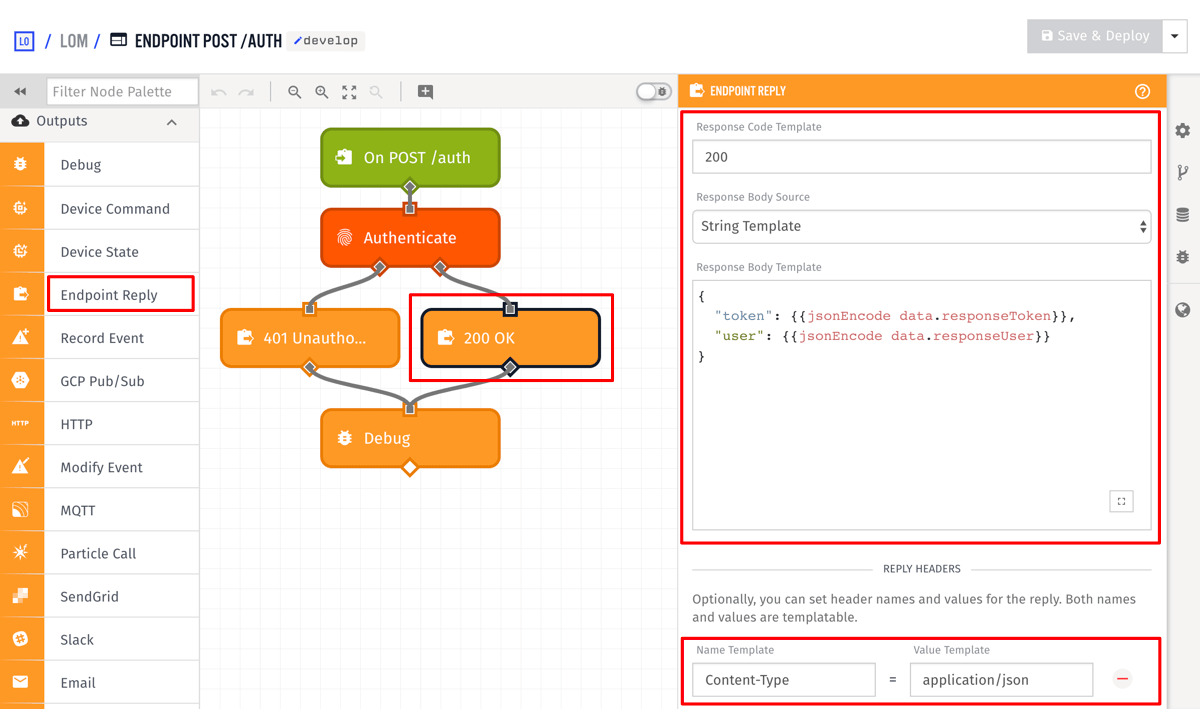
Add an Endpoint Reply node to the true output of the authenticate node and configure it to the following:
- Set the
Response Code Templateto200. - Add a
Content-Typeheader with the valueapplication/json. - Set the
Response Body Templateto:
{
  "token": {{jsonEncode data.responseToken}},
  "user": {{jsonEncode data.responseUser}}
}
The /auth requires the user's email and password to be sent as POST data. It then uses the Authenticate node to check if an Experience User has an identical email and password. If the authentication fails, a 401 (Unauthorized) is returned to the client. If the email and password are valid, the token and the user object, both of which are added to the payload by the Authenticate node, are returned to the client.
You can test this by requesting /auth using one of the Experience Users you created in Part 1.
curl -H "Content-Type: application/json" -X POST \
  -d '{"email":"test@example.com","password":"my-password"}' \
  https://example.onlosant.com/auth
{
  "token": "THE_USER_TOKEN",
  "user": { ... }
}
Now whenever a lōm user enters their email and password on the main screen, the client POSTs them to /auth and obtains a token to make authenticated requests against the API.
Step Three: Returning a Token
Using the /auth route is the most common method users authenticate against your API. For convenience, modify the workflow we created in Part 1 to return a token whenever a user is registered:
- Add a Generate Token node and insert it after the Create User node.
- Set the
ID or Email Templateto{{ data.body.email }}. The Generate Token node works by accepting the ID or email of an existing Experience User and then creating a token for that user. - Set the
Result Pathtodata.newUser.token.
This removes the need to register the user and then make an additional API request to get the user's token.
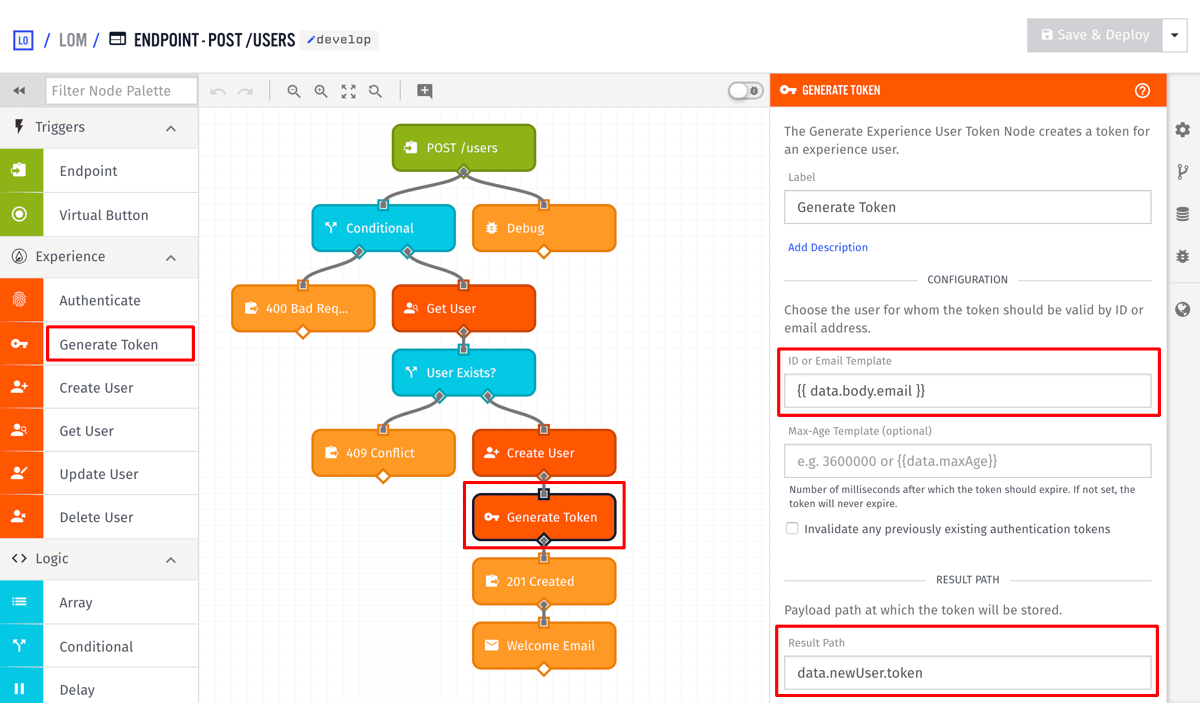
As we saw above, the Authenticate node automatically creates a token, however, you can use the Generate Token node to create a token whenever you want. This provides a way to implement custom authentication mechanisms if needed. With this, in addition to the POST /users endpoint, whenever a new user is registered, the client is returned the new user object and its token as the result.
{
  "email": "test@example.com",
  "firstName": "Jane",
  "lastName": "Smith",
  ...
  "token": "THE_USER_TOKEN"
}
Requesting authenticated routes is performed by providing the token in one of three ways. More details can be found on the endpoint documentation.
At this point, the lōm mobile app has everything it needs to successfully register users and allow those users to log in to the app. This concludes Part 2 of the application Experience walkthrough. Part 3: Device Registration describes how devices can be registered and associated with an Experience User.
Was this page helpful?
Still looking for help? You can also search the Losant Forums or submit your question there.