Managing Organizations
The Losant Instance Manager allows members to view, add, edit, or delete all Losant Organizations that fall under their company's instance. Using this tool, administrators can manage organizations from separate divisions in their company, and/or organizations that they have sold to end users as certified Losant resellers.
Note: Not all Losant users have access to the Instance Manager; if you are an administrator at a large-scale, enterprise company or are a Losant reseller, or you otherwise feel that access to the tool would be beneficial to your company, contact your Losant account manager.
Viewing Organizations
To access the Instance Manager, click the "Instance Manager" icon in the main navigation of the platform interface. This will redirect you to the instance's "Organizations" subnavigation item, which displays a list of all organizations currently under your instance, along with a selection of resources and their current usage vs. the applied limit for each organization.
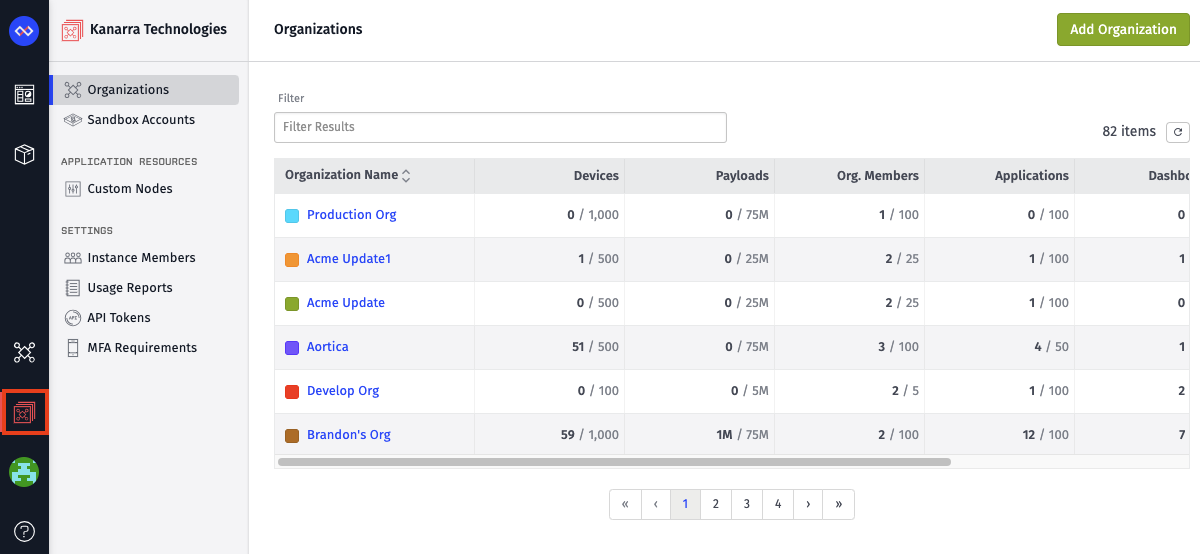
If any resource under the organization is approaching its limit, there will be an orange indicator alongside the organization name; this border changes to red if the organization has a resource at or above its limit.
Adding Organizations
To add a new organization to your instance, click the "Add Organization" button in the top right corner above the table. This will redirect you to a form where you may enter some information about the new organization, the properties of which are covered below.
By default, the organization is created with:
- The instance member who created the organization as its sole member, with Administrator privileges.
- Resource limits equal to the default new organization limits set on the instance.
Prior to handing the new organization over to its end users, you likely will want to:
- Update the resource limits to values specific for the new organization.
- Bootstrap the organization with one or more applications.
- Add members to the organization and remove yourself as an organization member.
Default Resource Limits
Instance administrators can set the default resource limits applied to new organizations by clicking the "Default Limits" link in the instance subnavigation.
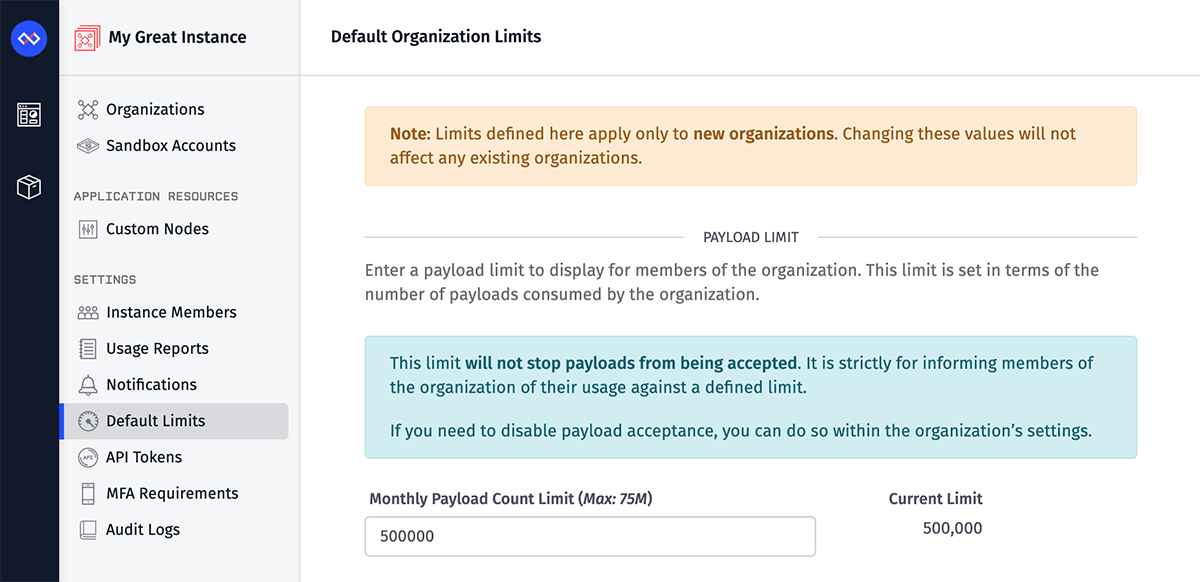
Limits defined here apply to new organizations only; changes to these limits have no effect on existing organizations. To change the limits of an existing organization, visit that organization's "Resources" tab.
Editing Organizations
From your instance's organizations list, select an organization to view and edit its properties, members, or resource limits.
Note: Instance members do not have access to the applications under their organizations; however, instance administrators may edit the organization's membership and add themselves at any time to gain access to the applications.
Properties
There are three properties of an organization that are visible to–and editable by–members of the organization as well as instance administrators:
- Name: (Required) The name of the organization.
- Icon Color: (Required) The color associated with the organization, which is applied to the icon alongside any of its applications' names for easily identifying its source.
- Description: (Optional) A longer description of the organization.
In addition, instance administrators may set a few other properties that affect the behavior of the organization.
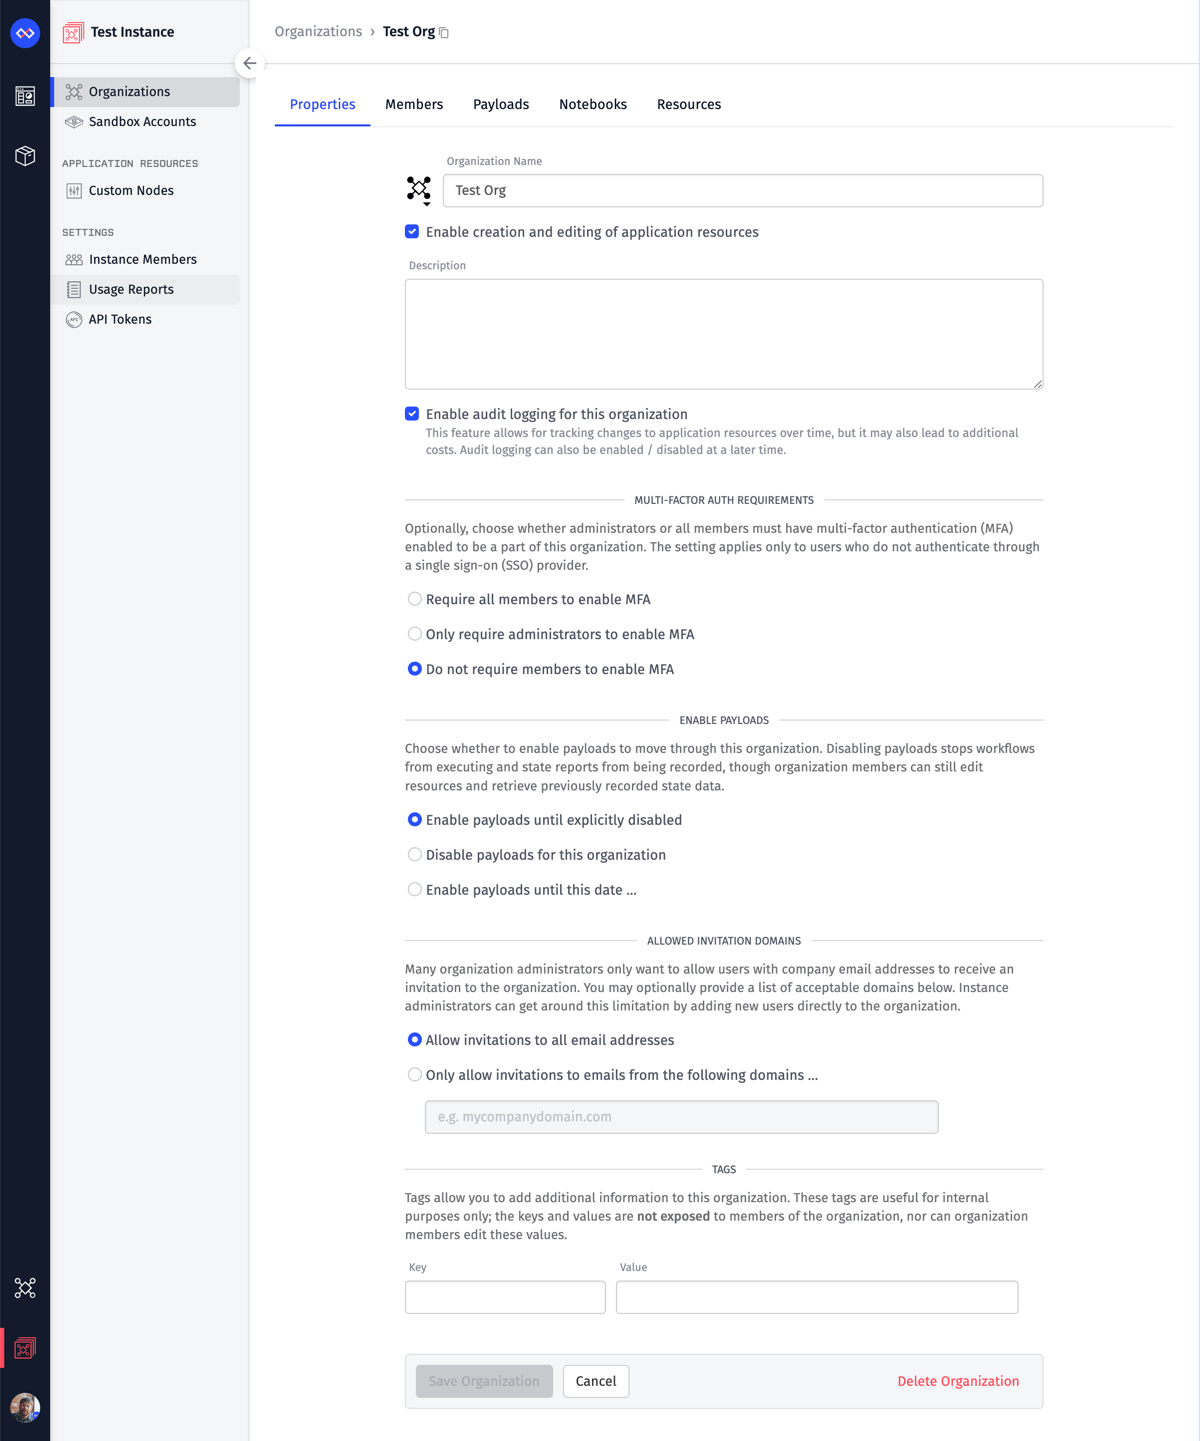
Enable Creation and Editing of Application Resources
As an alternative to entirely disabling payloads, instance administrators may disable this setting to put an organization in a read-only state. Payloads will still be received, and workflows will continue to run, but members of the organization will not be able to make any changes to the organization's applications.
Organizations in read-only mode will receive a notice of this change at the top of the platform interface, along with a note to contact their administrator for more information.
Audit Logs
Choose whether to store audit logs for changes made to the organization's applications and sub-resources. Note: This property will only be editable if audit logs are enabled for the instance as well.
Multi-Factor Authentication Requirements
Choose if an organization should require its members to have multi-factor authentication (MFA) enabled for their account. There are three possible modes:
- Require all members to enable MFA: This option will require any organization member to have MFA enabled on their account. If this mode is selected ...
- Any current members without MFA enabled will be removed.
- Joining the organization without MFA enabled will be prevented.
- Members will no longer be allowed to disable MFA on their account without first leaving the organization.
- Only require administrators to enable MFA: This option will require any organization administrator to have MFA enabled on their account. If this mode is selected ...
- Any current administrators without MFA enabled will be downgraded to the editor role.
- Upgrading a current member without MFA enabled to the administrator role will be prevented.
- Joining the organization without MFA enabled as an administrator will be prevented.
- Administrators will no longer be allowed to disable MFA on their account without first leaving the organization or downgrading their permissions in the organization.
- Do not require members to enable MFA: This is the default, where users are allowed to be organization members whether or not they have MFA enabled on their account.
If a user authenticates using an SSO provider, Losant will treat that user as if they have MFA enabled for the purposes of the above modes.
You can view which members have MFA enabled on the Members tab. In addition, when changing the MFA requirements for an organization, the changes to the current membership will be previewed on the page. Note: Relaxing the MFA requirements for an organization will not re-add members who were previously removed or downgraded due to the stricter requirements. Any members will have to be manually re-invited.
Enable Payloads
Instance administrators have the ability to disallow payloads—such as device state reports, custom MQTT topic publishes and subscriptions, workflow timer triggers, and other payload types—from moving through the organization's applications.
There are three options available for this setting:
- Enable payloads until explicitly disabled: (Default) Payloads flow through the organization's applications without any condition.
- Disable payloads for this organization: When selected, this immediately stops payloads from being accepted by the platform.
- Enable payloads until this date …: When selected, you must also choose a date in the future after which payloads will no longer be accepted. This is useful, for example, if you wish to provide a 90-day trial organization as a Losant reseller.
Organizations whose payloads have been disabled will receive a notice of this change at the top of the platform interface, along with a note to contact their administrator for more information.
Note: Disallowing payloads does not prevent organization members from creating and editing existing resources, nor does it cause any loss of data or removal of application configuration. Organization members may also still access any data that has been recorded prior to payloads being disabled using the Losant API, dashboards, data exports, or application archiving.
Notification Banner
Optionally, instance administrators may add a banner to the top of the interface for all organization members. When displaying a custom banner, you must provide the following properties ...
- Banner Level: One of "Info", "Warning", or "Critical". This property changes the color of the banner and the icon displayed alongside the message.
- Banner Message: A message to display to all organization members. This property supports limited Markdown - inline elements such as text links and decorators.
If a banner is applied to the organization, it will display for all members as they use the Losant interface and cannot be dismissed. The banner will not display for Experience Users or public dashboard viewers.
Note: Some Losant banners will supersede a banner applied to an organization - such as scheduled maintenance windows and service outage reports.
Allowed Invitation Domains
Optionally, you may provide one or more domains that email addresses for new user invitations must be associated with. This limitation usually comes at the request of the organization itself. By default, invitations may be sent to email addresses associated with any domain. The limitation does not apply to users added to the organization through the Instance Manager.
Tags
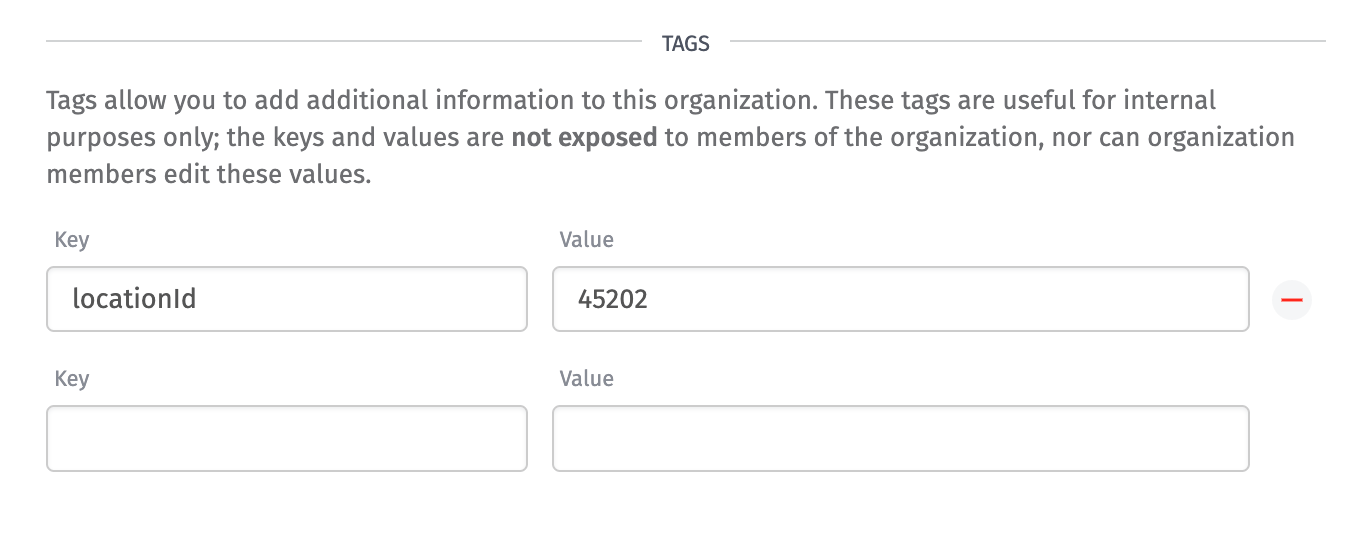
Just like for other platform resources, tags are a great way to track additional metadata associated with an organization. Examples include geographic information, sales information, or external IDs. Organization tags are only exposed to instance members. Organization members will not able to view, create, or edit their own tags.
Organization Membership
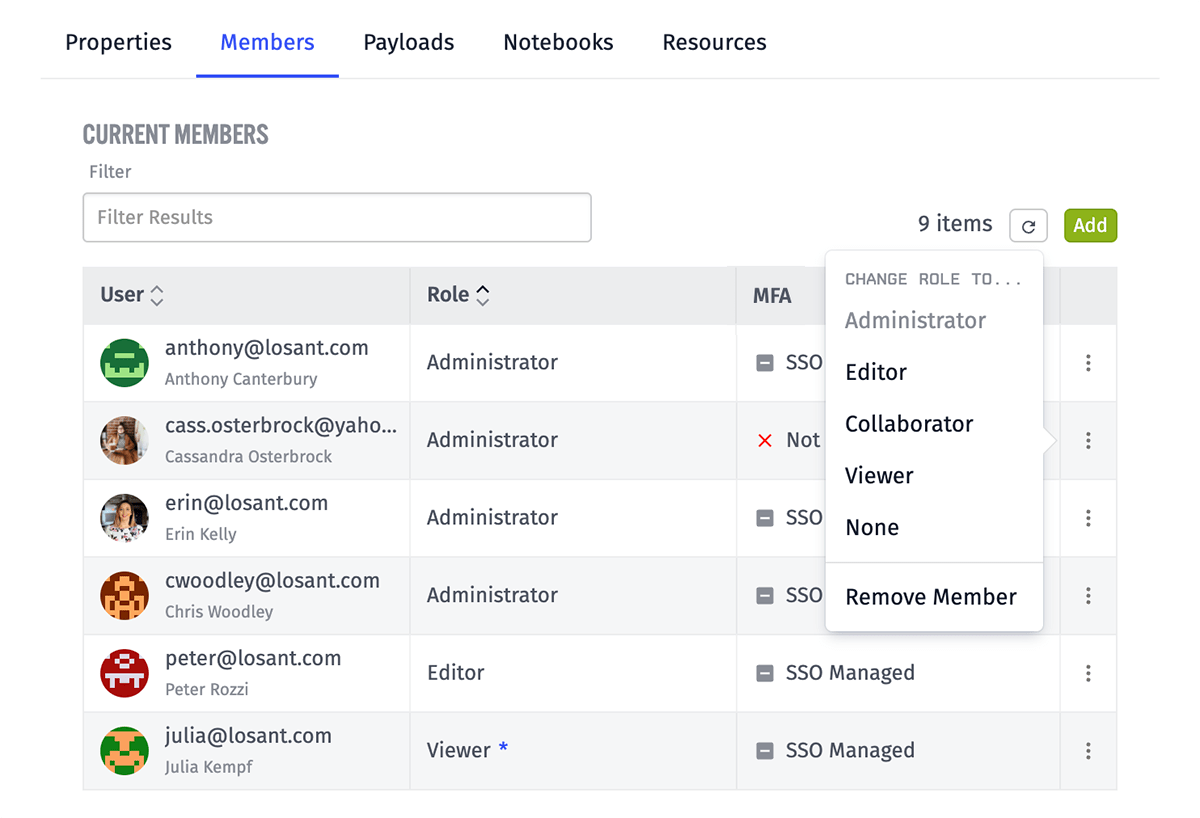
Instance administrators may also view and edit the membership, as well as pending invitations, of the organization. Click the "Members" tab under your selected organization to do so.
Adding Members
To add a member, click the "Add" button atop the list of organization members. This will display a modal where you may enter the email address and role for the new member.
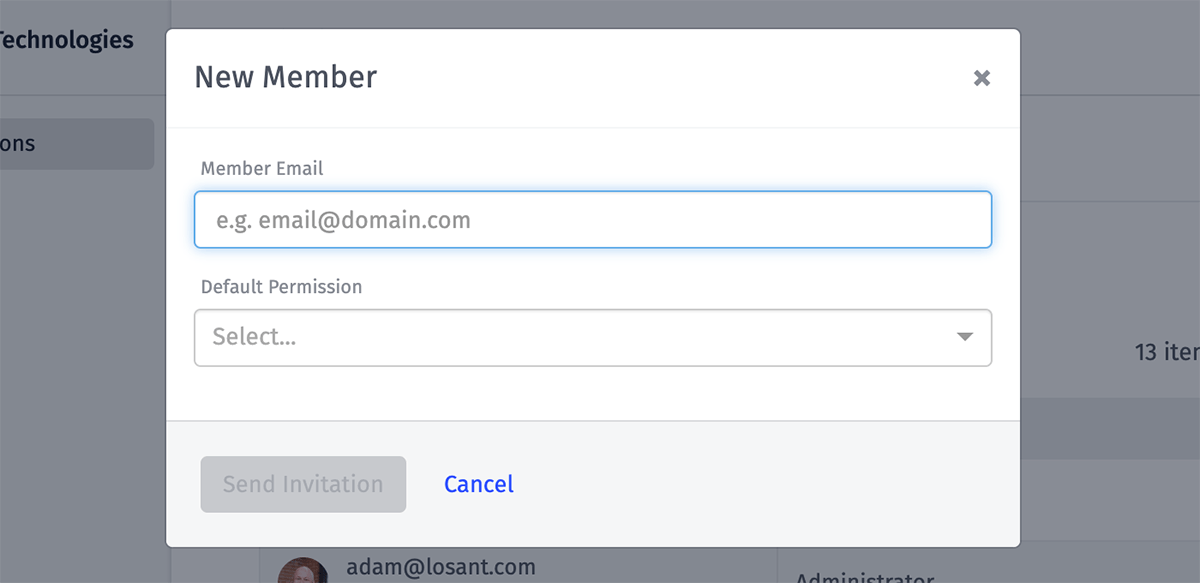
There are a few considerations when adding a new organization member:
- Instance administrators may bypass the organization's allowed invitation domains when adding organization members; in other words, they may add users with email addresses from any domain regardless of the organization's settings.
- If the new member's email address is associated with an existing Losant account, that user will be immediately added to the organization. If not, the user will receive an invitation to create an account and then join the organization, which the user may reject.
- Instance administrators can not set granular permissions for new or existing organization members.
Changing Roles and Removing Members
To change an organization member's role, or to remove the member from the organization, open the dropdown menu in the user's row of the member's table and choose the action you wish to perform. There are two considerations when taking these actions:
- As noted above, instance administrators may not edit an organization member's granular permissions. Changing the user's role will only affect their default role.
- An organization must always have at least one administrator; therefore, you may not downgrade the role of, nor remove, an organization administrator unless there is at least one additional administrator in the organization.
Renewing and Revoking Invitations
Instance administrators may also renew or revoke any invitation to join the organization, whether that invitation was created by an instance administrator or an organization administrator. To do so, open the dropdown menu in the invitation's row and select the action you wish to perform.

Viewing Usage
Instance members can also view detailed organization usage information, including payload and notebook minute consumption. The "Payloads" and "Notebooks" tabs are similar to the organization usage screens, except the per-application breakdown is not available to instance members.
Resource Limits
Instance administrators also have the ability to limit the number of resources the organization may consume. Select the "Resources" tab to view the current usage and limit applied to each resource.
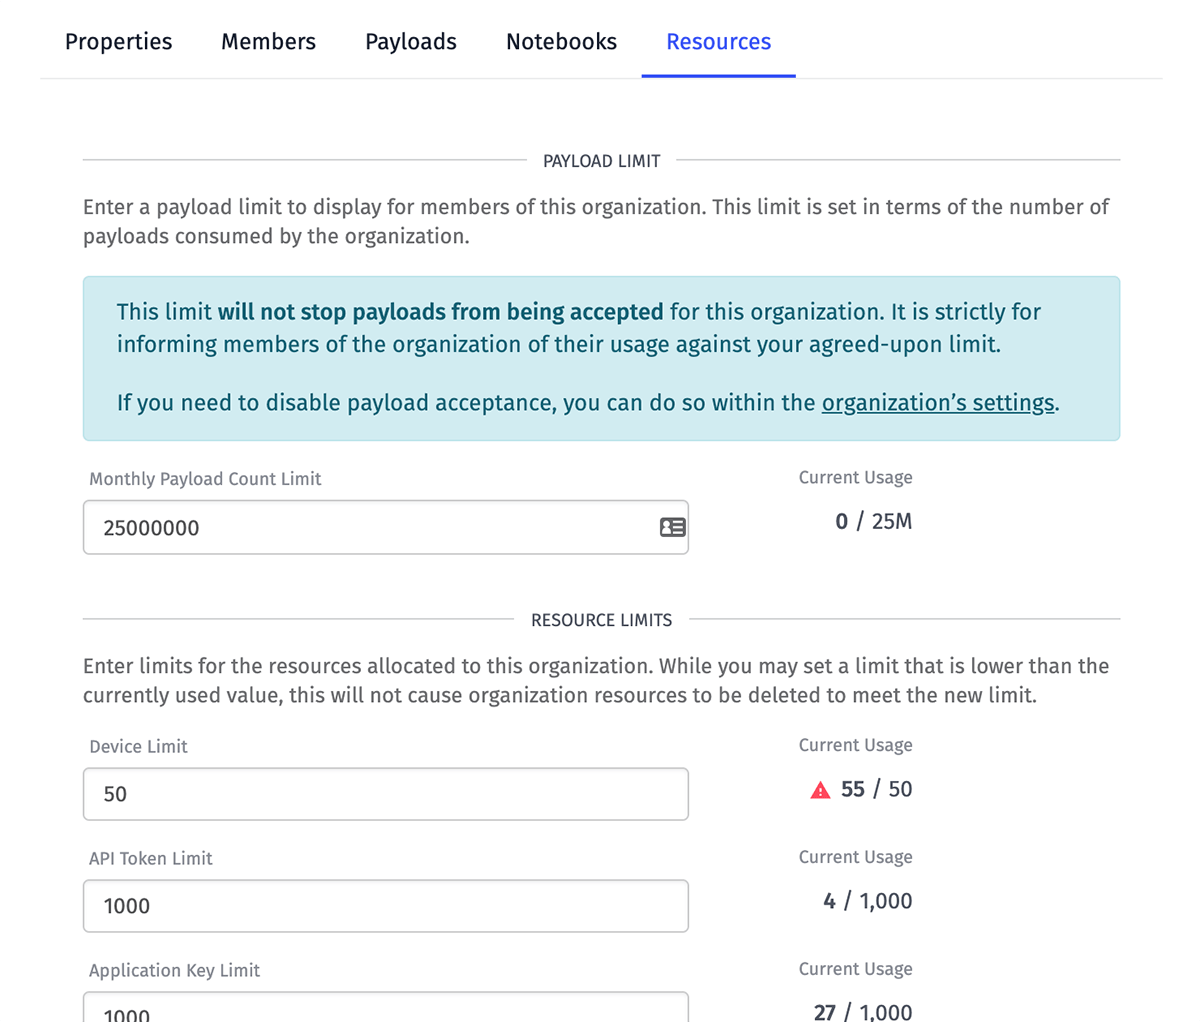
The maximum limit that may be set for a given resource in any organization is equal to the limit applied to the instance itself for the same resource; in other words, it is possible to allocate more devices, payloads, experience users, etc., to all your organizations collectively than are allowed for the instance itself.
Instance Limit Enforcement
Instance resource limits are not strictly enforced. Consider the following scenario ...
- An instance is allocated 1,000 devices per their Losant contract.
- The instance manages five organizations, and allocates 500 devices to each organization.
- Each organization only uses 200 of their 500 devices, for a total of 1,000 devices utilized by the instance (matching the instance limit).
- If one of those organizations attempts to add another device–bringing their total to 201 of their allocated 500 devices–that would put the instance at 1,001 devices, or one over its contractual limit.
- Blocking that organization, or any organization, from creating devices because of the instance limit would lead to a poor experience for the organization members; for all they know, they still have 300 devices available.
Therefore, while Losant does not enforce the instance's limits to avoid this negative experience for the organizations beneath it, using more than your instance's allowed resources may lead to additional charges or may require changes to your company's licensing agreement. Contact your Losant account manager for more information.
Payload Limit
The monthly payload limit is stated in number of billable payloads moving through the Losant platform. Organizations that are approaching (or have exceeded) their monthly payload limit will receive a notice at the top of the platform interface indicating that to organization members. This notice is not visible to experience users or public dashboard consumers.
An organization's payload limit is not strictly enforced. This is because disabling payload acceptance due to overusage can lead to unexpected loss of data and a negative user experience for organization members and the end users of the organization's applications. As the manager of the instance, you may negotiate metered overage pricing or higher payload limits with the organizations under your control.
Note: The current usage for monthly payloads updates approximately every 15 minutes, whereas other resource limits are always up to date on visit to the Resources tab.
Resources
As an instance administrator, you also have control over an organization's limits for each resource type. Every resource limit applied to an organization is visible here, along with its current usage. If a resource is at or is exceeding its limit, the value will be called out with a warning icon in the interface.
If an organization is at or above a resource limit, the organization members cannot create any additional resources of that type until they have either deleted some of those resources to free up spots for new items, or the limit has been increased.
Note: Lowering a resource limit to a number beneath its current usage does not delete resources; rather, doing so simply prevents organization members from creating any more of the resource.
There are a few special case resource limits that appear in this tab:
- Data Table Storage Limit (Bytes): Data table storage is measured not in number of rows, but in bytes stored across all data tables. Organizations that hit this limit will not be able to add new rows to their data tables, regardless of row size.
- Data TTL (Seconds): This limit affects the data retention period for the organization. Lowering this limit does not immediately remove data that falls outside of the TTL after the change, though it will remove that data within 24 hours.
- Notebook Minutes Per Month Limit: Notebook executions may be queued at any time, but if the organization has already used its monthly limit of notebook execution minutes, the execution will fail.
- Notebook Minutes Run Limit: This is the per-execution time limit applied to notebooks. Any notebook that takes longer to execute than the time stated in this limit will time out. Changing this limit does not affect any notebook execution already in progress.
- Notebook Running In Parallel Limit: This is the number of notebooks that may be running at any given time within the organization. If a notebook execution is requested while the organization is already running this number of notebooks, the execution will fail and an error will appear in the execution log.
Viewing Detailed Usage
Instance members can view an organization's detailed payload and notebook minute usage under the "Payloads" and "Notebooks" tabs. Data can be broken down by day or by hour when selecting a particular day. Statistics are available for the current billing cycle (in most cases the current month) as well as the previous two billing cycles.
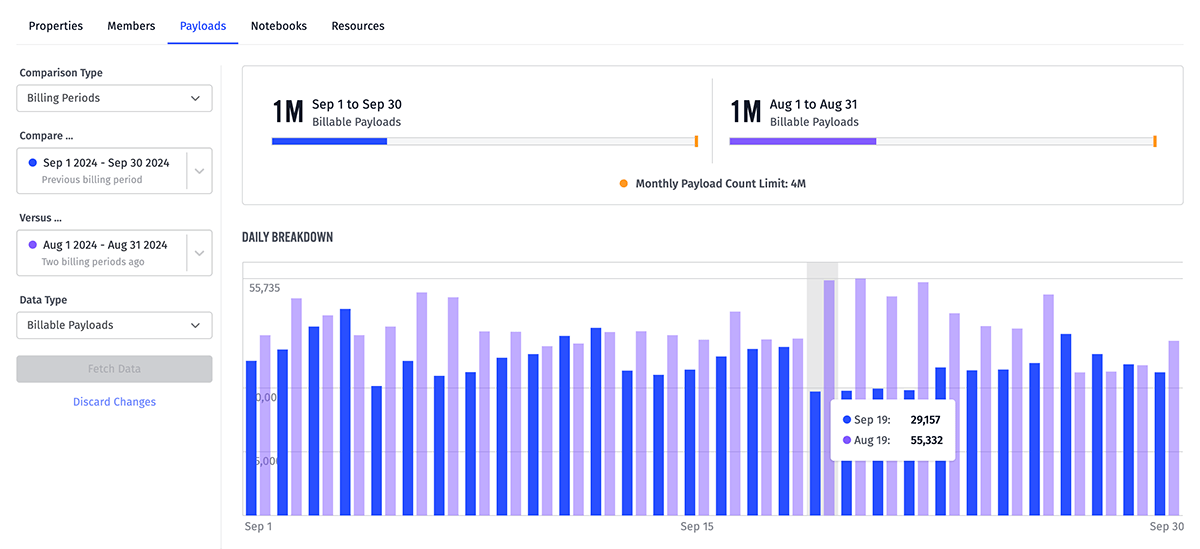
Payload data can be filtered to display only billable payload counts (as compared to the organization's payload limit); all payload counts; or payload throughput in bytes.
The interface is similar to the usage statistics provided to organization administrators; however, since instance members do not have direct access to an organization's application data, the per-application usage breakdown is not available.
Deleting Organizations
To delete an organization, visit the "Properties" tab of the organization you would like to delete and look for the "Delete Organization" button at the bottom of the screen. This action cannot be undone. Deleting the organization will also delete any applications, dashboards, or other sub-resources created within it. It will not, however, delete the Losant accounts of any members in the organization.
Was this page helpful?
Still looking for help? You can also search the Losant Forums or submit your question there.