Forgot Password
In this tutorial, you'll build a flow that allows an experience user to reset his/her password. You'll follow a standard reset password flow from on the web:
- The user requests to reset their password by providing his/her email address.
- Soon after, the user receives an email with a generated link to reset the password.
- After clicking the provided link, the user supplies his/her email address again along with a new password.
- If the email matches the token in the provided link, the user's password is changed to the new one he/she provided.

Step One: Create the Endpoints
You'll add four endpoints, all of which will be encountered by a user going through the password reset flow:
GET /forgot-password
This endpoint is responsible for handling requests to view the "Forgot Password" page. Here you will render a form for collecting the user's email address. From the "New Endpoint" page:
- Leave the
Methodset asGET. - Set the
Routeto/forgot-password. - Change the
Access ControltoAll public users. - Save the route.
- Return to the "Endpoints" list.
- Click "Add" to add the next route.
POST /forgot-password
This endpoint is responsible for handling the "Forgot Password" form submissions. From the "New Endpoint" page:
- Set the
MethodtoPOST. - Set the
Routeto/forgot-password. - Change the
Access ControltoAll public users. - Save the route.
Once complete, create the next endpoint.
GET /reset-password
This endpoint is responsible for handling requests to view the "Reset Password" page, which is where an experience user lands after clicking the reset link in his/her email. From the "New Endpoint" page:
- Leave the
Methodset asGET. - Set the
Routeto/reset-password. - Change the
Access ControltoAll public users.
POST /reset-password
The final endpoint is responsible for handling submissions of the form on the "Reset Password" page, which collects the user's email address and a new password. This is the last step before the password is reset:
- Set the
MethodtoPOST. - Set the
Routeto/reset-password. - Change the
Access ControltoAll public users. - Save the route.
- Return to the endpoints list page and click "Add" to add the next route.
Step Two: Create the Views
Now that all the endpoints have been created, it is time to create your new views. You'll create two new pages: one for requesting a password reset, and one for fulfilling the password reset request.
Page: Forgot Password
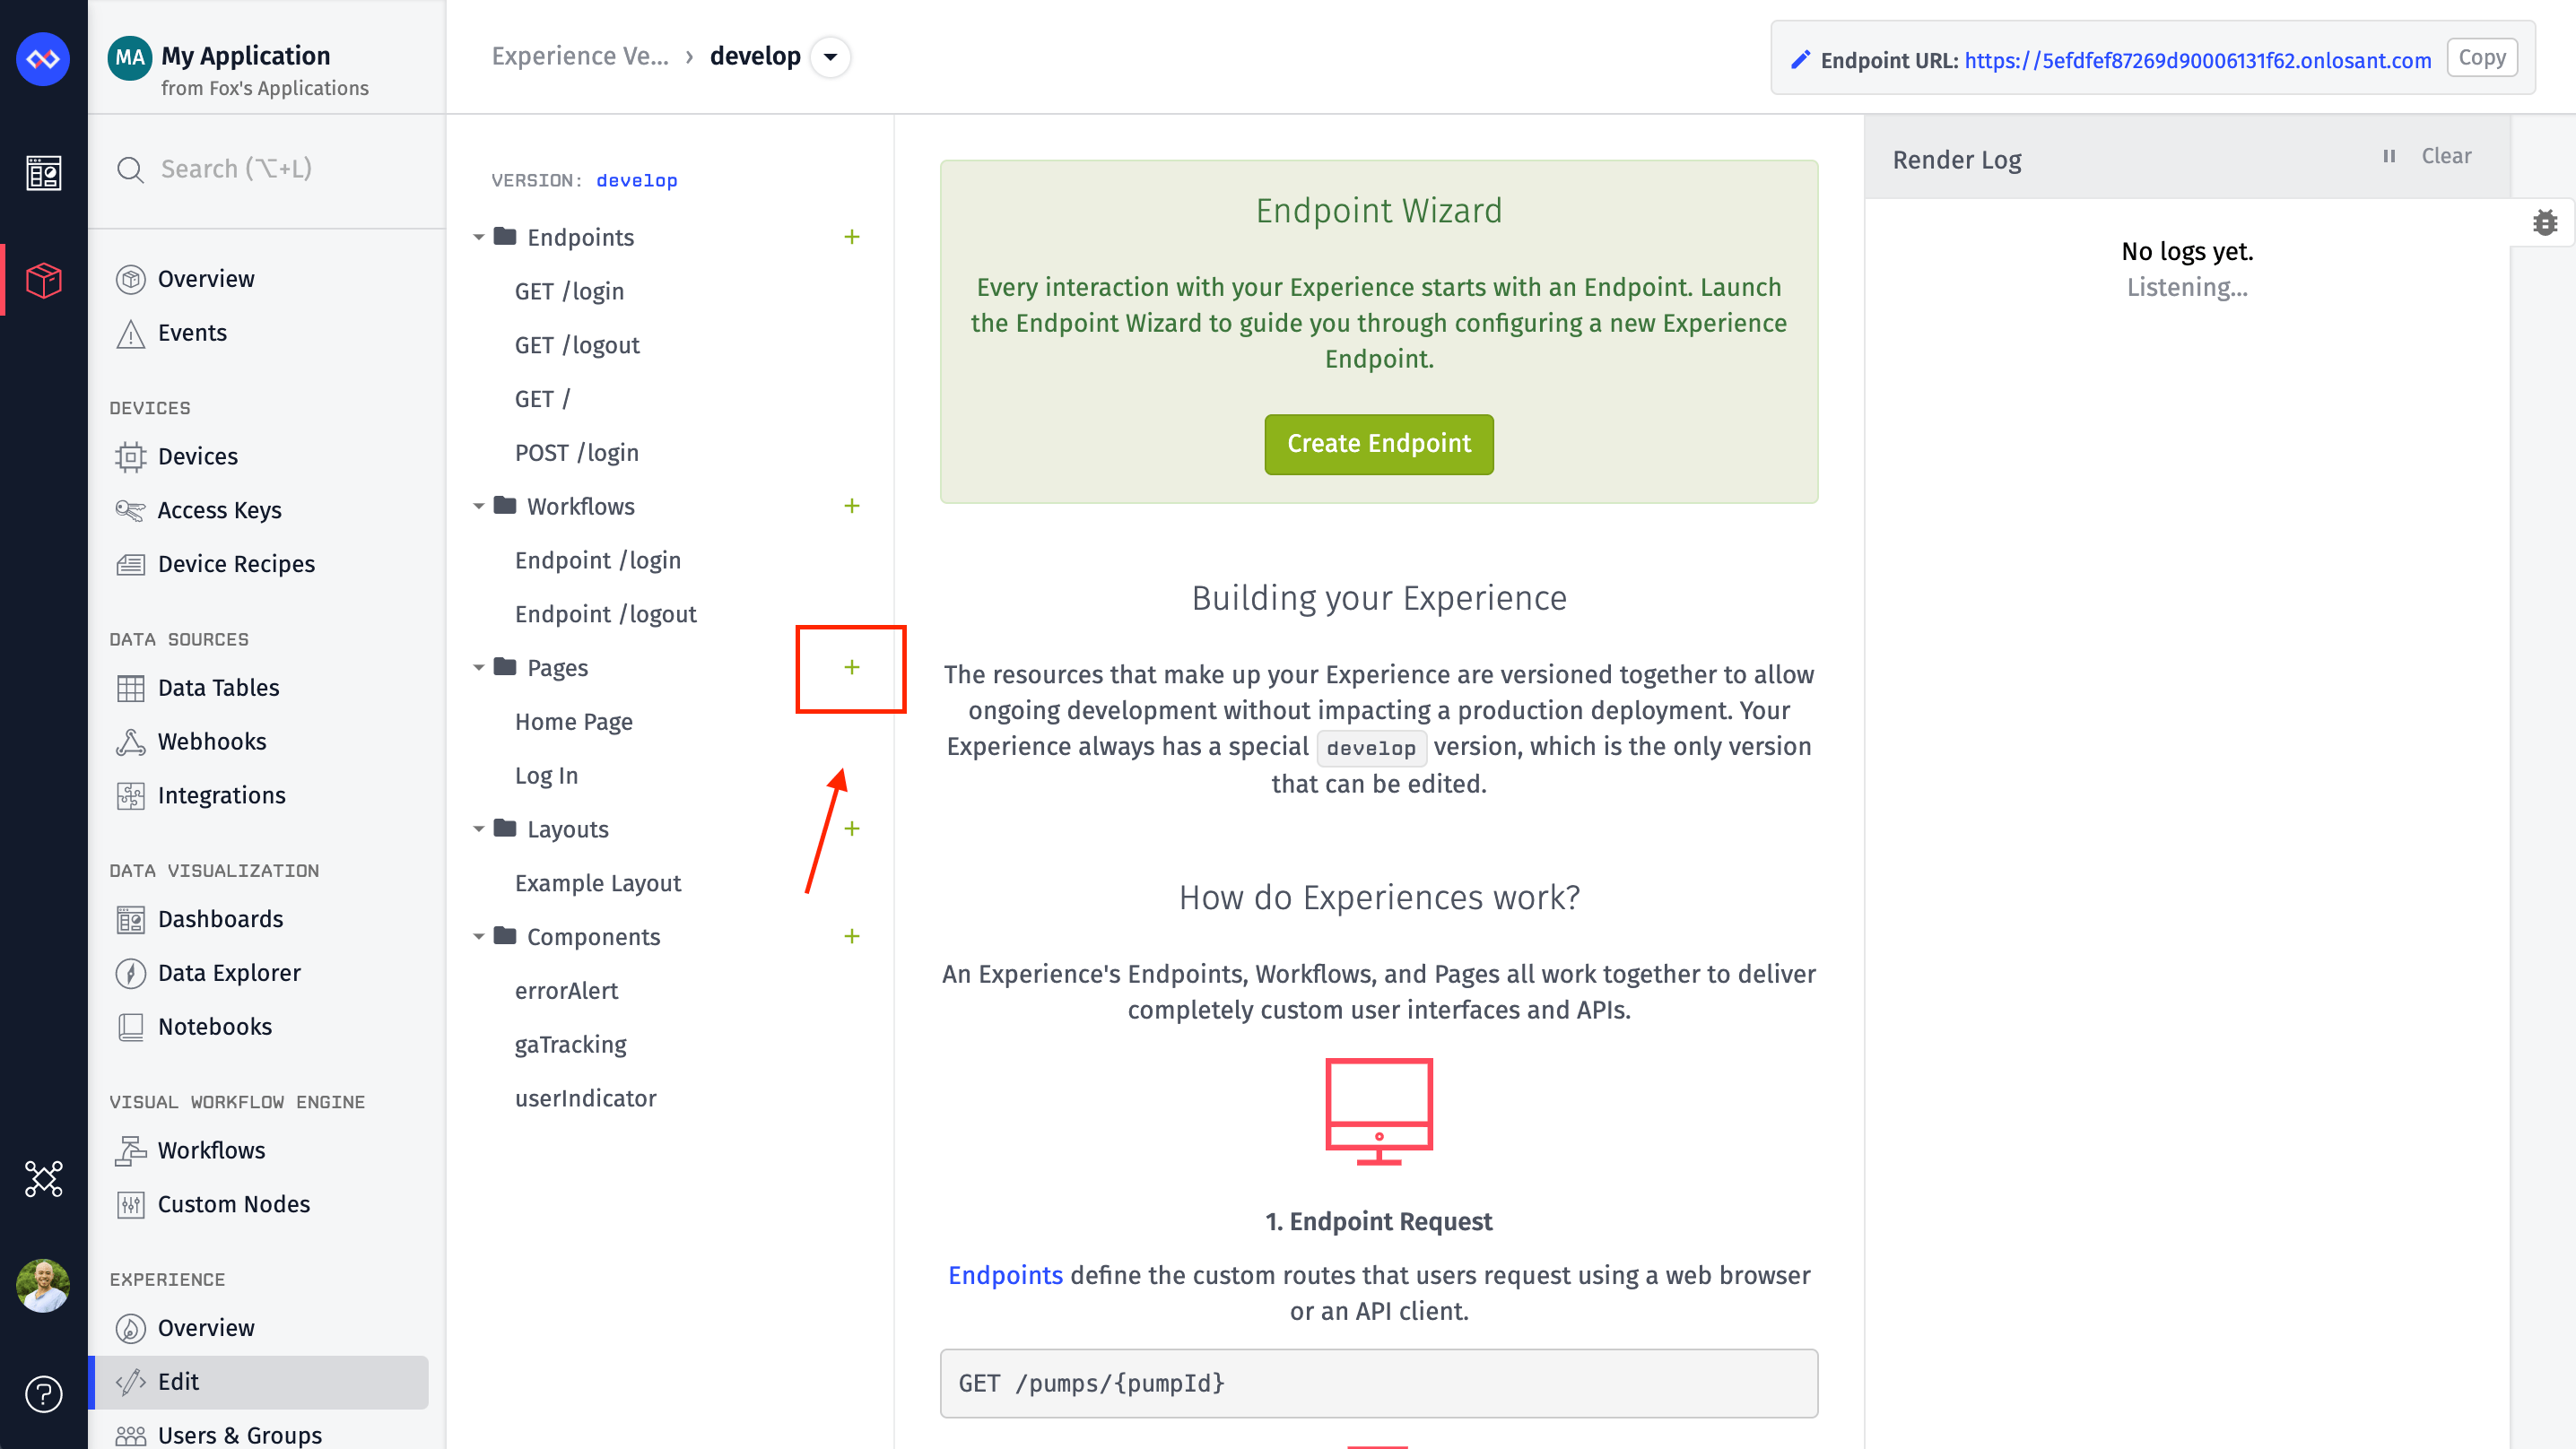
First you'll create a new page to render when the /forgot-password endpoint is requested. From here, users can enter their account email address and request a password change:
- Click "Views" in the left column to return to your Experience Views list.
- Click the "Add" button in the "Pages" list.
Namethe pageForgot Password.- Add a description. This field is optional and does not affect the page as it is presented to your experience users.
- Select your previously created layout for the page's
Layout. - Click "Create Page". This will redirect you to a screen where you can edit the new page's content.
- Copy this snippet and paste it for the page's
Content. - Once the page is ready, click "Create Page" to save your work.
Page: Reset Password
Next, add a page for where the actual password reset takes place. This is the page users will see after clicking the password reset link in their email. In it, you ask them to confirm their email address and enter a new password.
Namethis new pageReset Password.- Select the same
Layoutas for your other pages. - Click "Create Page". This will redirect you to a screen where you can edit the new page's content.
- Copy this code to serve as the page's
Content.
Step Three: Set a JWT Secret
The backbone of the password reset flow is a JSON Web Token that you send to the user via email. To encode this token on creation, and to decode it when you ensure the user is who they say they are as they are resetting their password, you need to sign the token with a secret, which must be shared between your /forgot-password and /reset-password endpoints.
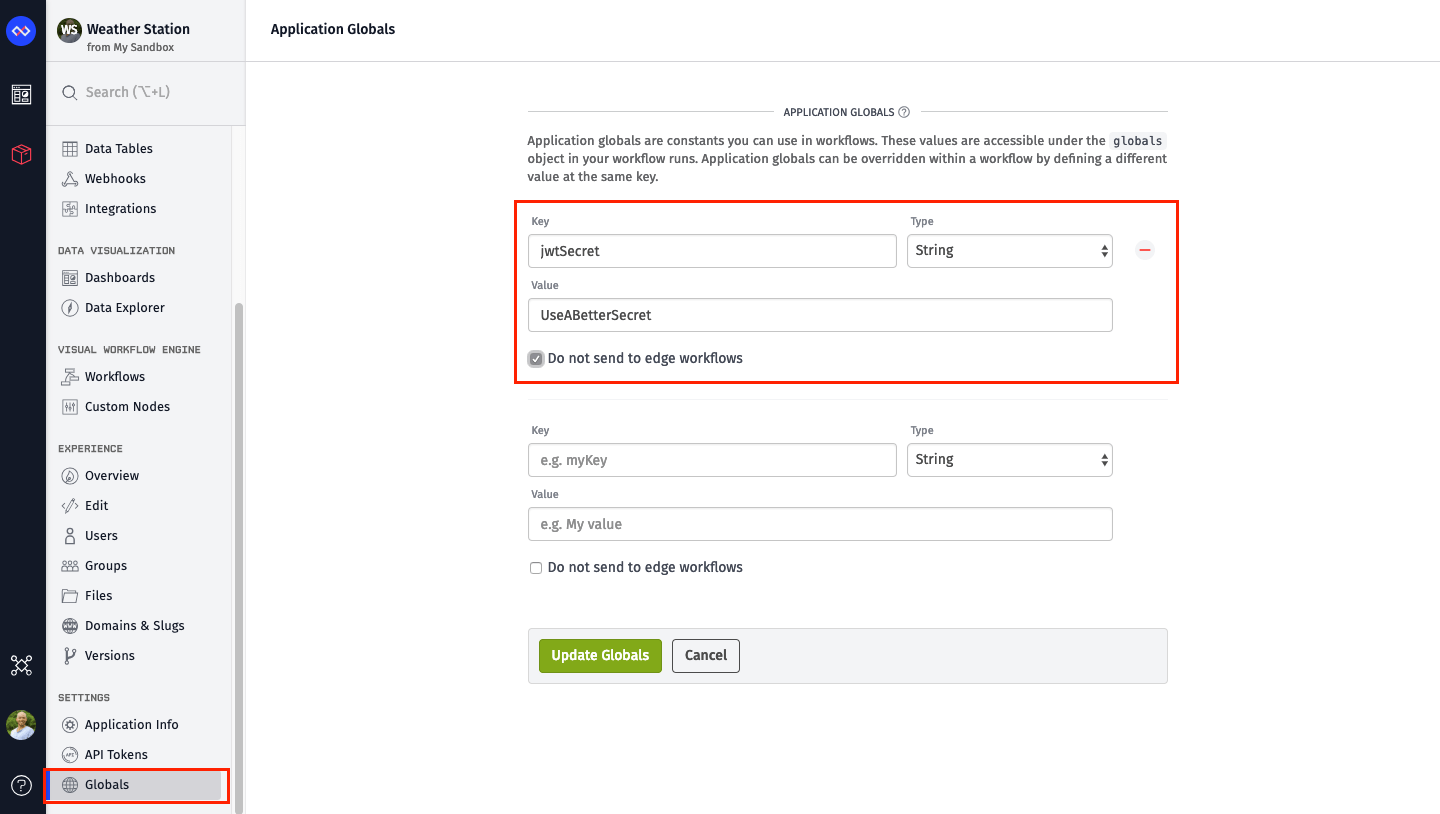
You'll set this secret as an application global so that both of the workflows you create in the next step can access it. To create the global:
- Click "Settings" in your application navigation bar.
- Click "Globals" in the left column.
- Set the
KeyasjwtSecret. - Leave the
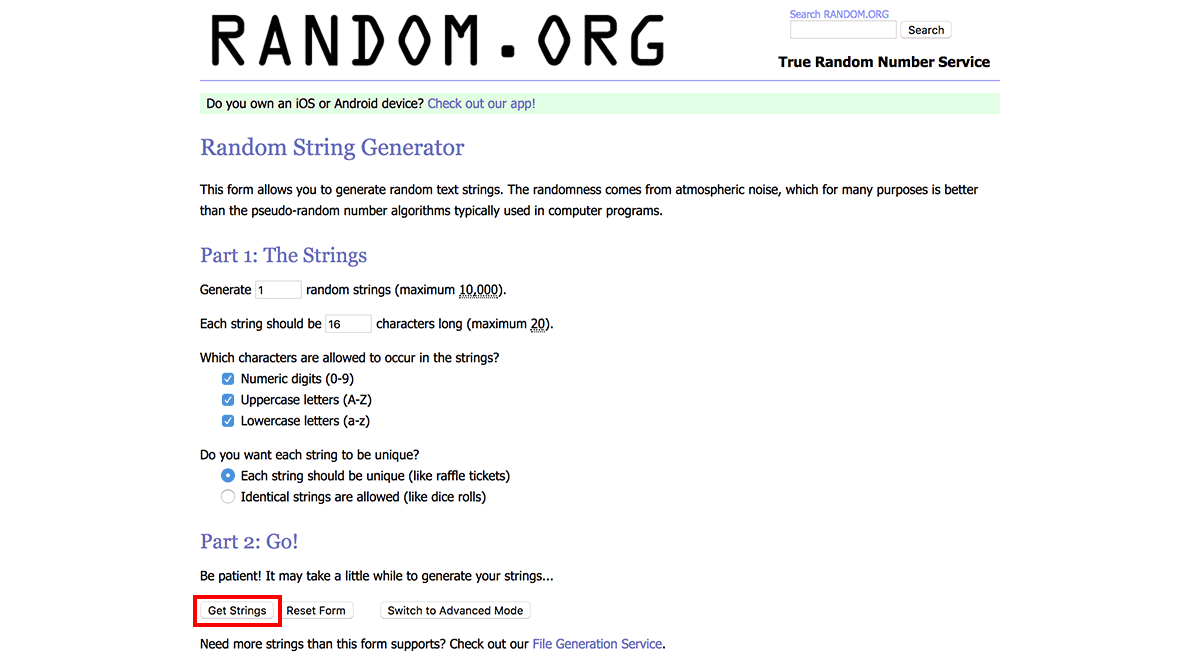
TypeasString. - For the value, enter a random alphanumeric string that is at least 8 characters long. This random string generator is recommended:
- Change the number of strings to
Generateto1. - Change the length to
16characters long. - Make sure to check all three character boxes (
Numeric,UppercaseandLowercase). - Click the "Get Strings" button at the bottom of the page, and your random string will be displayed on the next page.
- Copy the string and set it as the value of your new application global.
- Change the number of strings to
- Save your new global, and then move on to creating the workflows.
Step Four: Create the Workflows
Because you are requiring authenticated users who wish to change their password to enter their current password, it is possible for a user to have forgotten it while still in an active session.
Continue with the model you've followed so far by including the GET and POST methods for each route within the same workflow. Click the "Workflows" menu item, so you can create new experience workflows.
Forgot Password Workflow
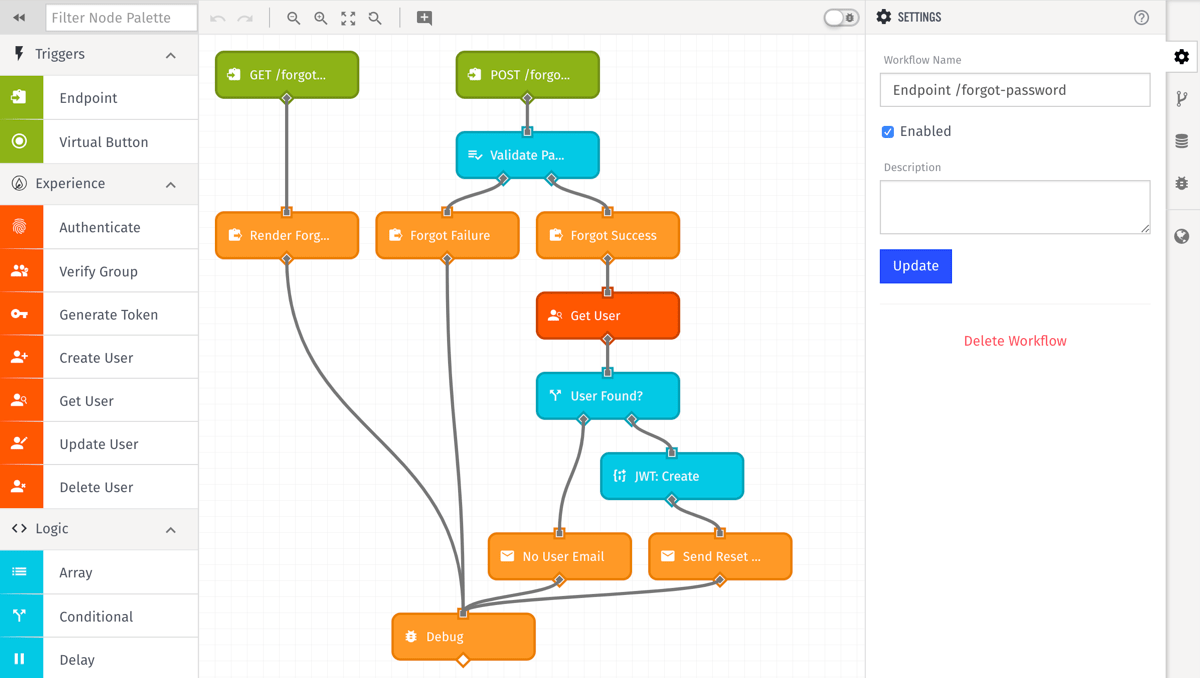
- Download the workflow template, then import the file
endpoint-forgot-password.flowas a new experience workflow. - Update each of the endpoint triggers to point to the
POST /forgot-passwordandGET /forgot-passwordendpoints you created above. - Update the endpoint reply nodes to point to your
Forgot Passwordpage. - Enable the workflow (since imported workflows are by default disabled).
As a general overview, this workflow handles the following:
- If a user visits
/forgot-password, you respond to the request with your newForgot Passwordpage. - When that user submits the
Forgot Passwordform, you validate that they have submitted all fields correctly and try to find an experience user matching that email.- If you find a user, you generate a JWT token (using the secret you created earlier) and send it via email to that user. The token expires after 24 hours.
- If you do not find a user, you still send an email to the address that was entered, stating that an attempt was made to reset a password for that user but you do not have the user on file. This is helpful to someone who has multiple email addresses and cannot remember which they used to sign up for your experience account.
- Whether or not you find a user, you reply to the request with a confirmation message to the form submitter. This is a security feature that prevents people from spamming your experience with loads of email addresses to determine who has an account.
There is a comment on each workflow node describing its function in more detail.
Reset Password Workflow
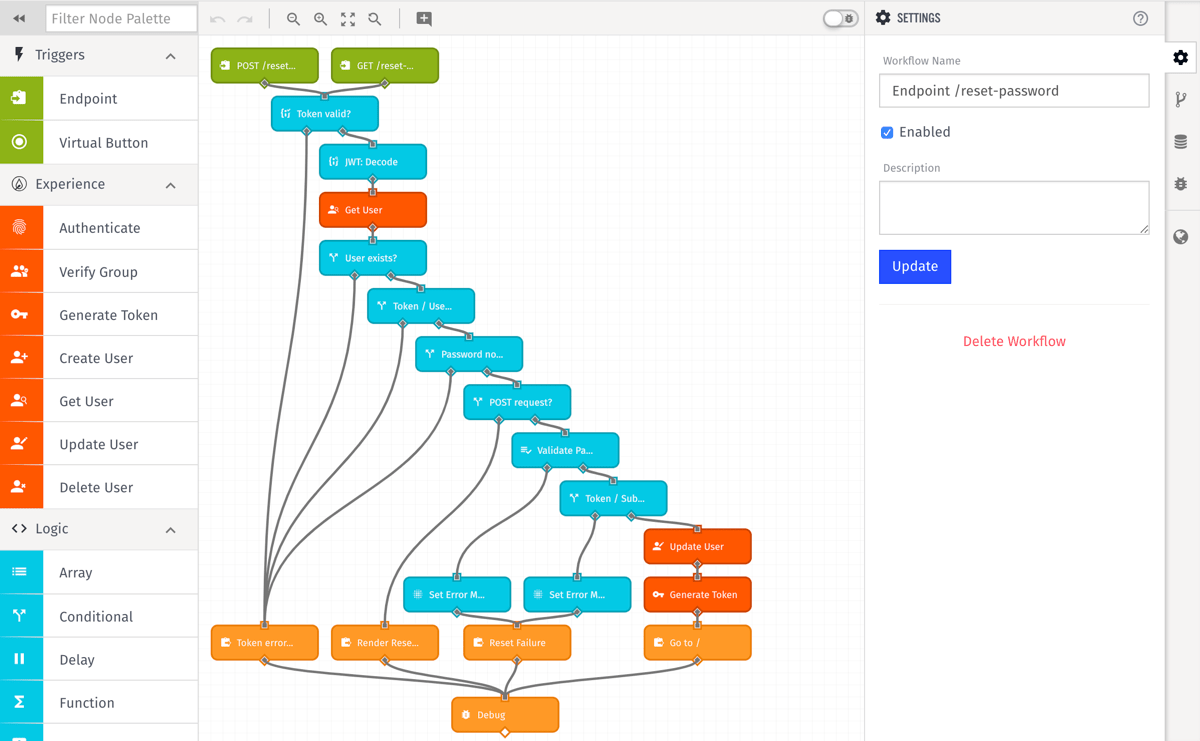
Now let's create a workflow allowing users to reset their passwords after clicking the token they were emailed above.
- Download the workflow template, then import the file
endpoint-reset-password.flowas a new experience workflow. - Update each of the endpoint triggers to point to the
POST /reset-passwordandGET /reset-passwordendpoints you created above. - Update the endpoint reply nodes to point to your
Reset Passwordpage. - Enable the workflow (since imported workflows are by default disabled).
As a general overview, this workflow handles the following:
- You make sure ALL of the following are true; if any of these fail, you redirect the user back to
/forgot-passwordwith an error message:- There is a token on the request as a query parameter, and it is a valid token (e.g. it hasn't expired).
- The token maps to a valid experience user, and that user's email address has not changed since the password reset was requested.
- The user's password has not been reset since the token was issued.
- If this is a GET request (i.e. the user clicked the email link), you render the Reset Password page.
- If the user is submitting the form, ensure the following:
- The user's new password is a valid password.
- The email address matches the address in the token.
- If the above checks pass, you set the user's new password, generate a new auth token while logging them out of other sessions, and redirect to the home page.
There is a comment on each workflow node describing its function in more detail.
Step Five: Link to the Feature
A "Forgot Password" link is typically found on an application's "Log In" page, directly beneath the password input. You'll put a link in the same spot, and since you're also allowing signed-in users to kick off the forgot password flow, you'll add the same link on the in-session "Change Password" page.
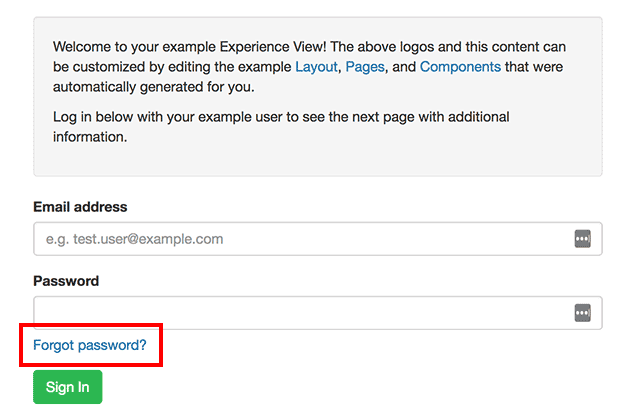
Immediately beneath the user's current password <input> tag, add the following line:
Review
Now it is possible for your experience users to reset their forgotten password, which, combined with your user registration and user profile management walkthroughs, completes the self-serve user management experience.
Was this page helpful?
Still looking for help? You can also search the Losant Forums or submit your question there.