How To Send Device Telemetry Data From AWS Lambda to Losant
Amazon Web Services (AWS) IoT and Losant can work together to power your Experiences. This enables you to send device telemetry data to Losant and trigger workflows, build dashboards, and end-user applications. This guide walks through integrating AWS IoT with Losant using Lambda.
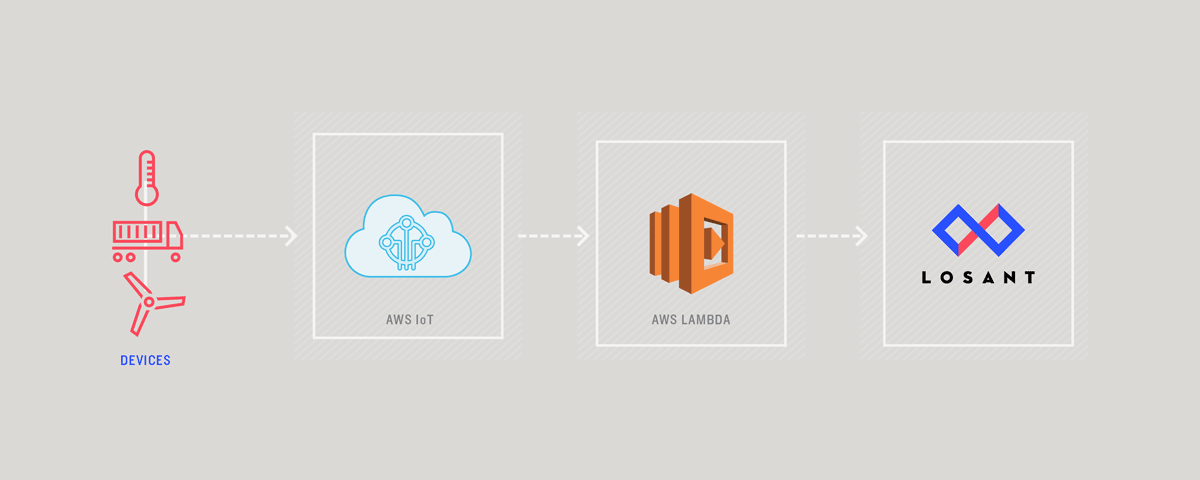
At the heart of AWS IoT is an MQTT broker and a rules engine. The rules engine is what tells AWS IoT what to do with the data once it's received by the broker. Rules are made up of a query and one or more actions. Queries, which are similar to SQL, control the data that's sent to the rule's actions.
The most powerful of these, and the one we'll be focusing on in this guide, is invoking a Lambda function. Once the data is inside Lambda, you can perform numerous tasks, including sending the data to Losant.
Prerequisites
Before you begin, you will need familiarity with:
- A device reporting to AWS IOT.
- Familiarity with AWS IoT.
- Familiarity with Lambda.
- Familiarity with Webhooks.
If you're new to AWS IoT, see AWS’s Getting Started Guide before continuing with this guide.
Create Losant Device
First, we will create a device within Losant. You will be storing data from AWS as Device Attributes within Losant.
If you haven't already, sign up for a Losant account and create an application. Once you’ve done that, let's create a device:
- Navigate to the Add Device Page.
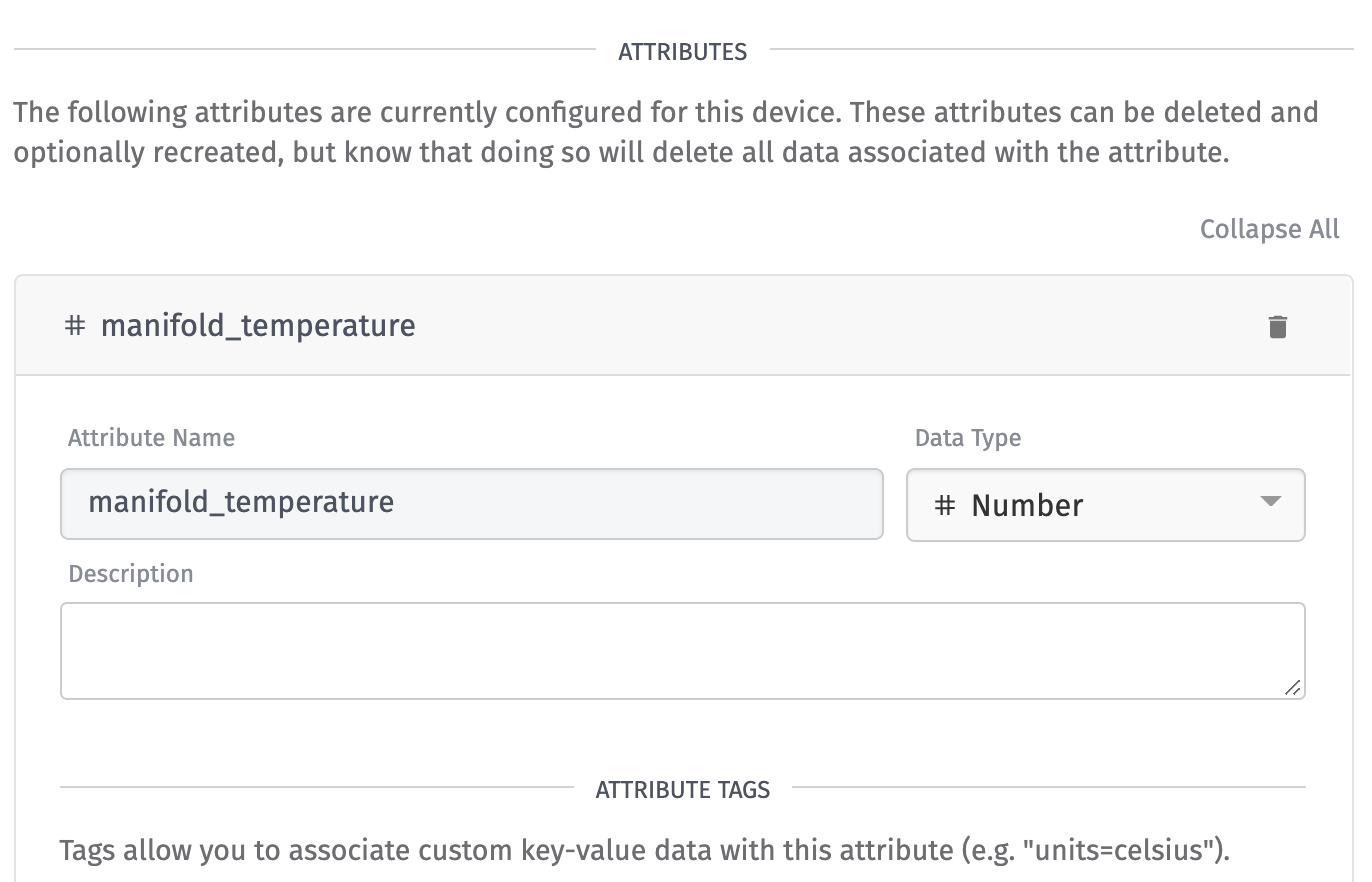
- Add one or more device attributes depending on the telemetry information your device reports.
The device below reports the temperature, so there is one attribute named "manifold_temperature" with the data type set to "Number".
Create Losant Webhook
Since Lambda Functions can invoke HTTP requests, you can trigger a Losant Webhook and trigger a workflow.
Pro Tip: You may also trigger Lambda functions using the AWS Lambda Node. This architecture allows for bi-directional communication between AWS and Losant.
Let's create a Webhook:
- Navigate to “Webhooks” in the Application Menu.
- Name the webhook.
- Click “Create Webhook.”
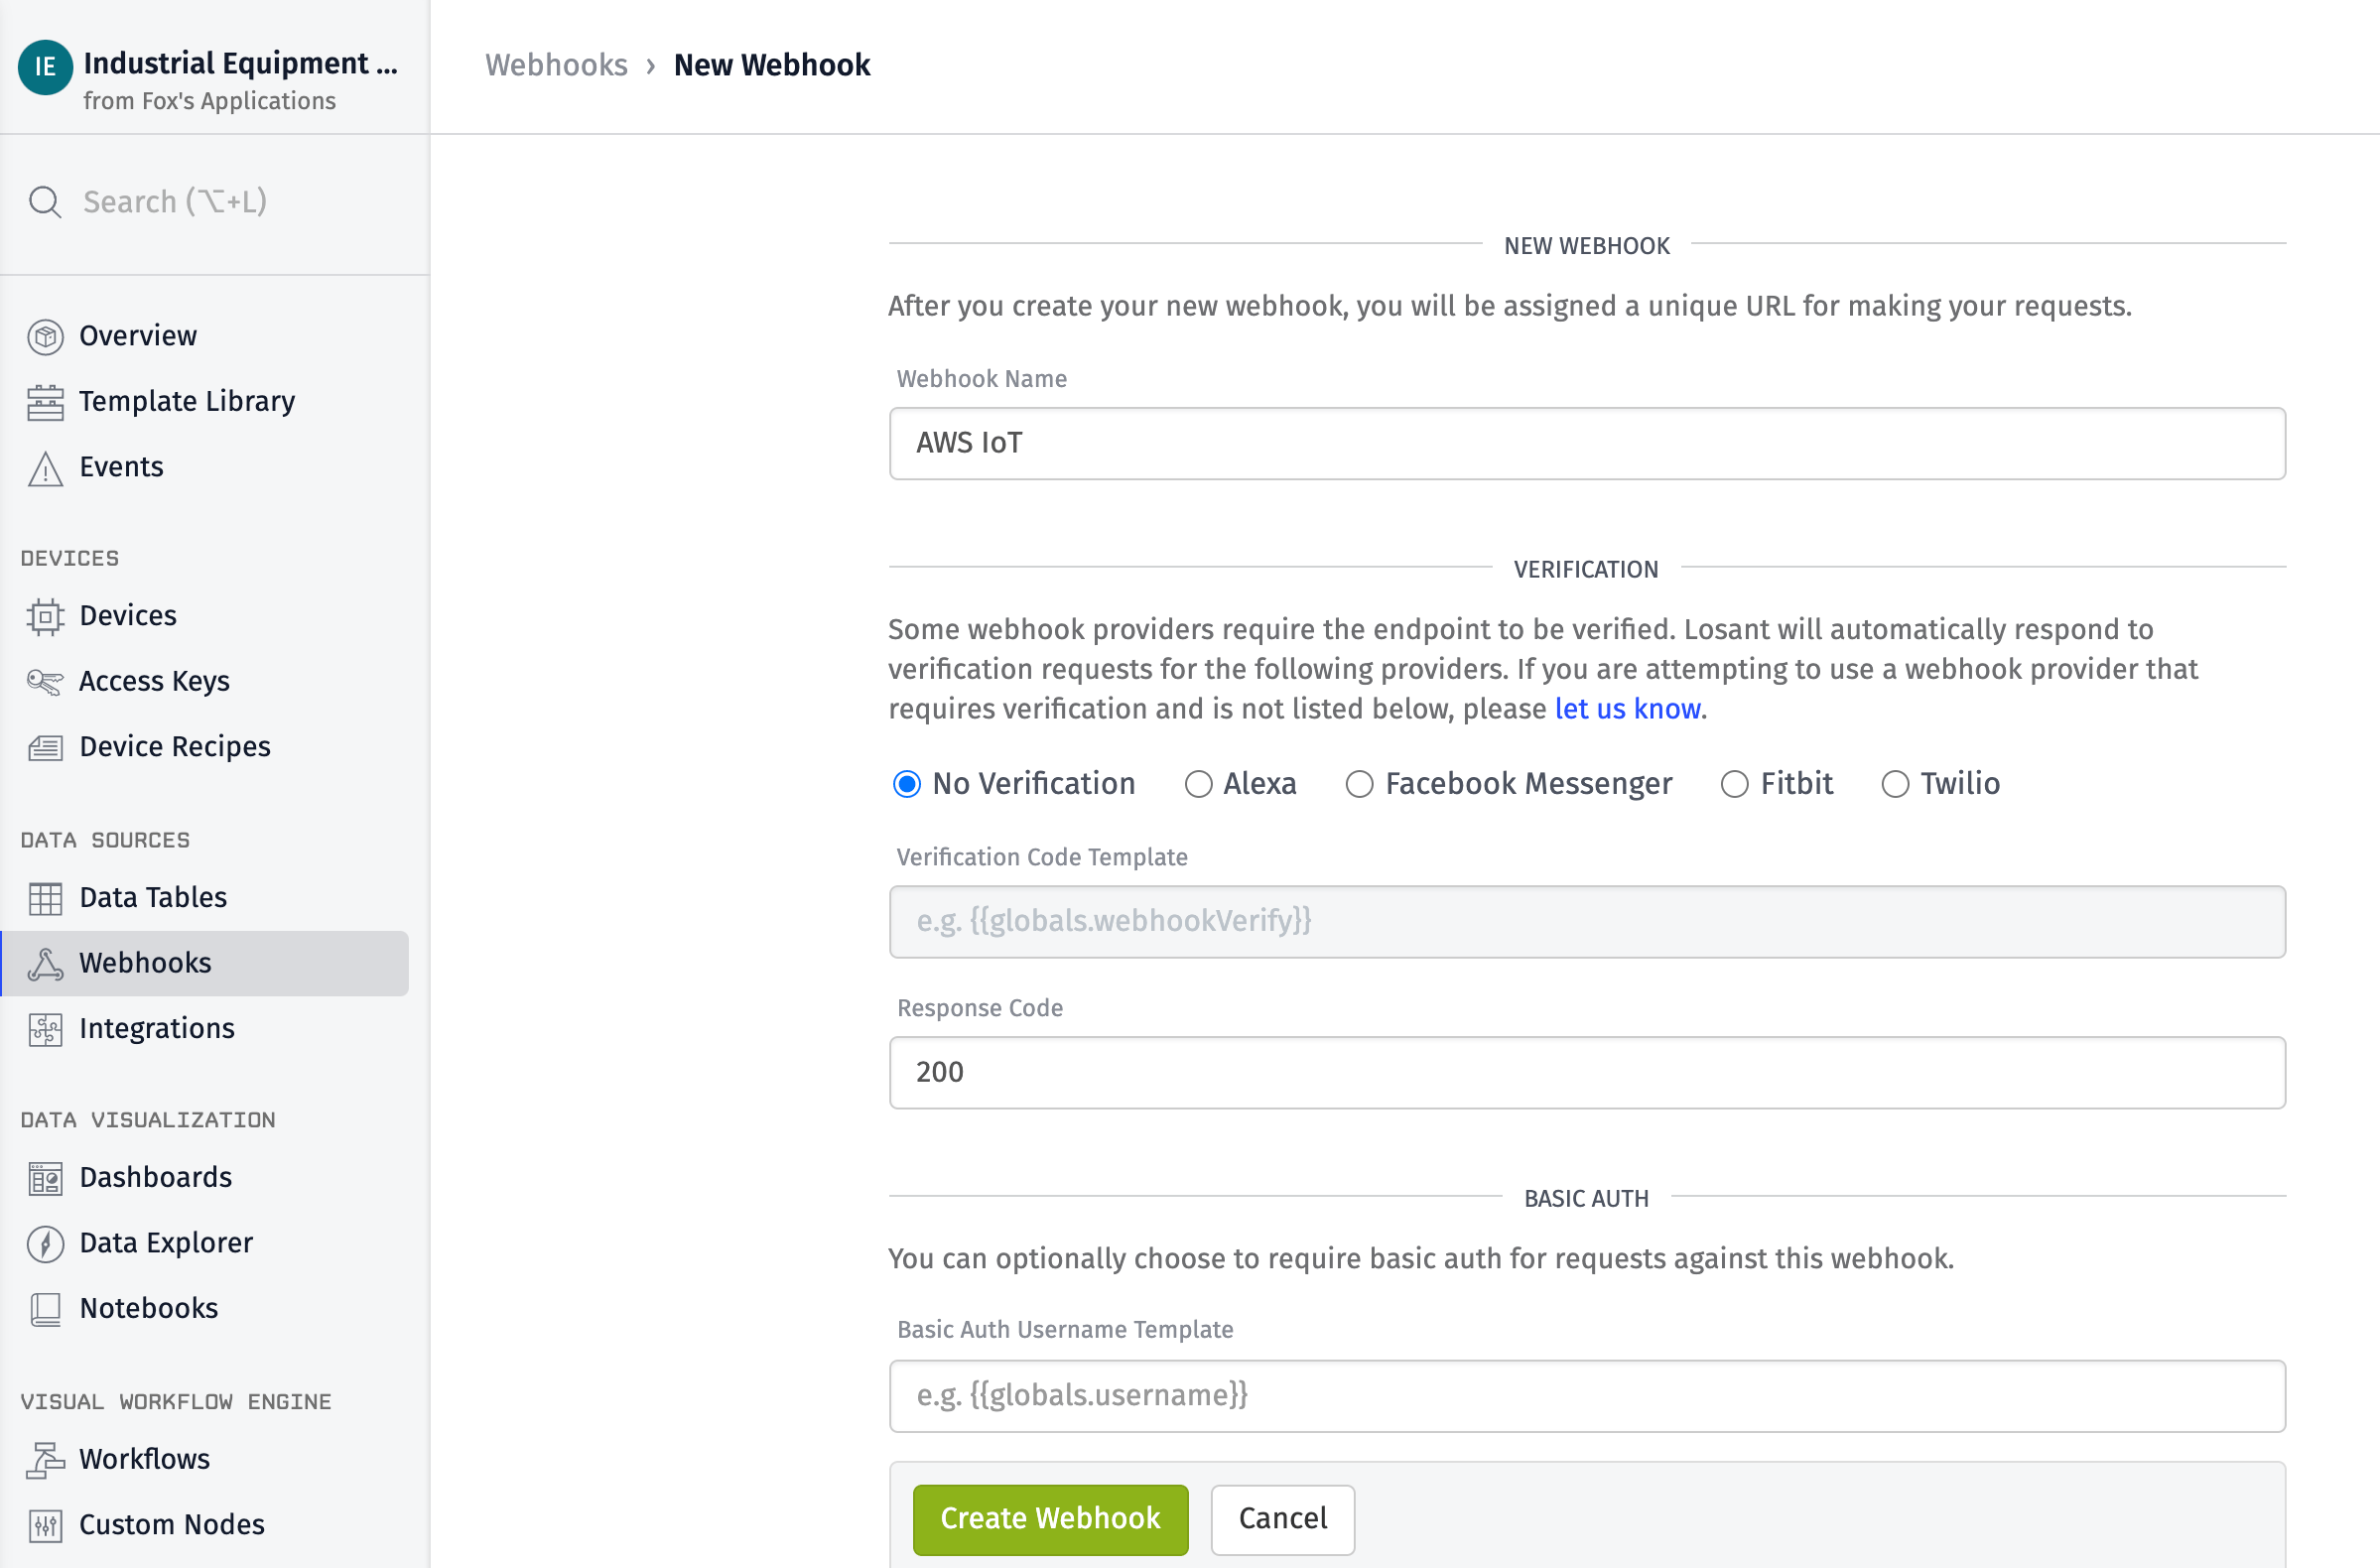
After you create the webhook, you'll be presented with its URL.
https://triggers.losant.com/webhooks/YT6wZZcDB-SYrDKbbM5NTm1U4cqATjTYdd58rNSb
Keep note of the URL as we will use it in our Lambda Function.
Create the Lambda Function
Within the AWS portal, create a new blank Lambda function.
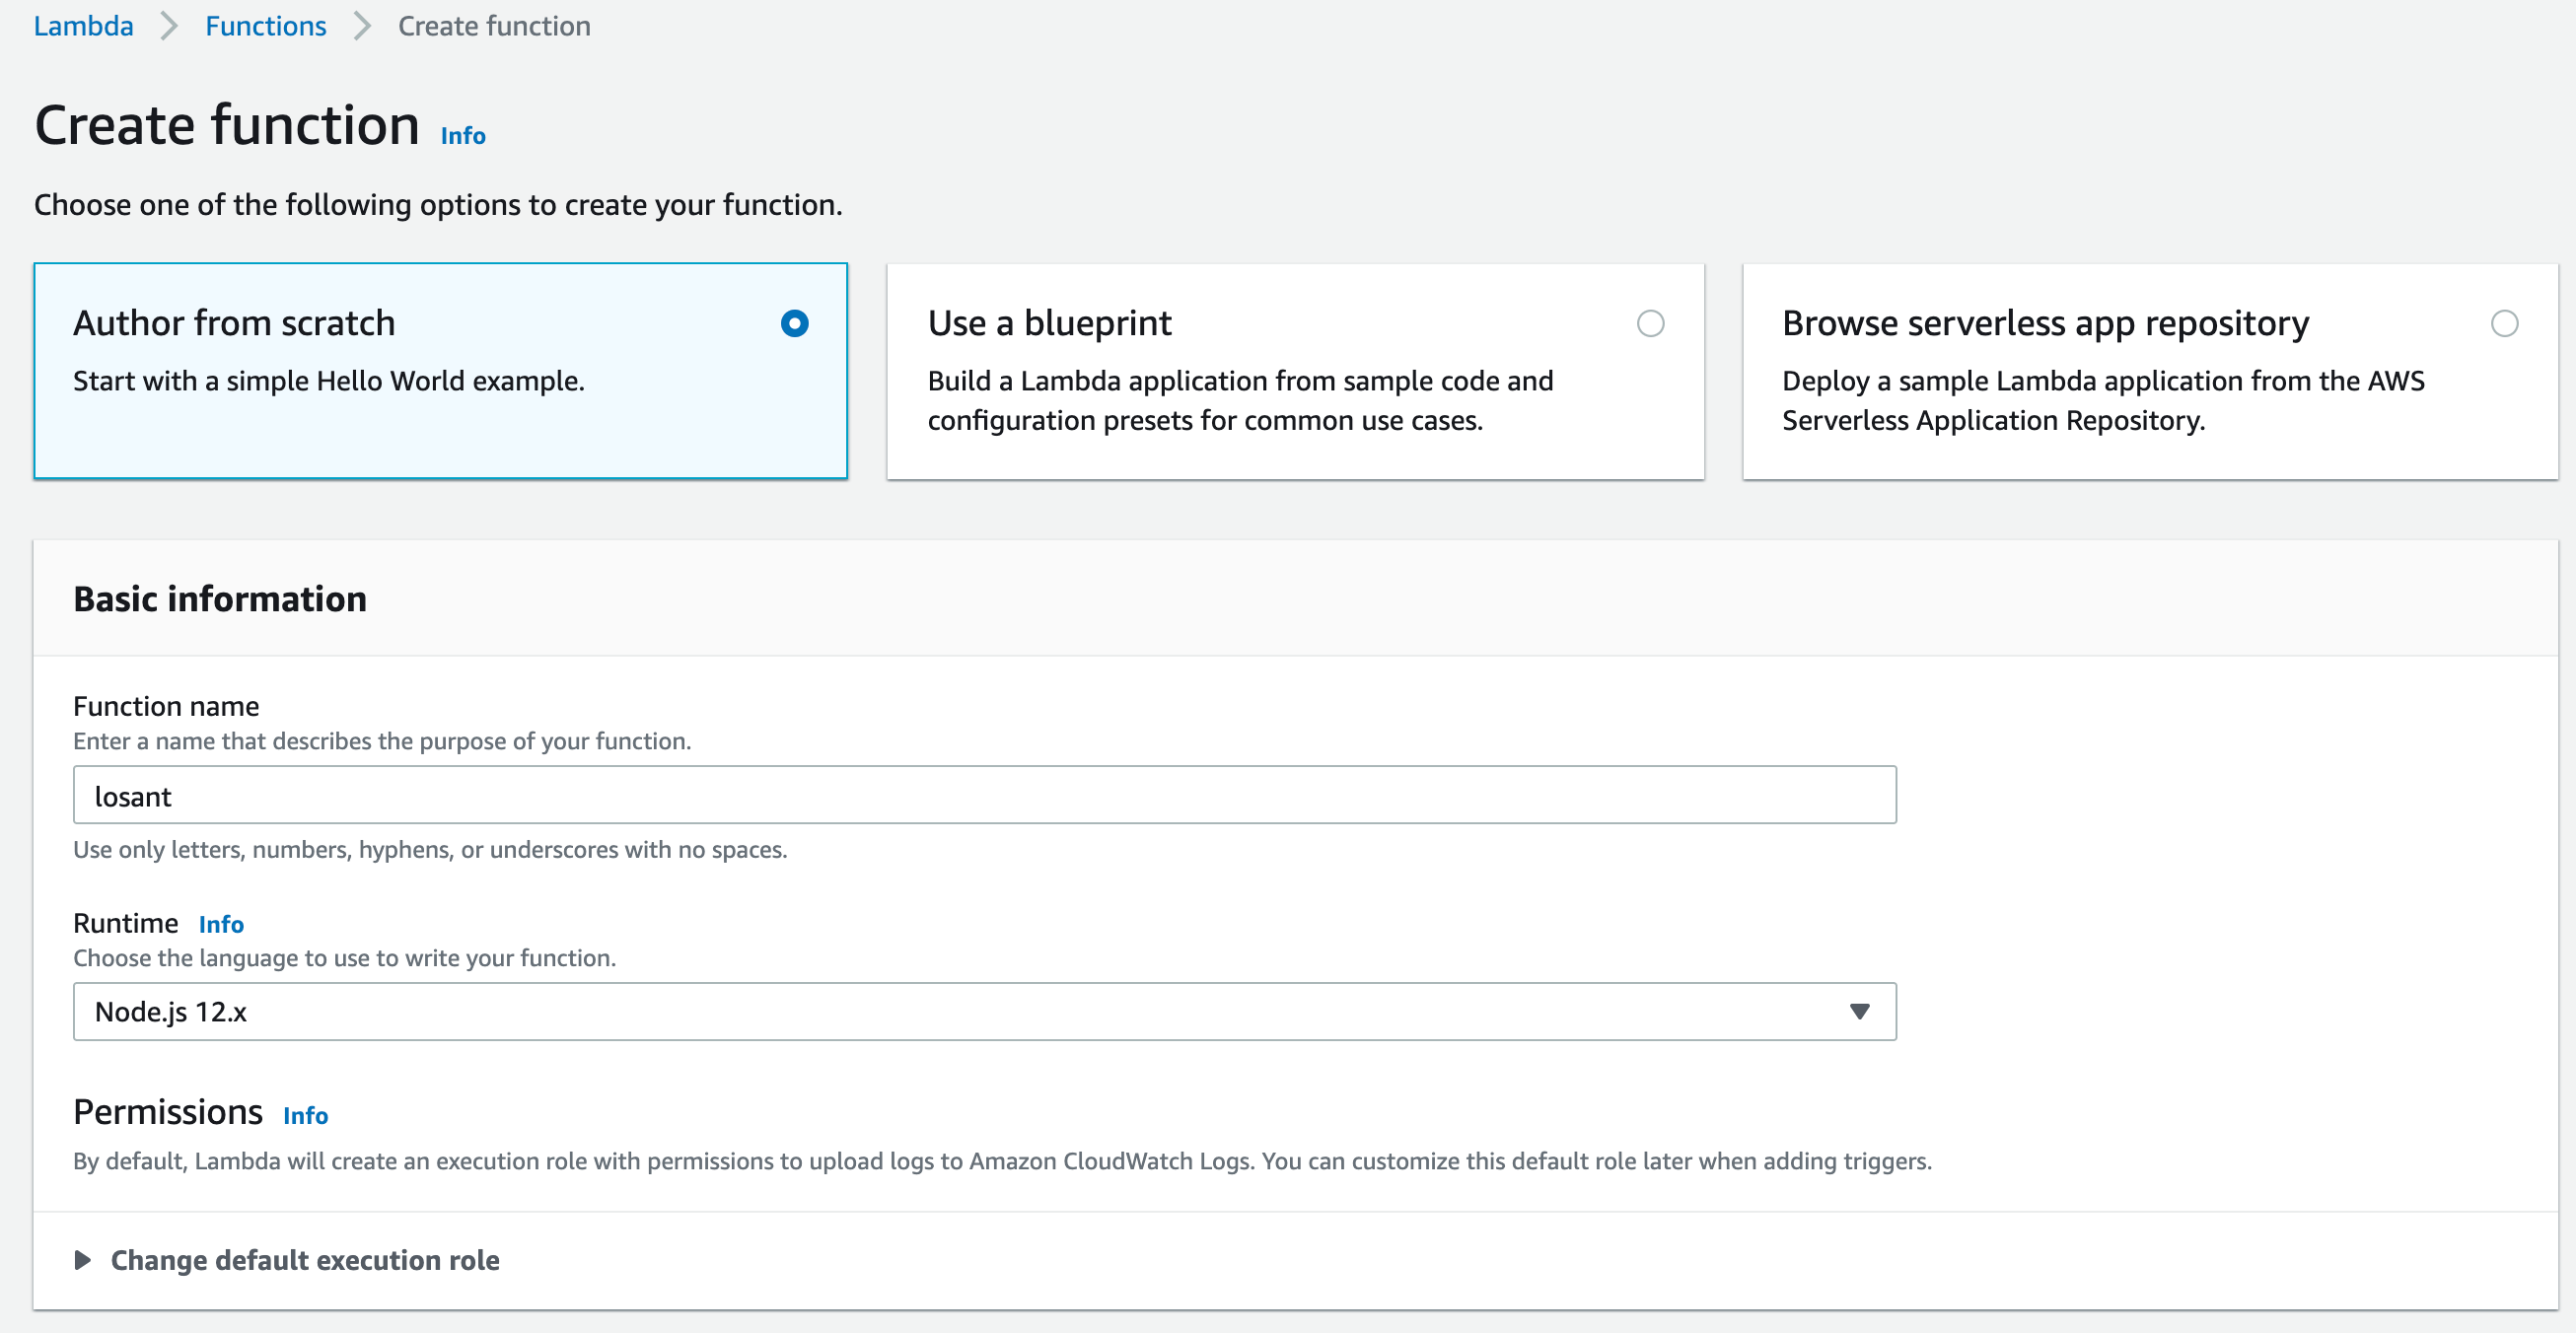
Many of the other settings are specific to your AWS environment. Refer to the Lambda Getting Started Guide for more details.
Invoke the Webhook from Lambda
Let's update your Lambda function with Node.js using the built-in HTTP module to request the Losant webhook.
- Copy and paste the following JavaScript into your function:
var https = require('https');

exports.handler = (event, context, callback) => {

  var postData = JSON.stringify(event);

  var options = {
    hostname: 'triggers.losant.com',
    port: 443,
    path: '/webhooks/my-webhook-id',
    method: 'POST',
    headers: {
      'Content-Type': 'application/json',
      'Content-Length': Buffer.byteLength(postData)
    }
  };

  var req = https.request(options, (res) => {
    console.log(`STATUS: ${res.statusCode}`);
    console.log(`HEADERS: ${JSON.stringify(res.headers)}`);
    res.setEncoding('utf8');
    res.on('data', (chunk) => {
      console.log(`BODY: ${chunk}`);
    });
    res.on('end', () => {
      callback();
    });
  });

  req.on('error', (e) => {
    console.log(`problem with request: ${e.message}`);
    callback();
  });

  // write data to request body
  req.write(postData);
  req.end();
};
- Replace
'/webhooks/my-webhook-id'with the path in your Webhook URL.
In this case event will be device telemetry data from AWS IoT and then sent with an HTTP POST to a Losant Webhook.
Now, we can configure AWS IoT to trigger the Lambda Function.
Create the AWS IoT Rule
The rule you create will send data into Lambda whenever specific topic or attribute is recorded. To create the rule:
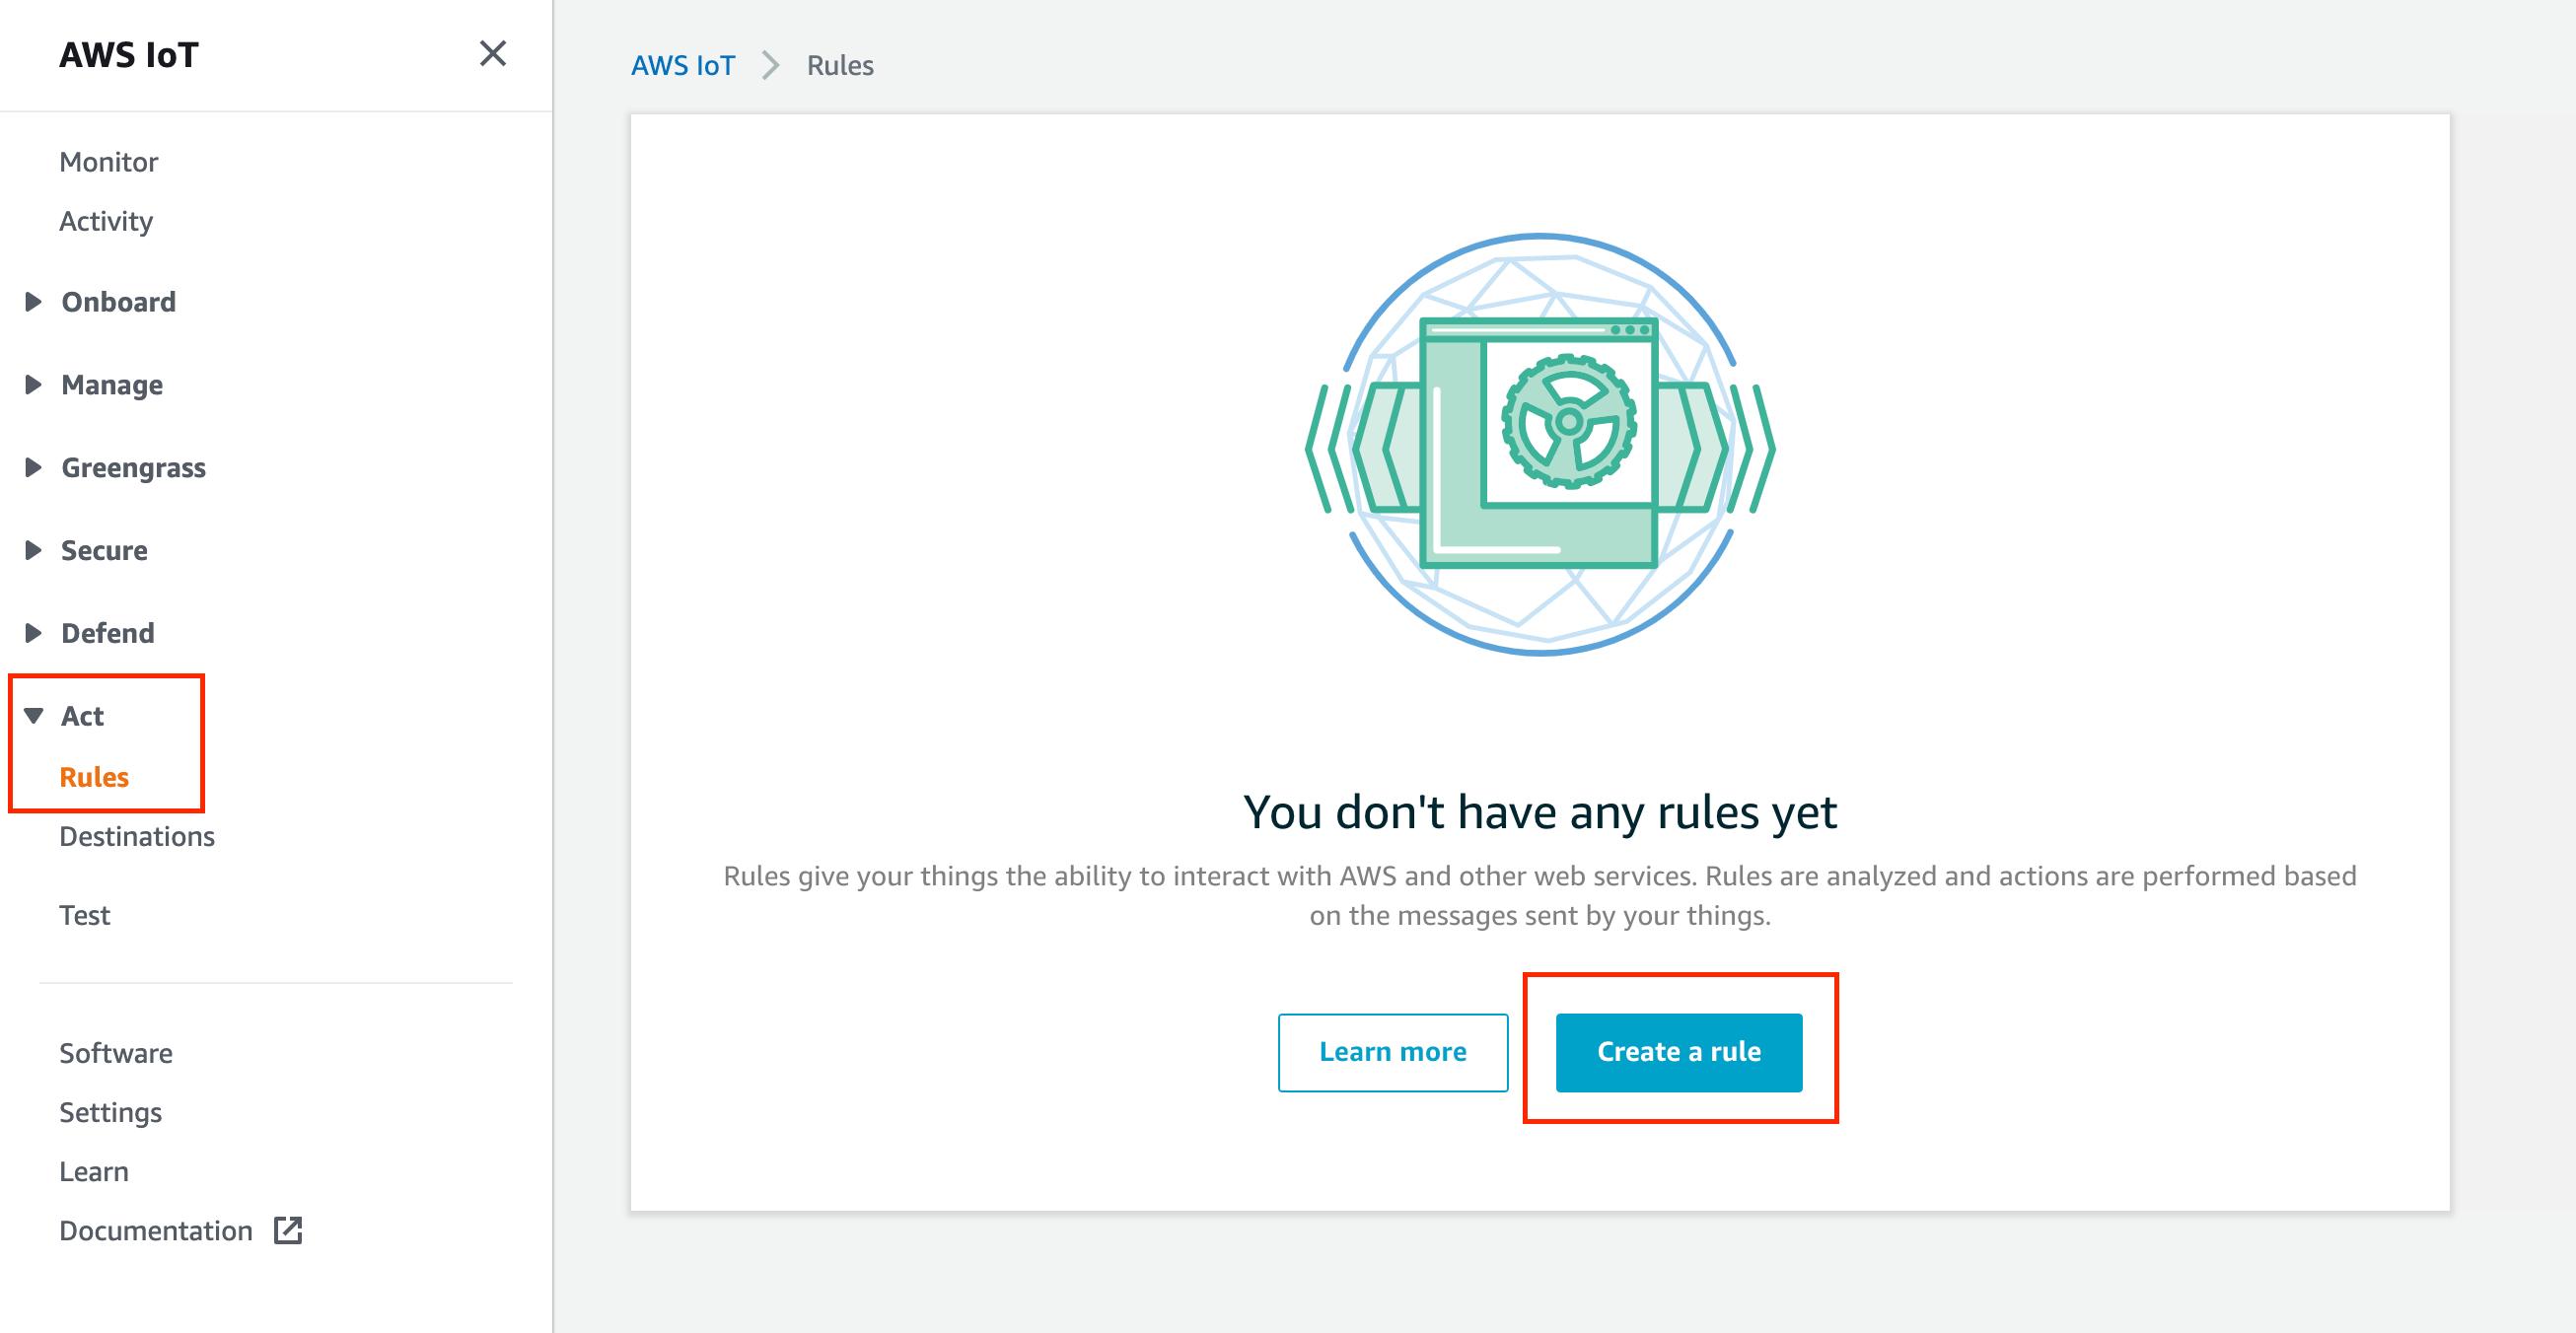
- Within AWS IoT, navigate to the Rules section.
- Create a new rule.
- Configure the "Rule Query Statement";
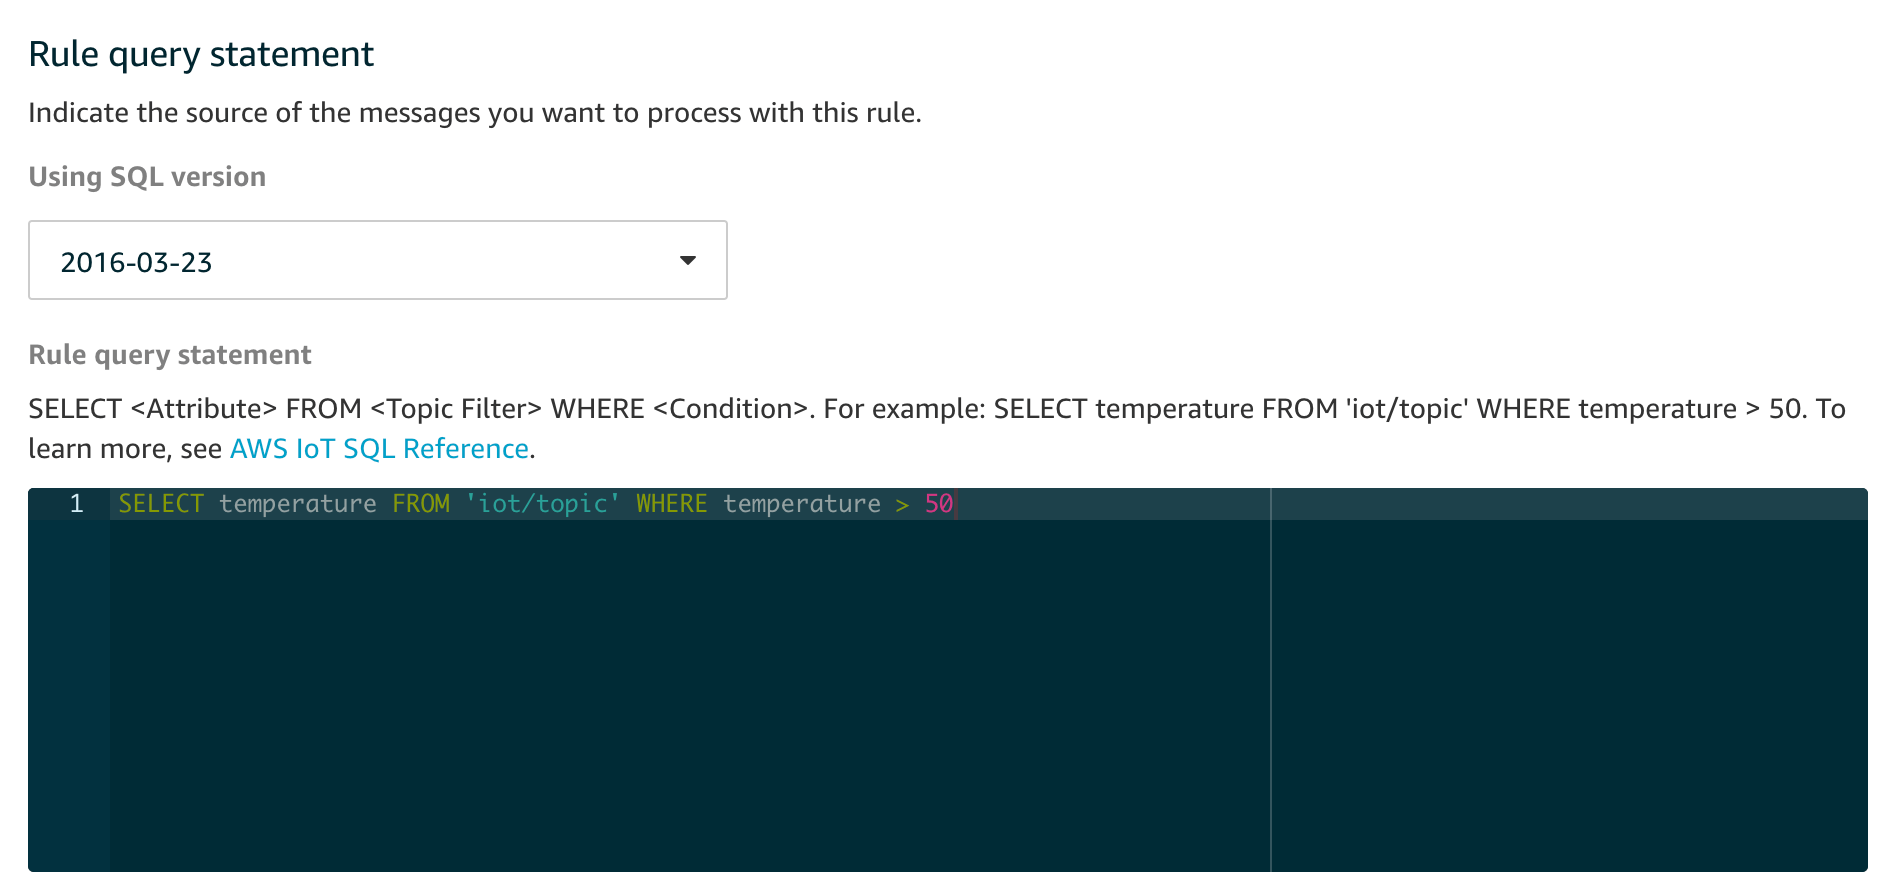
Here is an example query:
SELECT temperature FROM 'iot/topic' WHERE temperature > 50
With the above query, we can trigger the rule using AWS Publishing Tool with the following data:
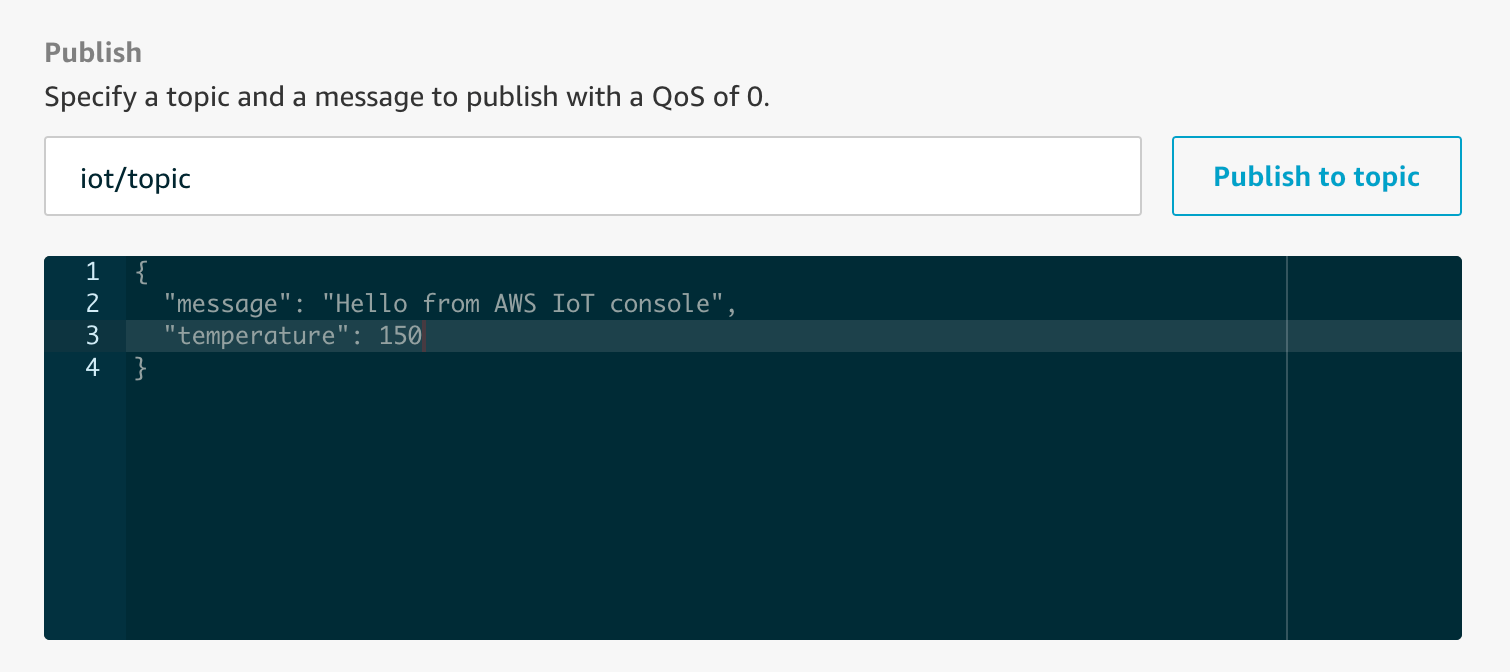
For more information see AWS IOT SQL Reference.
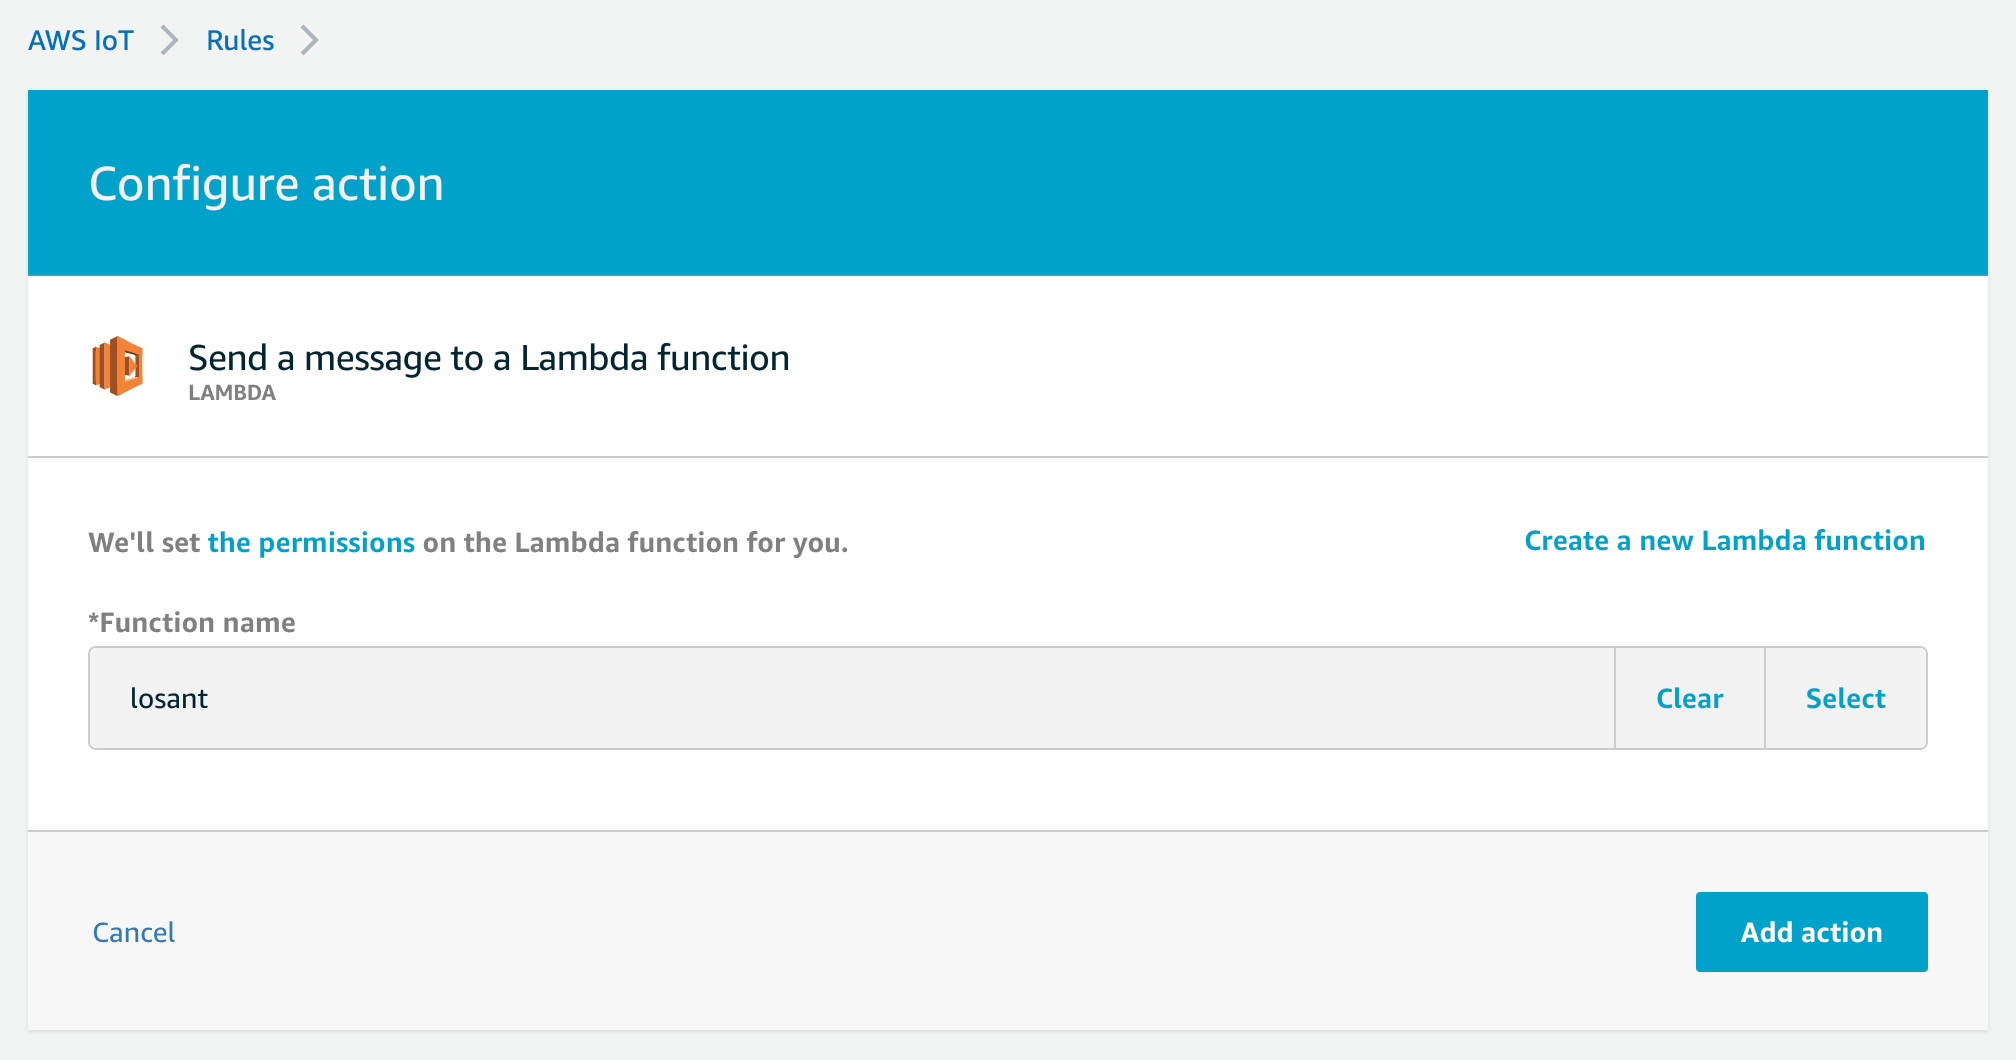
- Add an action and select the Lambda.
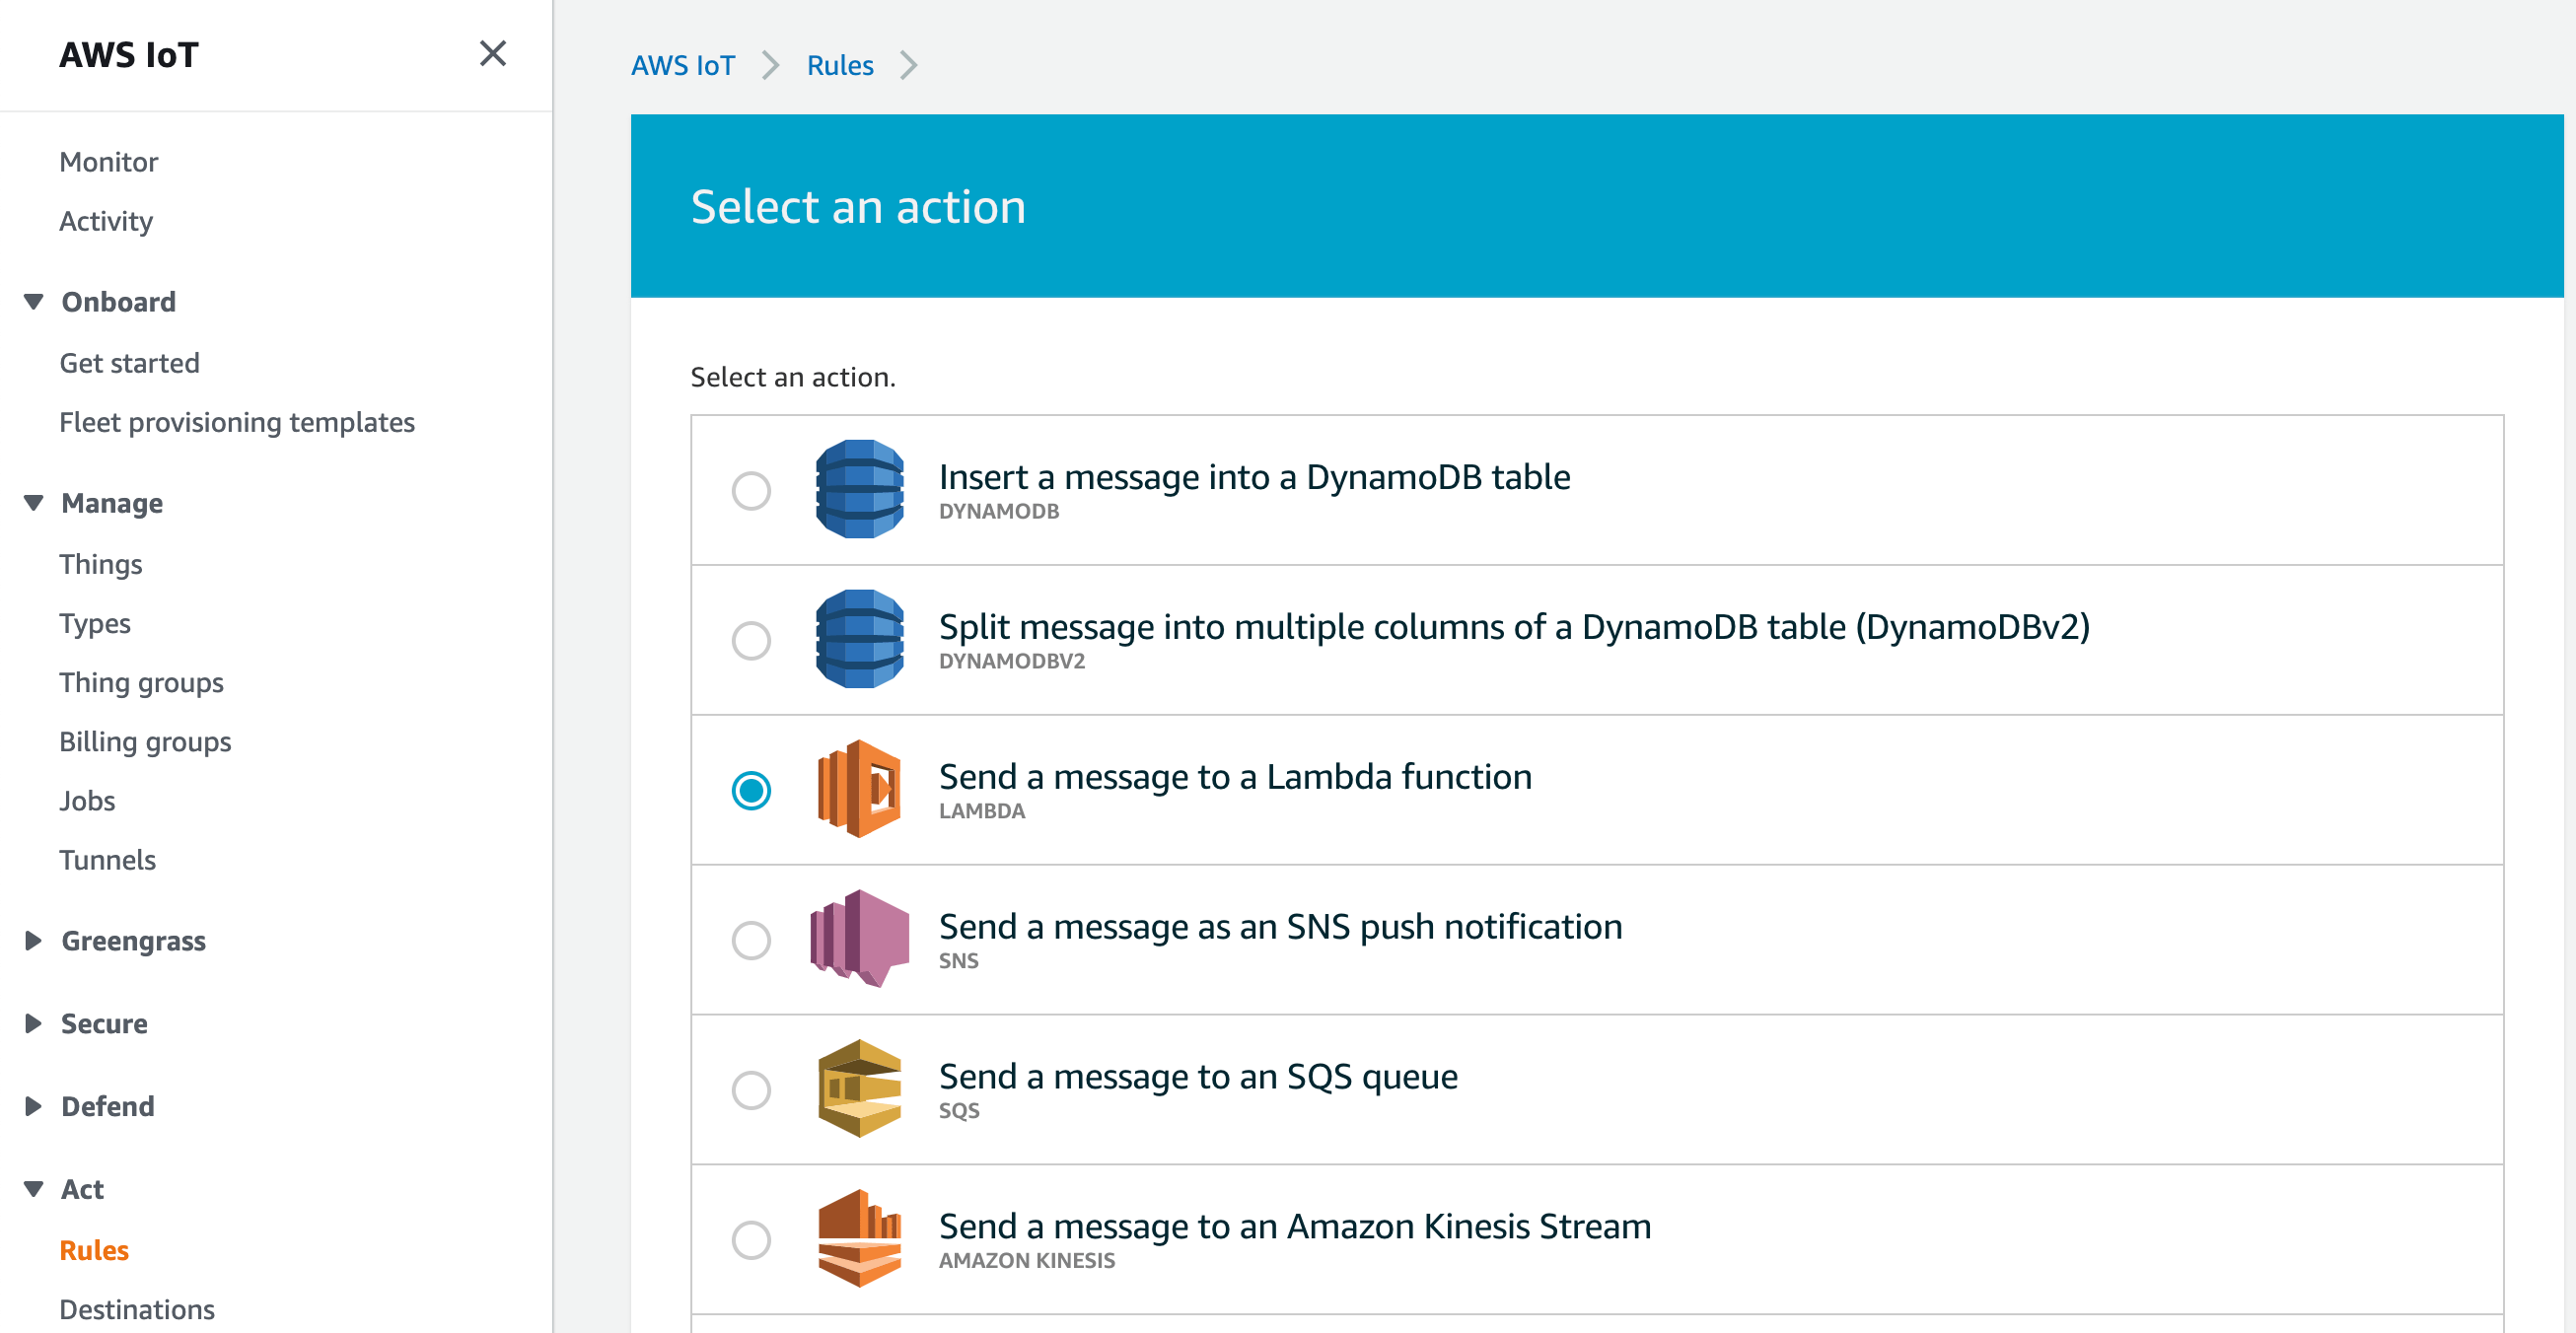
- Choose your newly created Lambda function from the list and click the "Add action" button.
- Click the "Create Rule" button to complete the process.
Now that our rule is created, we can build a Losant Workflow to accept incoming data.
Trigger a Workflow
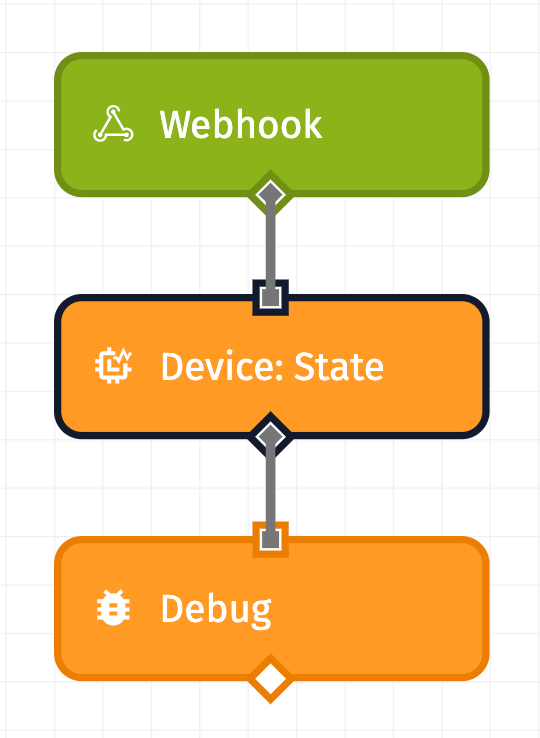
Here is the Application Workflow we are going to create:
When this Workflow is triggered, you will get a payload that looks like this:
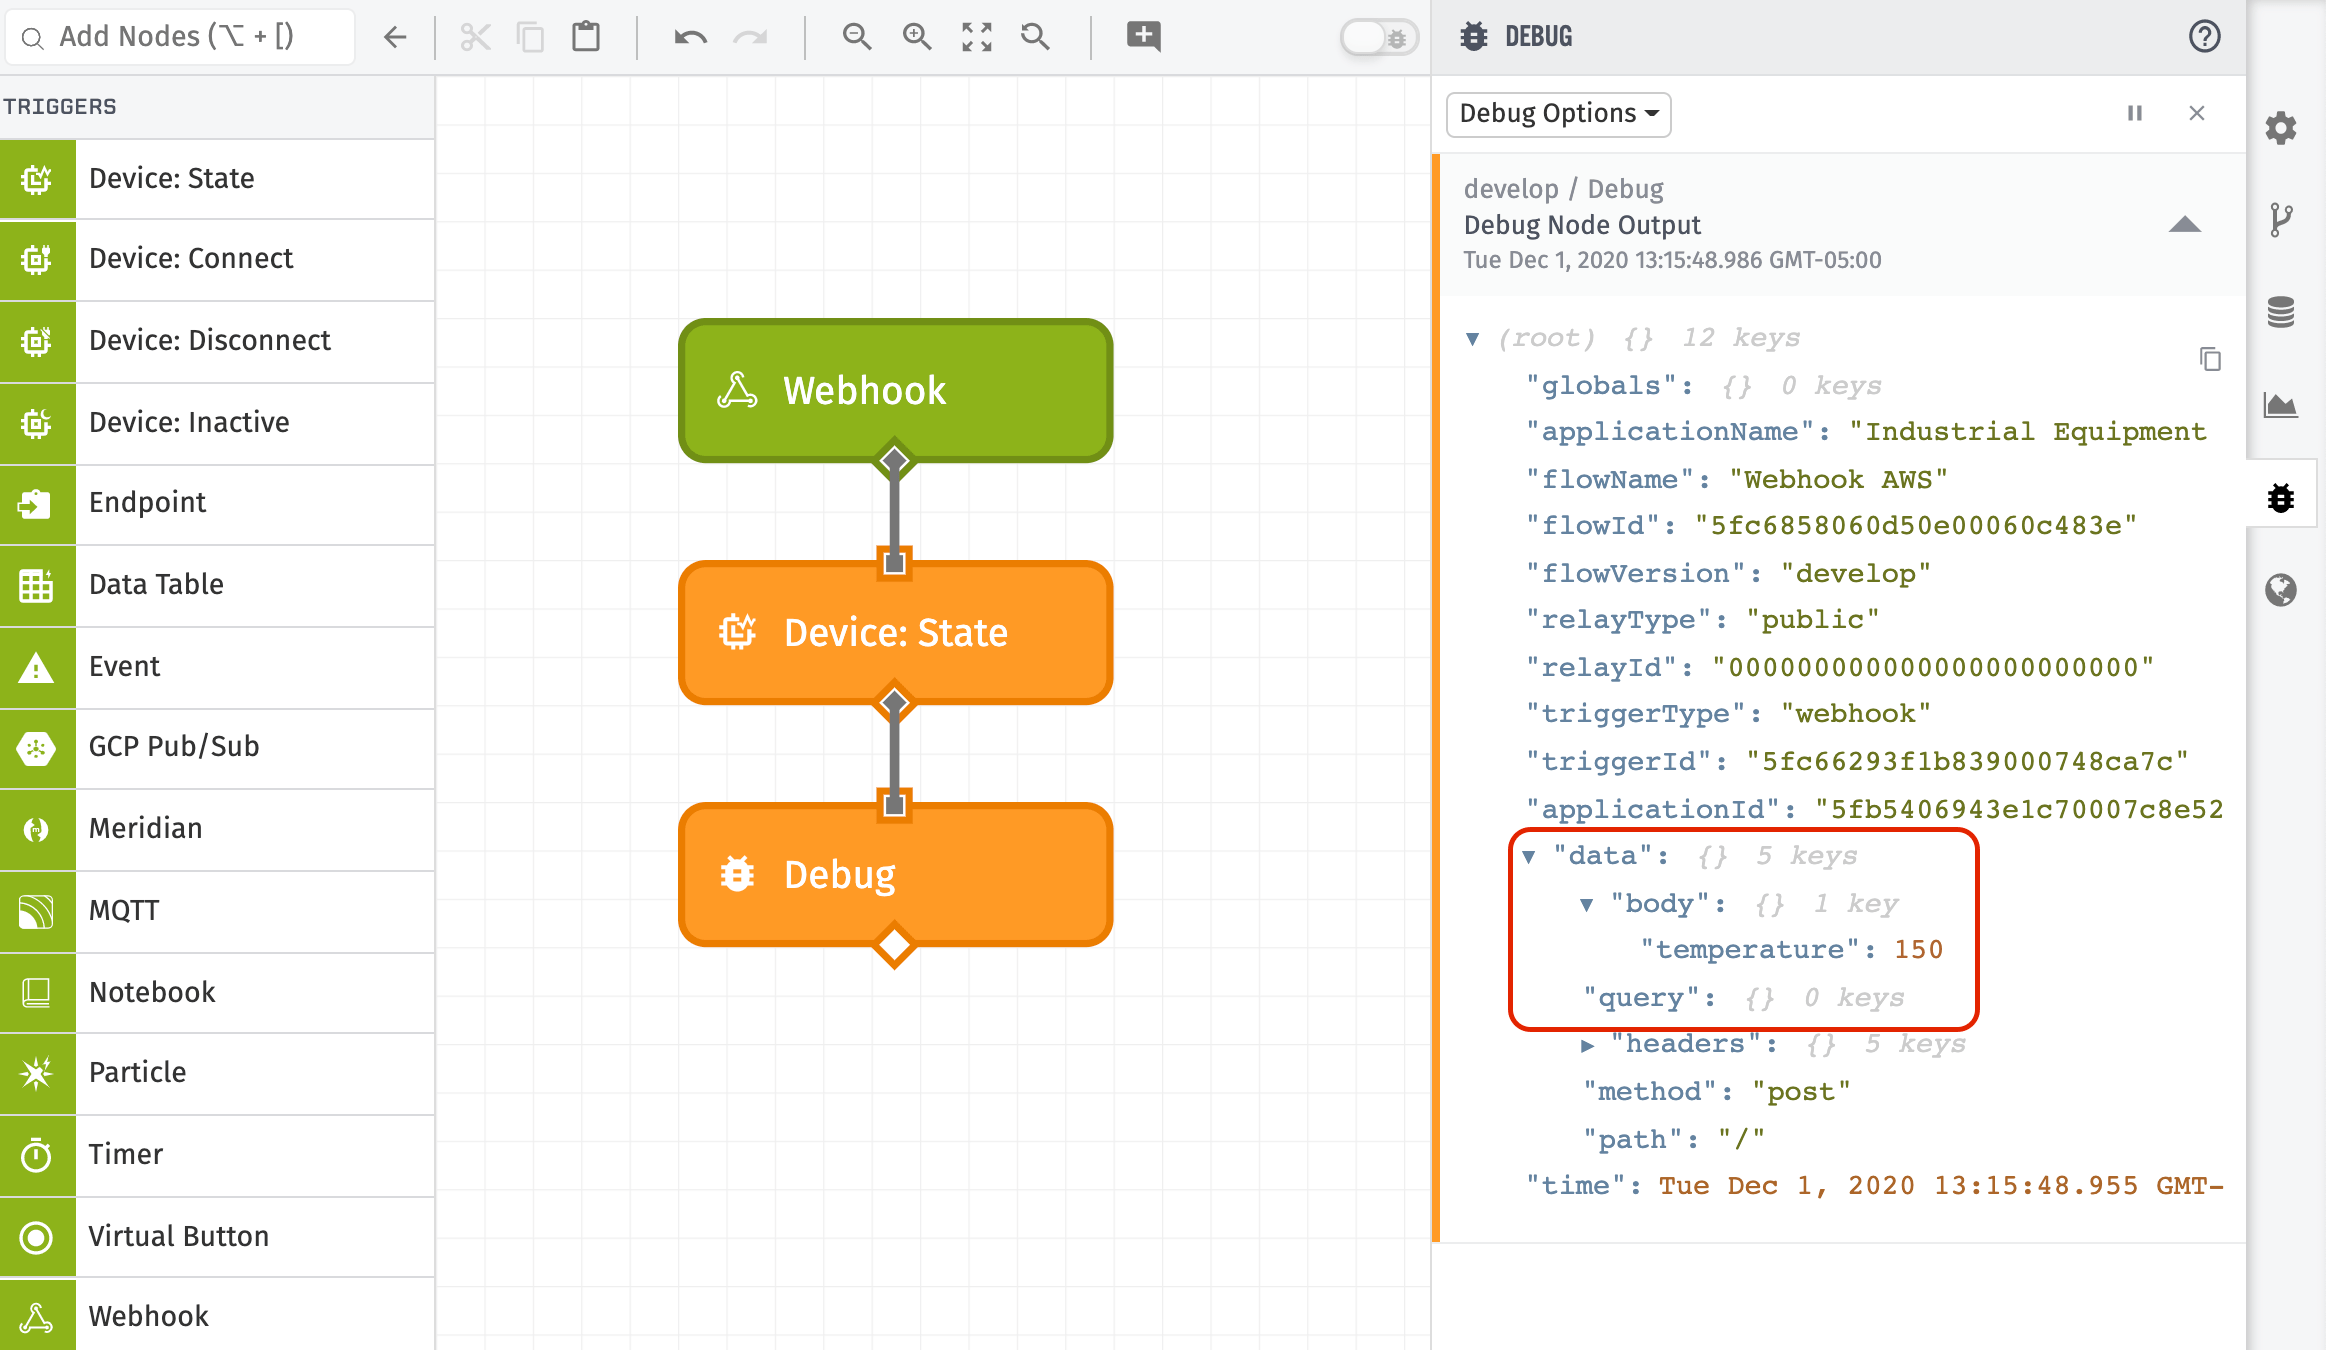
We can see that the data from the Lambda HTTP POST request can be found at:
data.body.temperature
We can now build our workflow to use this data within Losant. To create this workflow:
- Drag a Webhook Trigger onto the workflow canvas. Select your Webhook in the node's configuration.
- Connect a Device: State Node to the Webhook Trigger. This allows a workflow to save data to Losant's time-series database.
- Connect a Debug Node to the Device: State Node.
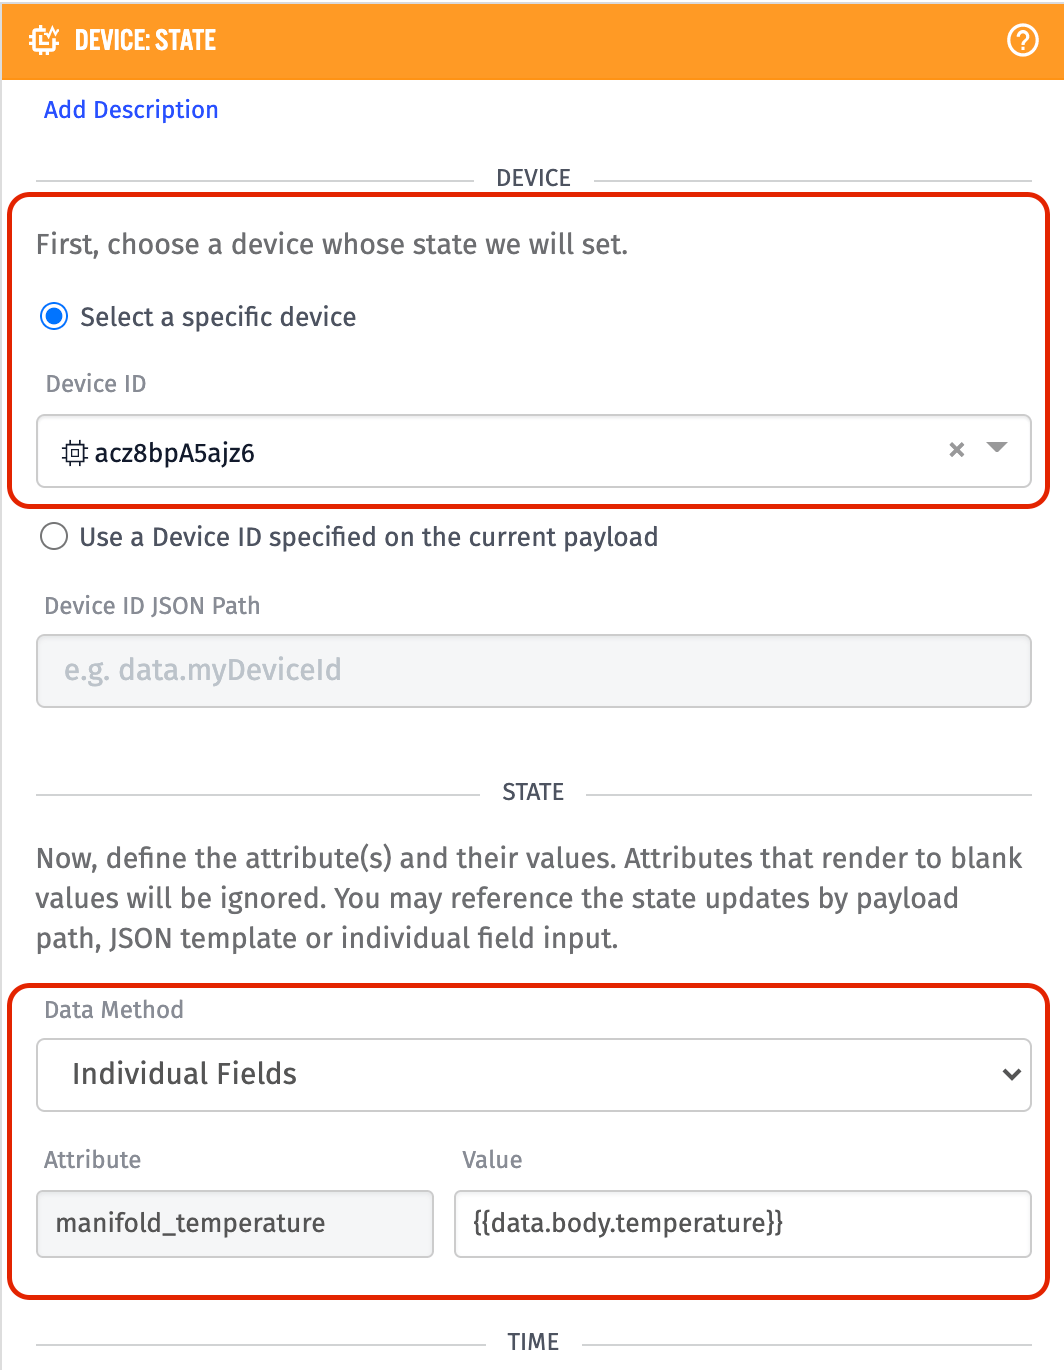
Next, we can configure the Device: State Node:
- Select your Device you created in the previous step.
- In the state configuration, add a template with the payload payload path of:
{{data.body.temperature}}.
Deploy this workflow using the "Deploy Workflow" button at the top-right of the screen.
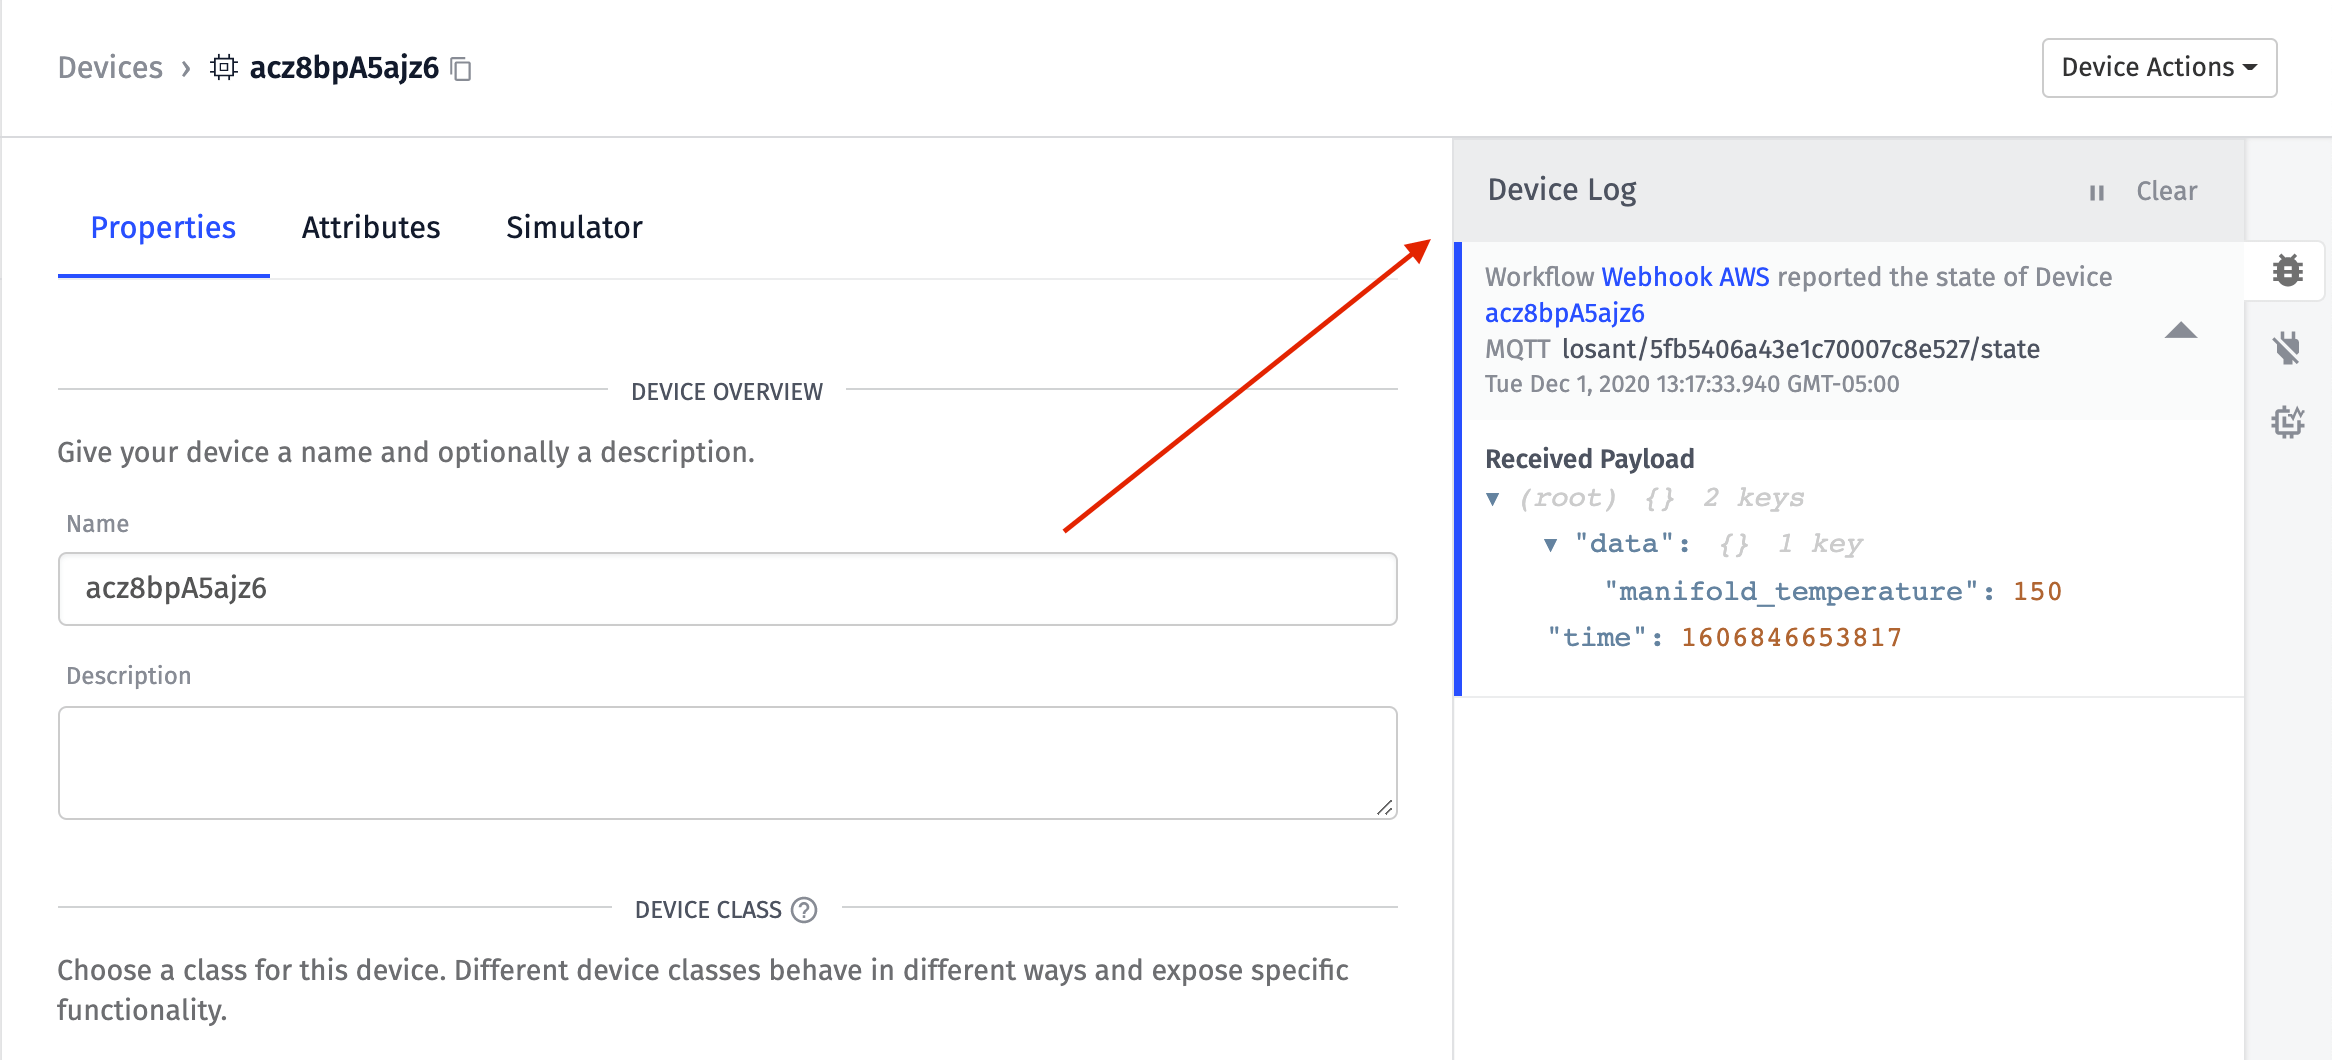
If your device is properly reporting state, you can see this reflected in your Device Logs:
What’s next?
With the data on a Losant device, you can now easy build complex, data-driven solutions using our dashboards, workflows, and build Experiences.
Here are some great resources:
Was this page helpful?
Still looking for help? You can also search the Losant Forums or submit your question there.