User Registration
Like most mobile applications, lōm starts by asking the user to create an account. This part of the walkthrough covers how Experience Users and Endpoints can be used to accomplish user registration.
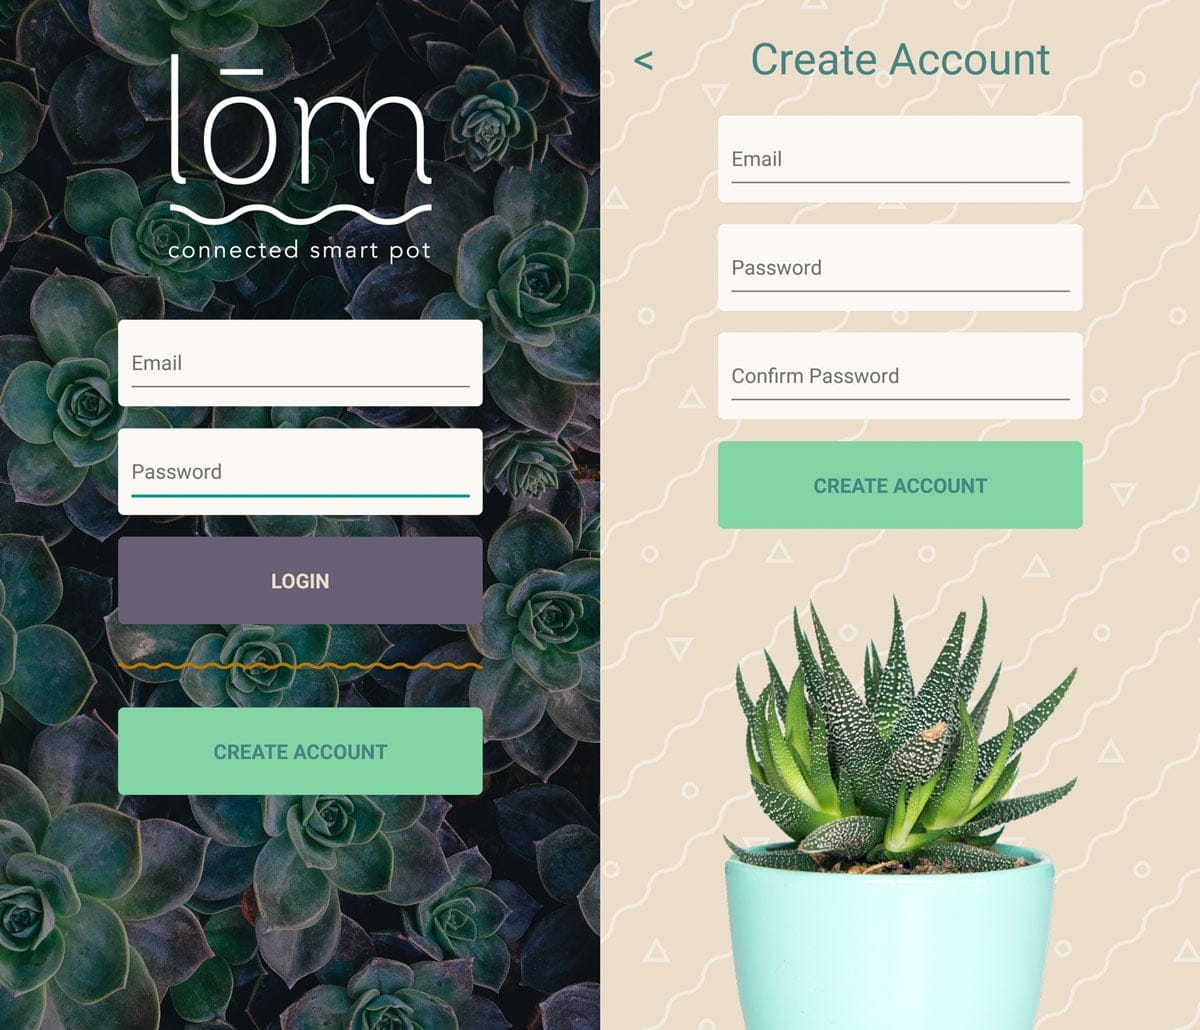
In the lōm mobile app, the “Create Account” button on the lōm main screen takes the user to the Create Account screen. This screen asks the user for an email and a password. The client-side code confirms the email is in a proper format and the passwords match. It then performs an Experience API Endpoint request to create the user.
The API for lōm follows a typical REST format, meaning you’ll use a POST request against the users collection to create a new user resource.
Step One: Create an Experience Endpoint
To accomplish this, create an Experience Endpoint with this route:
POST /usersThis new endpoint accepts email and password as POST data:
{ "email": "user@example.com", "password": "the-provided-password" }To create this endpoint in Losant, the first thing to do is create an endpoint within our application Experience:

- Click
Editin theExperiencesection of your application’s sub-navigation to manage your application’s Experience. First-time users are presented with a wizard that automatically creates a sample experience. This guide will not use any of those auto-generated resources, so it’s recommended that you skip the wizard for now. - Click the
Endpointstab in the top navigation. - Click
Addto create the new endpoint for user registration.

- Set the
MethodtoPOST. - Set the
Routeto/users. - Set the description to anything you’d like.
- Set the
Access ControltoAll public users.
Experience endpoints have three authentication options: all public users, any authenticated user, and users that belong to a specific group. Since it’s used to originally create the user, this registration route must be publicly available. All routes in lōm, other than account creation and user login, require authentication.
- When complete, click the
Create Endpointbutton at the bottom to create this endpoint, and then return to the list of endpoints.

Step Two: Create an Experience Workflow
At this point, you have the /users endpoint defined, but there’s no logic to run when it’s requested. If you were to request it now, Losant will automatically return a 404. To give this endpoint some intelligence, you create an experience workflow. All experience endpoints are backed by workflows that contain the Endpoint Trigger and Endpoint: Reply Node.
Create a new workflow for this endpoint from your application’s Workflows menu inside of the Visual Workflow Engine section. Make sure to choose Experience as the Workflow Type.


Now you have an empty workflow that you can use to power our /users endpoint. The first step is to add an endpoint trigger to the workflow canvas.

In the trigger’s configuration, select the endpoint you just created (i.e. POST /users). This workflow now runs whenever that API endpoint is requested.
For now, make a workflow that returns 200 (OK) whenever anything is requested. You’ll also use a Debug node so you can see the format of the data as it comes into the workflow.
You can add a Debug node and an Endpoint Reply node to the canvas. To do so:

- Add a Debug node and connect it to the Endpoint Trigger.
- Add an Endpoint Reply node and connect it to the Endpoint Trigger.
- In the Endpoint Reply config, set the
Response Code Templateto200. - In the Endpoint Reply config, set the
Response Body TemplatetoOK. - Click the
Save & Deploybutton to deploy this workflow. You can now request this API endpoint using an API tester, like Postman or CURL.
curl -H "Content-Type: application/json" -X POST \
  -d '{"email":"test@example.com","password":"my-password"}' \
  https://example.onlosant.com/users
Once you make this request, you’ll see an entry in the Debug tab with the payload that includes the email and password.

From here you can see that the email and password fields are available on the payload at data.body.email and data.body.password. Losant automatically hides the values of fields that could be considered sensitive, which is why it doesn’t show a value for the password field.
Step Three: Create a User: Get Node
Now that you’re receiving an email and password, you must check if the email already exists. If a user exists, this workflow should return a 409 (Conflict) back to the client.
First, add a User: Get Node to the workflow and connect it to the endpoint trigger.

- Set the
ID or Email Templateto{{ data.body.email }}. As you saw earlier, this is the location on the payload where the incoming email is available. - Set the
Result Pathtodata.existingUser. This puts the user, if found, back on the payload so you can access it in later steps. If no user is found, this field is set tonull.
If the user exists, data.existingUser is something other than null.
Next, add a Conditional node to check whether or not an existing user already exists. Connect it to the get user node:

- Set the
Expressionto{{ data.existingUser }} === null. If the expression returns true (the user does not exist), the workflow takes the right path. If the expression is false, the workflow takes the left path.
At this point, you’re ready to return the 409 (Conflict) back to the client if the user already exists. Add an Endpoint Reply node and connect it to the left (false) output of the conditional node.

- Set the
Response Code Templateto409. - Set the
Response Body Templateto{ "error": "Email already exists." }. - Add a
Content-Typeheader with the valueapplication/json.
This API properly checks that a user exists and returns an error if it does. You can test this by creating a sample user through the Losant interface and making a request with that same user email against this endpoint.
Click the Save & Deploy button to deploy this workflow.
curl -H "Content-Type: application/json" -X POST \
  -d '{"email":"example@example.com","password":"my-password"}' \
  https://example.onlosant.com/users
If you make this curl request with an already existing user, you should receive this response:
{ "error": "Email already exists." }Step Four: Create the User
The last thing to do is to create the user. Add a User: Create Node and attach it to the right (true) output of the conditional node.

- Set the
Email Address Templateto{{ data.body.email }}. - Set the
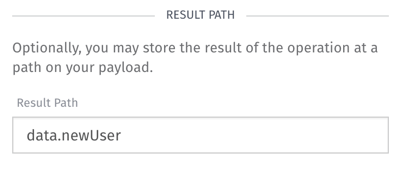
Password Templateto{{ data.body.password }}. - Set the
Result Pathtodata.newUser.
This node creates a new user inside your Application Experience. lōm only collects the email and password, however, experience users also have built-in fields for first and last names. User tags can be used to store any other information specific to your application’s users.
The new user is put back on the payload at data.newUser, so you can return it to the client as the result of this API request. Next, add an Endpoint Reply node and connect it to the User: Create Node.

- Set the
Response Code Templateto201, which is the HTTP status code for “created”. - Choose
Payload PathforResponse Body Source. - Set the
Response Body Payload Pathtodata.newUser. - Add a
Content-Typeheader with the valueapplication/json.
This node now returns the contents of the new user, in JSON format, back to the client as the body of the response.
When done, deploy this workflow using the Save & Deploy button. You can now test this route by attempting to create a new user.
curl -H "Content-Type: application/json" -X POST \
  -d '{"email":"my.awesome.user@example.com","password":"my-password"}' \
  https://example.onlosant.com/users
{
"email": "my.awesome.user@example.com",
"userTags": {},
"applicationId": "58e0152c1c3ce300017cc5bf",
"creationDate": "2018-11-15T17:17:37.169Z",
"lastUpdated": "2018-11-15T17:17:37.553Z",
"passwordLastUpdated": "2018-11-15T17:17:37.553Z",
"experienceUserId": "58e02cac0d1a3b00011f0d81",
"avatarUrl": "....",
"id": "58e02cac0d1a3b00011f0d81",
"experienceGroups": []
}Once this route is requested successfully, you’ll see the new user in the experience user list.

Step Five: Welcome Email
The next thing to do is send your new user a welcome email once they’ve registered. Add an Email node and connect it to the Endpoint Reply node:

- Set the
To Address Templateto{{ data.body.email }}. - Set the
From Address Templateto whatever email address you’d like. - Set the
Email Subject Templateto whatever you’d like. - Set the
Email Body Templateto whatever HTML contents you’d like.
Now whenever a user registers, they’ll receive your welcome email. The built-in email node does have a limit of one message per minute. If you plan on registering a bunch of users, you may want to switch to the SendGrid node, which uses your own SendGrid account to send as many emails as you’d like.
Step Six: Input Validation
The very last step is to add some input validation on the incoming data. You must make sure the client sent an email and password before doing any other work. If a field is missing, this API will return a 400 (Bad Request) back to the client. Add a conditional node directly after the endpoint trigger.

- Set the
Expressionto{{ data.body.email }} && {{ data.body.password }}. This expression checks that both email and password exist.
You can now connect the right (true) output of the new Condition node to the existing User: Get Node, which now only attempts to run the rest of this workflow if the client actually provided an email and password. To reply with an error, add an Endpoint Reply to the left (false) output of the Conditional node:

- Set the
Response Code Templateto400. - Set the
Response Body Templateto `{ “error”: “Email and password fields required.” }. - Add a
Content-Typeheader with the valueapplication/json.
You can now test this endpoint by attempting to register a user with a missing field. Click the Save & Deploy button to deploy this workflow.
curl -H "Content-Type: application/json" -X POST \
  -d '{"password":"my-password"}' \
  https://example.onlosant.com/users
{ "error": "Email and password fields required." }This concludes Part 1 of the application experience walkthrough. As of now, lōm has a fully functional user registration endpoint. Part 2: User Authentication covers how users will log in once they’ve registered.
Was this page helpful?
Still looking for help? You can also search the Losant Forums or submit your question there.