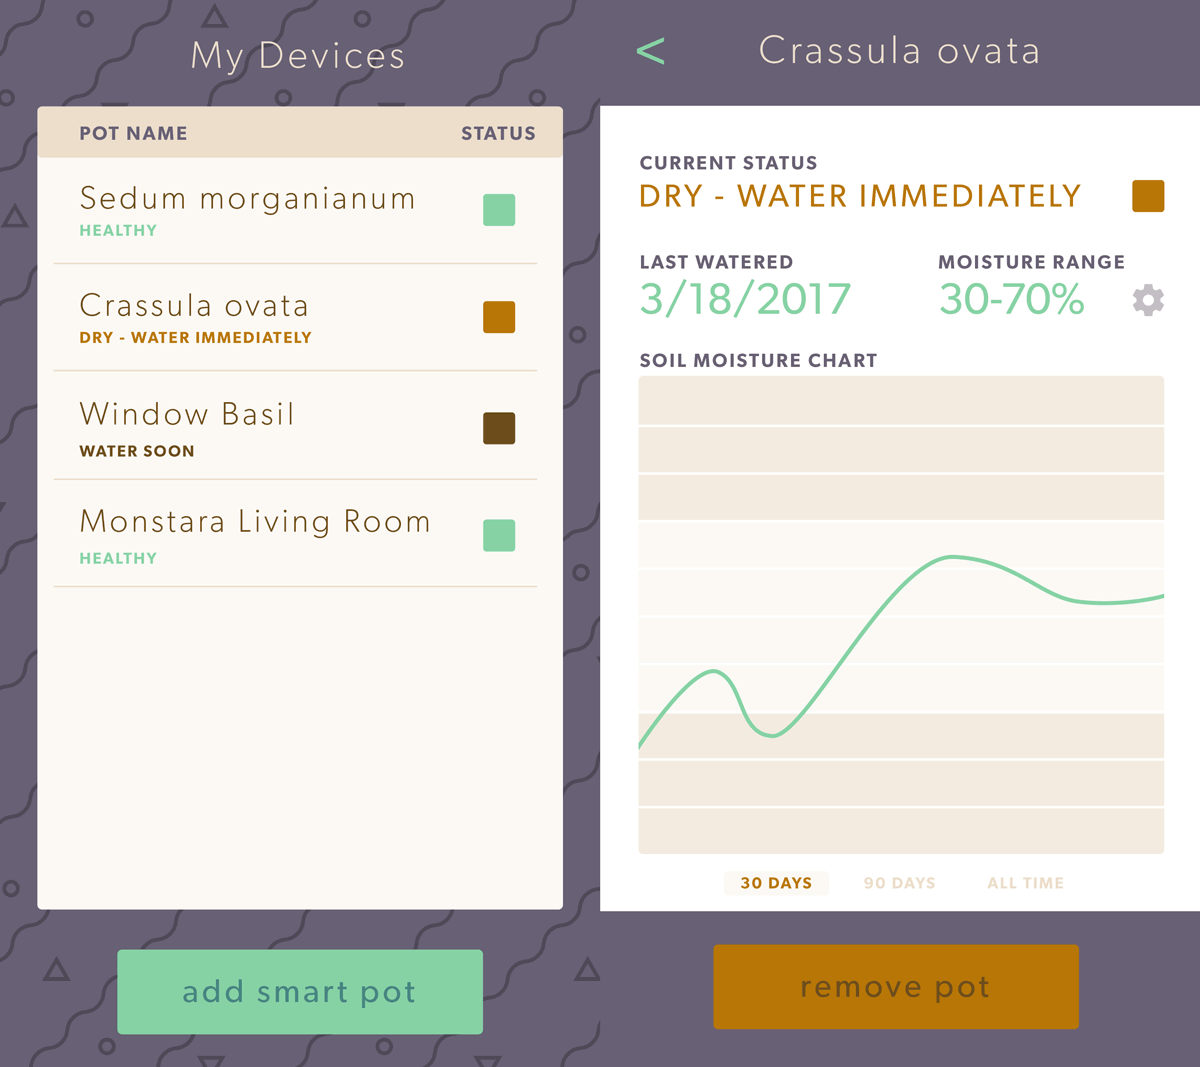
Viewing Device Data
In Part 1, Part 2, and Part 3 of this walkthrough you created an API for our lōm smart plant mobile app that allows users to sign up, log in, and register devices. In this part, you will add the ability to view a list of devices owned by the current user and cover how to request historical device data.
Step One: Create First Endpoint
The first endpoint you’ll create is GET /devices, which returns a list of all devices owned by the currently authenticated user:

- Set the
MethodtoGET. - Set the
Routeto/devices. - Add a
Description. - Set the
Access ControltoAny authenticated user.
Like all endpoints you’ve created, this one also needs a workflow with a matching endpoint trigger. Next, add a Get Device node that you’ll use to look up the user’s devices:

- Set
Find by...toTag Query. This allows you to query devices by their tags. - Check the
Return multiple devices?checkbox. - Add a tag query and set the
Key Templateto “owner” and set the value template to{{ experience.user.id }}. - Check the
Return tags as an object map instead of an arraycheckbox. This changes how tags to an object map. - Set the
Result Pathtodata.devices.
In Part 3 of this walkthrough, you learned how devices were tagged with the owner when they were created. You can now use this tag to find all devices owned by the user that requested this endpoint. Losant automatically adds the Experience User to the payload whenever an authenticated route is requested, so you can get the user ID at experience.user.id.

All that’s left to do for this endpoint is to reply with the devices you just looked up.

- Set the
Response Code Templateto200, which is the HTTP status code for OK. - Change the
Response Body Sourceradio toPayload Path. - Change the
Response Body Payload Pathtodata.devices. This is the location on the payload where the Get Device node put its result. You’re going to reply with the same value. - Add a
Content-Typeheader with the valueapplication/json.
At this point, the lōm mobile app can now request all of the devices owned by the currently logged-in user. You can test this route by requesting the devices created in Part 3 of this walkthrough.
curl -H "Authorization: Bearer USER_TOKEN" \
  https://example.onlosant.com/devices
[
{
"name": "My Awesome Plant",
"tags": {
"owner": [
"58e016591c3ce300017cc5d4"
],
"manufacturerId": [
"000000"
]
},
"attributes": [
{
"name": "moisture",
"dataType": "number"
}
],
"id": "58e4605f29eeec0001d383df"
...
}
]Step Two: Create Second Endpoint
The lōm mobile app now allows the user to select a device from the list to show historical moisture data collected by that device. To support this, you need to create a new endpoint to get this data. You can call it GET /devices/{id}/data. To create the endpoint:

- Set the
MethodtoGET. - Set the
Routeto/devices/{id}/data. This route makes use of route parameters, which provide a way to pass variables to the endpoint. In this case, you’ll be passing the Losant device ID. - Set the
Access ControltoAny authenticated user.
The device ID for each device is available on the result of the GET /devices endpoint above.
Next, create a workflow for this endpoint with a matching endpoint trigger. The workflow needs to determine whether the current user has access to the device ID that was passed in. You can do this by getting the device that matches the route parameter and then checking that its owner tag matches the ID of the current user.
First, add a “get device” node to the canvas:

- Set the
ID Templateto{{ data.params.id }}. - Check the
Return tags as an object map instead of an arraycheckbox. - Set the
Result Pathtodata.device.
Losant automatically parses the route parameters and puts them on the payload. In this case, our device ID parameter id can be found at data.params.id.

The next step is to add a Conditional node to check that this device has an owner tag that matches the current user.

Set the Expression to the following:
{{ data.device }} && {{ data.device.tags.owner.[0] }} === {{ experience.user.id }}This expression first checks if any device was returned at all. Since this route could be requested with any value as the ID, for example /devices/not-a-real-value/data, the result of the Get Device node could be null. It then checks that the value of the owner tag matches the current Experience User. Since Losant devices can have duplicate values for the same tag, the values are always returned as an array, which is why the syntax is data.device.tags.owner.[0].
If the device can’t be found, or the owner tag doesn’t match, use an Endpoint Reply node to respond with a 403 (Forbidden).
If you did get a valid device ID, you can now use the Time Series node to request historical data for the device:

- Select the
Use Device ID(s) specified on the current payloadradio. - Set the
Device ID(s) JSON Pathtodata.params.id. This performs a time series query against the device that was passed in through the route parameters. - Set the
Time Rangeto a range that makes sense for the application. In this example, it is showing the last 24 hours of data. - Set the
Resolutionto a value that makes sense for the application. In this example, it returns 24 hours of data with a data point for each 5 minute interval. - Set the
Payload Path for Valuetodata.resultData.
The Time Series node provides powerful aggregation support for data that has been reported by your devices. The duration, resolution, and aggregation can all be changed to match your desired result. The last step is to reply with this data using an Endpoint Reply node:

- Set the
Response Code Templateto200, which is the HTTP status code forOK. - Change the
Response Body Sourceradio toPayload Path. - Set the
Response Body Payload Pathtodata.resultData. This where the Time Series node put its result, so this reply sends the result back to the client. - Add a
Content-Typeheader with the valueapplication/json.
You can now test this endpoint to see data that has been reported by your application’s devices.
curl -H "Authorization: Bearer USER_TOKEN" \
  https://example.onlosant.com/devices/my-device-id/data
[
{
"time": "2017-04-05T05:05:00.000Z",
"sum": 235,
"count": 5,
"value": 47
},
{
"time": "2017-04-05T05:00:00.000Z",
"sum": 235,
"count": 5,
"value": 47
}
...
]The result of this API request is a data point for each five-minute interval over the last 24 hours. Since the aggregation in the Time Series node was set to Mean, the value above will be the average. The count is the number of data points collected in that five-minute interval. The sum is the value of every point collected in the five-minute interval added together.
The lōm mobile app now has an API that supports all required features. Users can sign up, they can log in, they can register devices, they can see a list of their devices, and they can view historical data for each device. This concludes the Losant Application Experience walkthrough. If you have additional questions about experiences, please visit our forums.

Was this page helpful?
Still looking for help? You can also search the Losant Forums or submit your question there.